How to Replace Front Brakes 2002-05 Dodge Ram 1500
Created on: 2011-04-14
Watch this video to learn how to fix squeaky or fading front brakes. The experts at 1A Auto show you how to replace the brake pads and rotors on your 02-08 Dodge Ram.
-
step 1 :Remove wheel.
- Remove hub cap or center cap if you have it.
- While your car is still on the ground, use your 22mm socket to loosen your lug nuts.
- Jack up and secure your car with jack stands.
- Remove the lug nuts with your 22mm socket and ratchet.
- Remove the wheel and set aside.
-
step 2 :Remove the calipers
- Use a screwdriver to force the pistons back in.
- Remove the two 13mm bolts to remove the calipers.
- Use a wire tie to fasten the caliper out of the way.
- Use your screwdriver to pry out your brake pads.
- Remove the two 13/16 inch bolts on the caliper bracket to remove it.
- Remove the caliper bolt sleeves.
- Check their condition and clean them with a wire brush if necessary.
- Pull off the brake rotor.
- Hit the rotor with a rubber mallet or hammer if necessary.
- Take care not to damage the lug studs.
-
step 3 :Install new rotor and pads
- Clean new rotor with brake cleaner.
- Insert your new pads into the brackets.
- Put your caliper bracket back on, and tighten the bolts to 110 ft lbs.
- Compress the caliper piston with a c-clamp to reset the pistons.
- Mount the caliper on the bracket and torque the bolts in to 25 ft lbs.
-
step 4 :Put wheel back on
- Make sure to use a star pattern when putting your wheel lugs back on.
- Tighten to 120 ft lbs.
- Replace hubcap/center cap.
-
step 5 :Test and set brakes
- Before driving the car again, start it up and pump the brakes a few times to get the pistons in the brakes in place.
- Test the brakes in your driveway before taking the car onto the road.
- Set your rotors by evenly braking from 30mph to 10mph, 50mph-30mph and finally 70mph to 40mph.
- This is best done on a straight back road without any traffic.
Tools needed
-
13mm Socket
Large C-Clamp
Torque Wrench
Flat Blade Screwdriver
Large Hammer
7/8 Inch Socket
13/16 Inch Socket
Anti-Seize Grease
Wire Ties
Lug Wrench
Ratchet
Wire Brush
Floor Jack
1/2 Inch Breaker Bar
Brought to you by 1AAuto.com-- your source for quality replacement parts and the best service on the internet.
Hi, I'm Mike Green. I am one of the owners of 1AAuto. I want to help you save time and money repairing or maintaining your vehicle. I'm going to use my 20 plus years of experience restoring and repairing cars and trucks like this to show you the correct way to install parts from 1AAuto.com. The right parts installed correctly, that's going to save you time and money. Thank you and enjoy the video.
In this video, we're going to show you how to replace the front brake pads and rotors on this 2004 Dodge Ram 1500. This is a full-drive. This procedure is generally the same for most of this generation truck. Tools you'll need are 7/8, actually, or a 22 millimeter, pretty much the same size, 13/16", 13 millimeter sockets, ratchet. You'll probably want a breaker bar or a pipe to get some leverage on your ratchet handle. A sledge hammer if your rotors are rusted like they were on our vehicle, a large screwdriver or a small pry bar, wire brush, large C-clamp and we also use some penetrating oil.
First, you want to remove your wheel. If you're just using hand tools, start with the vehicle on the ground, loosen the lug nuts first and then raise it, secure it with jack stand then remove the wheel. I've got air tools and I use them. Either the 7/8" or 22 millimeter, both will work. Okay, and we'll fast forward here as I remove the lug nuts, the cap and the wheel. Now, with the wheel off, you can check the condition of your brakes or your rotors. Use the back of your finger. Just run them up and if you're feeling hard ridges, or this actually has some pretty deep bruise here so I'm actually going to replace these rotors. Then you can check the condition of your pads. As you can see, my pads are actually in pretty good shape. The pad is right there and I will only turn the rotor. On the rotor, you can see turning for pads right next to it. There are some pretty good bites in the pad but I don't like the look of these rotors so I'm going to replace the rotors and pads.
What you want to do, take a large pry bar or large screw driver or a small pry bar like this. You're going to pry out on the caliper. It pushes the pistons. These are pistons right here. By prying out those pistons, get pushed back into the caliper. You remove the caliper; you're going to want to remove two 13 millimeter bolts, one here and then one up here. Pretty easy and it's loosen up, supposed to be too tight but it will come up with a small ratchet and then socket or wrench. The caliper comes off, take that, just left it up here for now. Now, your brake pads, it will just come right out. You'll need your pry bar and I got it right out. Now, you can see that rotor is still blocked by this bracket. To get the bracket off, it's two bolts, one here, one here. What I'm finding the best is a 13/16", 21 millimeters looks like is a little too big. It's kind of odd that they go back and forth between standard and metric.
When these bolts are done, you'll either want a breaker bar like this or you could just have a ratchet and a piece of pipe, put it under your ratchet or your breaker bar, give yourself an extra leverage and loosen up the bolts. Just be careful when you do this, you'd pull nicely so it doesn't jerk. I mean, you're putting not much torque on it. You don't want to pull off the bolt. After showing you how to do the leverage, I just cheat and use the impact wrench anyways. I'm going to spray the rotor with tons of penetrate. Hopefully, it's getting there. On your vehicle, you maybe want to do this, just sit it overnight and come back on the back side of the rotor and the hub. Pull out the big gun.
You probably noticed the shiny, new hub there. I did do this brake video along with a couple of other repairs. If you like to see the other steps involved in replacing that hub, then just check out our other videos. You go on nicely. I would just take a lug nut. Just sort of somewhat hold on there while I put the brakes together. This is the bracket that the caliper bolt too is on and has a stainless steel slide here. This one will take a wire brush to clean those off real good.
Now, we have two lug bolts, 13/16", just put the bracket on like that. Just a reminder, the bracket goes on the disc side and the bolts go in. I'm going to tighten these bolts a little bit. Made my tool crunch and tighten it to 110 pounds. Now, I'm just going to wipe rotors down, just a little bit of Mineral Spirits here, just to make sure there's nothing on, Mineral Spirits brake cleaner even gasoline as long as it cleans off grease and then evaporate quickly. Okay, my new pads from 1AAuto, exactly the same as the old pads. On here, I assemble around within a minute. It's pretty to put to these on, but what I found was that the brake disc was wobbling around and preventing me so I put another bolt on it and just another, that's all set.
For the next step, you may want to loosen your brake fluid cap a little. When we pried out the caliper, we attempted to reset the pistons. You see the pistons are still slipping out. What we can do is just take an old tab and then a large C-clamp. Then you have the C-clamp to reset pistons, as I tighten the C-clamp, the pistons go further in. Caliper back on just to make sure that these are sliding nice and free. Got to push them all the way that way, and then put this back on. You put the top up in first and then the bottom. You'll now start your 13 millimeter bolts and we'll put these in. Then torque comes to 25 pounds.
Then we'll fast forward through the preliminary tightening of those bolts. I'll fast forward it a little bit here. Remove those two lug nuts that I used to hold the rotor in place, then put the wheel back up on. Hand-thread the lug nuts and then I just tighten them up preliminary with the air wrench. Then, as you lower the vehicle on the ground and then tighten the lug nuts, 120 pounds and you want to create a star pattern as you're torqueing them.
Last very important step, make sure you reset your disk brakes by pumping them and then before you road test, you stop from 5 and 10 miles an hour just to make sure your vehicle just stop before you enter the roadway.
We hope this helps you out. Brought to you by www.1AAuto.com- your source for quality replacement parts and the best service on the internet. Please feel free to call us toll free, 888-844, 3393. We're the company that's here for you on the internet and in person.
Shop Products


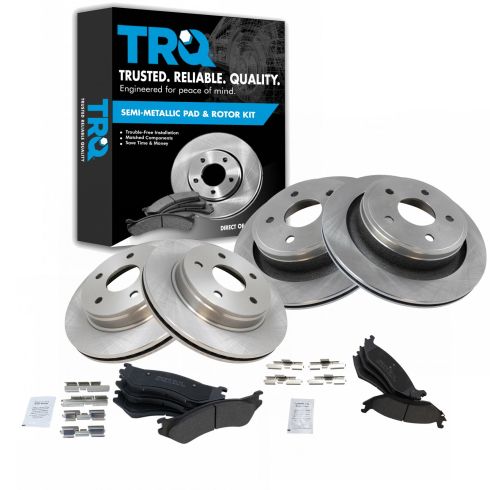
Dodge Ram 1500 Front & Rear Semi-Metallic Brake Pad & Rotor Kit TRQ BKA11211
- Semi-Metallic
- Premium Posi
- Vented
- Vented
- 13.86 in. (352mm)
- 13.19 in. (335mm)
- 5 Lug
- (1) Rear Semi-Metallic Brake Pad Set with Contact Point Grease & Hardware
- (1) Front Semi-Metallic Brake Pad Set with Contact Point Grease & Hardware
- (2) Front Brake Rotors
- (2) Rear Brake Rotors

How To Replace Front Brakes 2000-04 Ford Focus
Check out this video and learn how to do your own brakes! This one is for your 00-04 Ford Focus. You can do it, 1A Auto will help!

