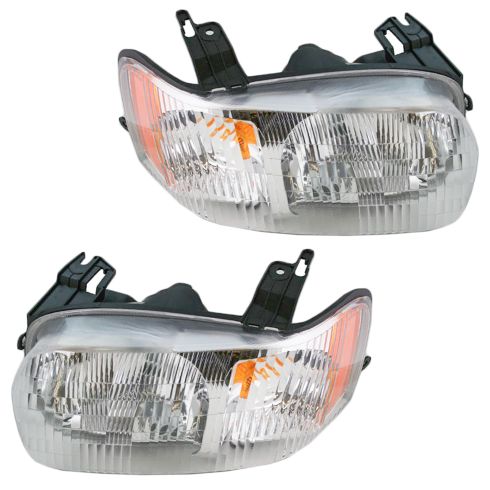
Kit Includes: (1) Passenger Side Headlight (1) Driver Side Headlight
Product Features
Direct Fit - No vehicle or wiring modification necessary
DOT, SAE, and FMVSS Compliant - Meets on-road use regulations
Matching set for a restored look
Complete Repair in One Purchase - Stop searching for parts individually and complete your repair with a customized kit or set from DIY Solutions.
High-Quality Parts from Trusted Brands - DIY Solutions' kits and sets are selected from the best automotive brands and include hard-to-find and even obsolete parts you may need for your vehicle.
Guaranteed Fit - DIY Solutions ensures its selected parts are quality-tested to guarantee fit and function.
Assemblies may include halogen or incandescent test bulbs that should be replaced before installation.
Item Condition:New
Attention California Customers:
WARNING: This product can expose you to chemicals including Chromium (Hexavalent Compounds), which is known to the State of California to cause cancer, and birth defects or other reproductive harm. For more information, go to www.P65Warnings.ca.gov
Lifetime Warranty
This item is backed by our limited lifetime warranty. In the event that this item should fail due to manufacturing defects during intended use, we will replace the part free of charge. This warranty covers the cost of the part only.
FREE Shipping is standard on orders shipped to the lower 48 States (Contiguous United States). Standard shipping charges apply to Hawaii and Alaska.
Shipping is not available to a P.O. Box, APO/FPO/DPO addresses, US Territories, or Canada for this item.
Expedited is available on checkout to the United States, excluding Alaska, Hawaii.
Final shipping costs are available at checkout.
How to Replace Headlight 2001-04 Ford Escape
Created on:
Tools used
Phillips Head Screwdriver
10mm Socket
Ratchet
1. To replace just the headlight bulbs
Pop the hood and secure.
Reach behind the headlight assembly and remove the rubber boot and pull away the retaining wire
Remove the bulb and unplug the harness
Reverse the process to install new bulbs
2. Remove the front bumper cover
Use a 10 mm socket and ratchet to remove the front bumper cover.
Disconnect your fog lights if you have them.
Remove the bumper cover and set aside.
3. Remove the headlight assembly
Remove the four 10mm bolts securing the headlight assembly
Unplug the bulbs and harness.
4. Install the new headlight assembly
Plug in the bulbs and harness
Bolt the headlight assembly in using your 10 mm socket and ratchet.
5. Install the bumper cover
Plug your fog lights back in if you have them
Secure your bumper cover by replacing all the push clips and bolts.
Close your hood and enjoy your new 1A Auto headlights.
Brought to you by 1AAuto.com, your source for quality replacement parts and the best service on the internet. Hi, I'm Mike from 1A Auto. I hope this how-to video helps you out, and next time you need parts for your vehicle think of 1AAuto.com. Thanks.
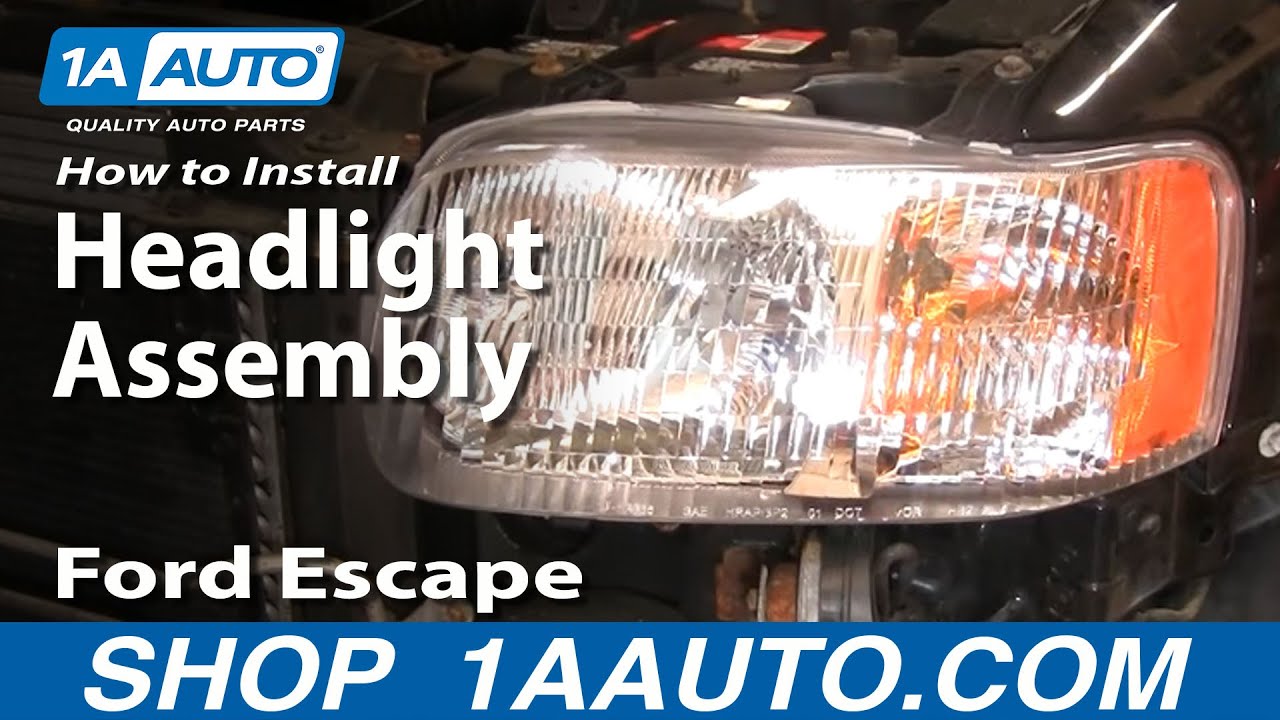
In this video we're going to show you how to service the headlight on this 2002 Ford Escape same as any 2001 to 2004. We show you first just changing the bulb if that's all you want to do and then we also show you the entire procedure for removing the whole headlight assembly and replacing it helpful if you have clouded or faded or even a broken headlight assembly. Only tools you'll need are a short Phillips screwdriver and a 10mm socket with a ratchet and extension.
If you're just looking to replace a headlight you'll want to pop your hood and then you come right over here and here's the back of your light. You want to reach in and grab the sides of this connector and squeeze. You'll feel a couple tabs. Squeeze those tabs and pull off your connector. Then you can pull off this boot here, and now there's a little, not sure if you can see this, there are a couple little tabs here. You push them in and down. Then you push this one in and up and this retainer comes out and then you can pull your headlight out. There's your bulb. A new bulb just goes in reverse of the procedure. Put the bulb in. It should be lined up with this prong up two on the sides and one on top. Then put your retainer back in. Push the bottom one up or actually push it into lock. Push the top one into lock. Take your boot. You kind of have to stuff it in there a little bit. Just fast forward here a little bit as I get that boot into place. Make sure it goes around the bulb properly and then locks in on the outside perimeter. Put your lead back and that just pushes right back on.
If you need to change your whole assembly because it's broken or faded or cloudy, to start you're going to have to take the bumper cover off which is not that difficult. You're going to remove a 10mm bolt here and here to start. Fast forward here as I use a 10mm socket and ratchet to remove those two bolts and pretty much this is what I'll do throughout the video. I'll show you the step and then I'll kind of fast forward through me doing it.
Now you can see I have the car raised up off the ground. You don't need to raise the car off the ground. It just certainly makes it a lot easier to film. There's going to be a series of Phillips clips. So here's one of the clips. Use your Phillips screwdriver. Lightly try and turn this. The center should come out, and then when the center comes out the whole clip will pop out. So there's three on the side here. There are three on the other side as well as a couple right up under here underneath your grill.
And here again we'll fast forward as I remove the rest of those clips. Once you get those out then there are two more. You pull this back and it's probably a little difficult to see but up in there is another one of those little Phillips clips. If you feel up in here with your hand you'll feel the head of it. The bet strategy for these is actually just pull firmly down on them and the clips will break free. Now there are a series of 10mm bolts under here. One there, one there. There's a few up under here on the other side. So I'm going to fast forward through removing these. Because these bolts are up underneath, a lot of times they're rusted from salt and sand and what not so they'll be difficult to get apart and you could see as I went through in the previous shot, one of them was broken off and you may break one or two off but do your best to get them out. One of them I actually go back spray on some penetrant, wait and see if the penetrating oil will help. If you break one or two of them off it's not the biggest thing. You can put it back together with just one or two of them missing.
You can see as I get the last bolt broken free the bumper cover is about to basically come right off. You can see I've got that bumper cover off now. If your vehicle does have fog lights then at this point before you pull the bumper cover too far off you would want to reach inside and just disconnect each fog light. Now there are four bolts that hold the headlight; one here, one here, and then one over here, and one right down here. Up the speed a little bit as I just remove those four bolts. Lift up on that tab there. Lift up there. Pull out there. The light comes forward. You can just twist this bulb counterclockwise and it comes out. Again just like before just squeeze the tabs on the sides of your bulb connection and the light is being difficult so I'm going to go to Plan B. I cannot get this one out. Pull the boot. Unclip the retainer. I had to take it out the hard way. There's your light out.
New light from 1AAuto. One thing you might want to do. You can actually put this nut back on kind of finger tight. Take the plastic off the side here. Plug our headlight in. Put our marker light back in. Twist clockwise to lock it. Now it's all back in. Now I'll speed up here again as I start the last, the three bolts that hold it in and then tighten them up nice and firm. Obviously, you repeat for the other side. If you've got a broken damaged or clouded headlight, you'll want to replace them in pairs and usually even if you have a broken headlight you're going to want to replace the other side. It makes much better vision at night and much more clear just a better looking vehicle overall.
I'm going to kind of speed through this a little bit. At this point the first thing you want to do is make sure that all your clips are out especially those clips you had to kind of reach up underneath make sure those are out of the bumper cover and then if you have fog lights reconnect them and then have your two bolts ready for the top and put the bumper cover back in place and just kind of finger tighten those two top bolts to hold it.
Now go up underneath and just make sure that the black lower fascia kind of overlaps the gray part of the fascia and on my vehicle the center bolt was still there so I just kind of put that in and preliminarily tightened it up to hold things in place. Next you're going to put all the clips back in and you want to kind of set them up like this. Have the screw kind of just inserted a little bit so that you can push them in place and then obviously do the ones up underneath first. Push them into the fascia first and then up into the fender and lock them in place, and obviously repeat for the other side as well.
Kind of keeping the work pace going, I'm going to put the clips up in underneath the grill and then I'm going to start all the 10mm bolts for the bottom. Again, if one of these, or one or two of them break, not a big deal. You can put it back together with what you have. It's pretty much inevitable that if you have a car with quite a few miles on it that one or two of them will break. Then once you're done starting them in then tighten them up. Now here I'm just putting the rest of those Phillips-style pins back in that hold the sides of the wheel wells. Then finish up by tightening the two top bolts on each side of the grill.
We hope this helps you out. Brought to you by www.1AAuto.com, your source for quality replacement parts and the best service on the internet. Please feel free to call us toll free, 888-844-3393. We're the company that's here for you on the internet and in person.
LHT03217
In Stock
Product Reviews
Loading reviews
4.86/ 5.07
7 reviews
5 Stars
4 Stars
3 Stars
2 Stars
1 Star
6
1
0
0
0
head kights
wendy
April 3, 2017
unfortunately I had to return the product but I was extremely pleased with the delivery time and the return policy.
2002 Ford Escape Headlight Pair
T
July 4, 2017
Order received quickly and I was able to track shipment. Although they were complete with bulbs and turn signals I found that I had to use existing turn signal, parking lamp connections due to the new ones did not match with wiring harness connectors.
Very highly satisfied
william
July 4, 2017
I purchased two sets of lights for two different vehicles. The fit and finish were excellent on both. Installation was very easy after watching the videos from your company. I will do business with your company in the future.
Headlight Set
Deborah
February 26, 2020
I was extremely satisfied with my purchase. The past was the right fit just like it was guaranteed. If I need any other part for my Ford Escape, 1A Auto will be my shopping place.
Headlights
Ronnie
April 6, 2020
The best deal with fast delivery and lifetime warranty!!!
Quick and easy replacement and SO MUCH better than yellow lens
Gary
October 17, 2021
I had an old 2002 Ford Escape that I bought for a winter beater car and noticed the lights where UV damaged. I made a few calls and opted to purchase these from 1Aauto all I can say is that the assemblies fit perfect and I quickly did the job and saved a ton compared to the dealer part price! Call your local dealer and laugh...
Nathan
June 17, 2022
Good parts . Fast shipping
Customer Q&A
Will this fit an 06 ford escape or only up to 04?June 6, 2016
Di'Andra H
10
up to 2004 Only
June 6, 2016
Brian F
10
I can't answer question, I have an 02, but they fit beautifully. Just make sure to purchase a pair that says its for an 06
June 6, 2016
Justin O
10
I recommend to you to get the headlights for that specific year because even when i ordered them for my 01 I had a hard time to put them in place specially the passenger side one, samething happened with my 06 equinox passenger side but if you already have them just try it,
June 6, 2016
Nicolas T
10
No they won't fit an 06 Ford Escape...those are found here:
June 6, 2016
JD S
10
These headlights will not fit a 2006 Ford Escape. The 2006 headlamps are different.
June 8, 2016
Bill C
There's a headlight assembly come with bulbs?August 13, 2022
James G
10
New light bulbs are not included with this assembly. Occasionally, manufacturers leave test bulbs in the lights. If you receive test bulbs, you'll want to replace them with your original bulbs or with new bulbs.
August 13, 2022
Cristina P
Customer service
877-844-3393
Monday - Friday 8:00am - 9:30pm ET Saturday - Sunday 8:00am - 4:30pm ET
Enter Vehicle Year Make Model
Specify your vehicle's year, make and model to guarantee fit.
Year
Make
Model
Options
Drivetrain
This part doesn’t fit a . Select from parts that fit.