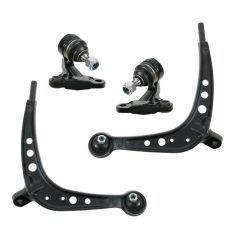
Replaces
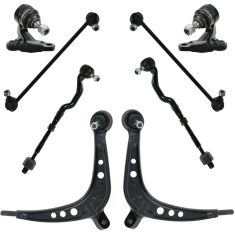
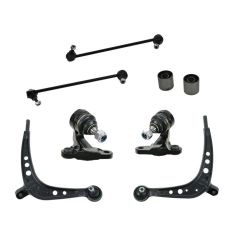
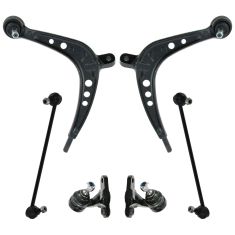
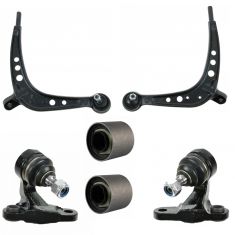
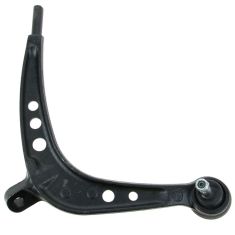
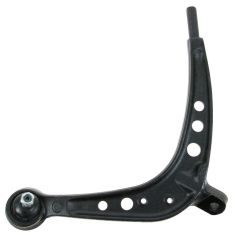
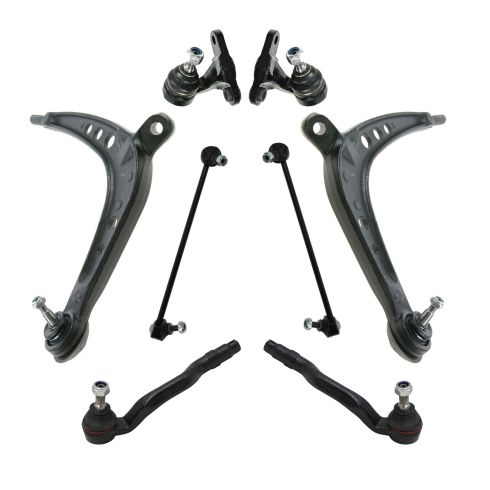
Replaces 2001-05 BMW 325Xi 330Xi Front Driver Side Lower Control Arm with Ball Joint TRQ PSA84050
$70.95
Replaces 2001-05 BMW 325Xi 330Xi Front Passenger Side Lower Control Arm with Ball Joint TRQ PSA84051
$70.95
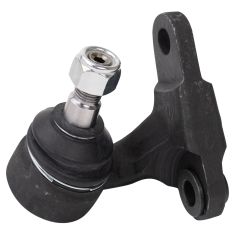
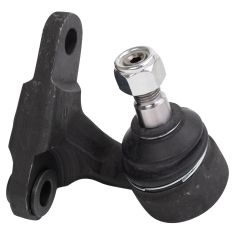
Replaces BMW 325Xi 330Xi Front Passenger Side Ball Joint TRQ PSA66203
$44.95
Replaces BMW 325Xi 330Xi Front Driver Side Ball Joint TRQ PSA66200
$39.95
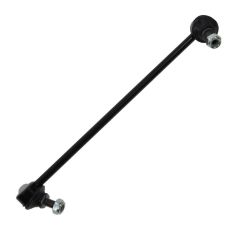
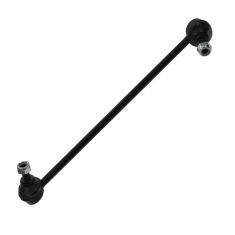
Replaces 2001-05 BMW 325Xi 330Xi Front Driver Side Sway Bar Link TRQ PSA68167
$34.95
Replaces 2001-05 BMW 325Xi 330Xi Front Passenger Side Sway Bar Link TRQ PSA68171
$34.95
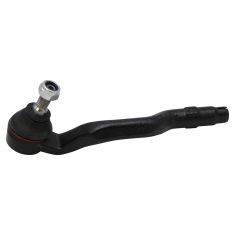
Replaces 2001-05 BMW 325Xi 330Xi Front Driver Side Outer Tie Rod TRQ PSA67458
$28.95
Replaces 2001-05 BMW 325Xi 330Xi Front Passenger Side Outer Tie Rod TRQ PSA67459
$28.95
Part Details
TRQ suspension kits are manufactured using premium raw materials and coatings for extended service life. Each TRQ suspension component is designed to be a direct, maintenance-free replacement to the stock unit. To extend the life of your steering and suspension components, TRQ recommends replacing components in pairs, sets, or kits. All products are fit and road-tested in our Massachusetts R&D facility to ensure we deliver on our promise of Trusted Reliable Quality.
Product Features
Install Tip: When replacing steering components, have a professional alignment performed afterwards. This ensures proper tracking and even tire wear.
Our steering and suspension components are pre-greased and sealed for long life and do not require the extra maintenance typically required by greaseable versions.
Item Condition:
New
Attention California Customers:
WARNING: This product can expose you to chemicals including Chromium (Hexavalent Compounds), which is known to the State of California to cause cancer, and birth defects or other reproductive harm. For more information, go to www.P65Warnings.ca.gov
Lifetime Warranty
This item is backed by our limited lifetime warranty. In the event that this item should fail due to manufacturing defects during intended use, we will replace the part free of charge. This warranty covers the cost of the part only.
FREE Shipping is standard on orders shipped to the lower 48 States (Contiguous United States). Standard shipping charges apply to Hawaii and Alaska.
Shipping is not available to a P.O. Box, APO/FPO/DPO addresses, US Territories, or Canada for this item.
Expedited is available on checkout to the United States, excluding Alaska, Hawaii.
Final shipping costs are available at checkout.
Created on:
Tools used
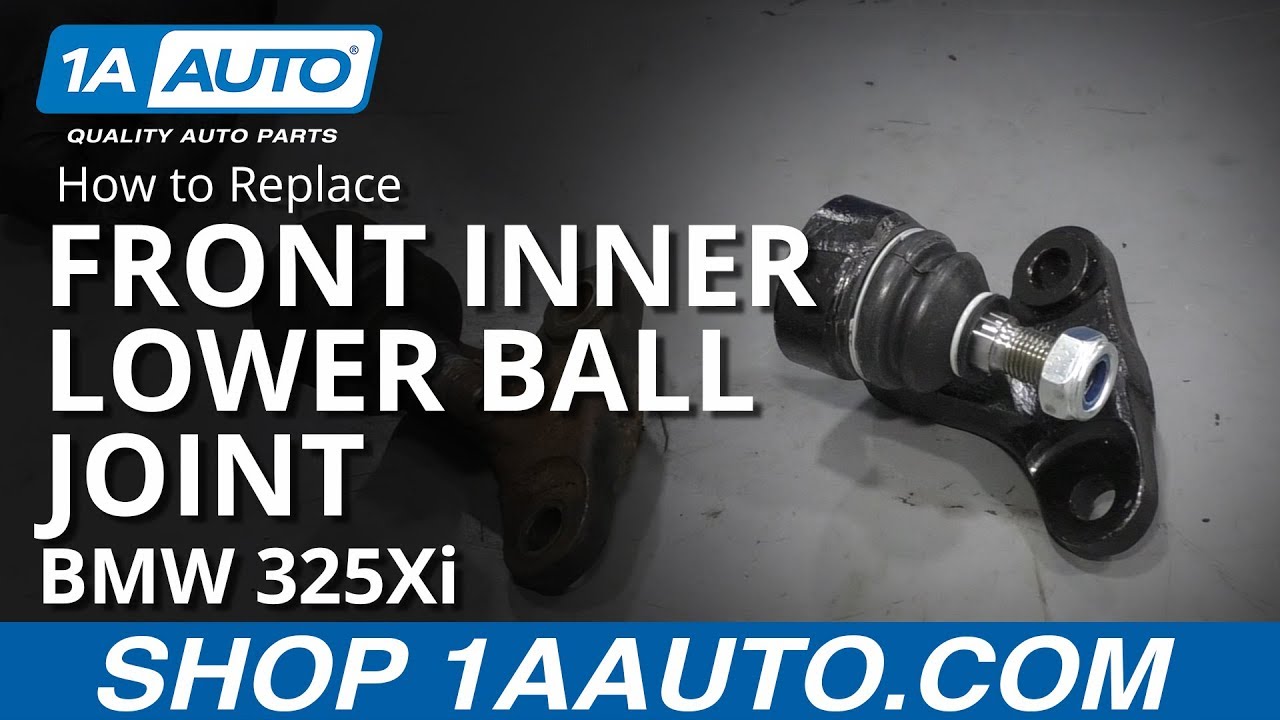
What's up, guys? I'm Andy from 1A Auto. In this video, I'm going to show you how to replace the front lower inner ball joint on this 2001 BMW 325xi. If you need this part or other parts for your vehicle, click the link in the description and head over to 1AAuto.com.
I raised the vehicle. We're using a two-post lift. If you're doing this at your house, you can use a jack and jack stands. I'm going to remove the tire to gain extra access. It's going to make it a little bit easier. I'm going to use the 17 millimeter socket and an air gun. You can always use a breaker bar. Take these lug nuts out, or lug studs out. When I get to the last one, I'm just going to hold the wheel so it doesn't fall. Take the last one out, and grab the wheel, pull it off.
I want to take this nut off and also the nut right here. They're pretty rusty, so I'm going to use some rust penetrant. Spray it down. Soak it for a little bit. Right there and right there. Now, I'm going to take a 18 millimeter wrench, go over this nut. I'm going to loosen this nut up. Once I get a couple turns on the box side, then I'll switch to the open side, and take this nut off. Get that nut loosened up. Sometimes, you can't get it off, because the axle's in the way. We're just going to leave it loose like that.
I'm going to separate the ball joint from the knuckle, right here. You can do this a couple of ways. Sometimes, there's a clamp that you can slide in there, and it pushes down on the ball joint. What we're going to use is a fork. We're going to try that method. You could also take a hammer and just tap on the knuckle itself, just be careful. You don't want to break anything. I'm just going to use this pickle fork and a hammer. Don't worry about that. Slide that in there. We'll separate it. Now, the reason why you might not want to use a pickle fork is, generally, it rips the boot on the lower control arm, or on the ball joint. Keep that in mind, if you're going to reuse the ball joint. You might not want to use this method. There we go, separated. Pull that nut out of the way.
If you're doing this job and you don't have an impact gun, what you're going to want to do is take a 22 millimeter wrench, get on this nut right here, and you're going to want to crack that free first. Otherwise, we're going to loosen up these two bolts right here. Just use an 18 millimeter socket, loosen these up. Do the same on this one. Those bolts are loose. I can take that one out. This one, I can't get out until I break this free. Just take a pry bar, put it under here, and just pry this away. Then, I can get the bolt out. Got to twist this a little bit, get that bolt out. Now, I can get a gun on here, take that nut off. Then, I'm going to take this nut off and just use a 22 millimeter socket and an impact gun. All right, got that off.
If you're going to reuse this ball joint, you're going to need to use a ball joint separator. What it does is it clamps in here and pushes up on the ball joint. If you're not going to reuse it, then you can either use a hammer on here or a pickle fork. I'm just going to use a hammer, try to break it free. If not, I'm going to use a pickle fork. All right, so I'm just hammering it off. I don't have enough stability with the arms, so I'm actually going to use a pickle fork. Just slide it in here, just be careful not to hit the CB shaft. There we go. Now, I did just put the nut back on, just so it didn't go flying. Just put it on a couple threads and slide it up.
Here's the old part. Here's the new front lower inner ball joint from 1AAuto.com. The shape is the same. Comes with a new nut. Take the nut off. This is just a dust cover. It's covered for shipping. Take that off. The boot is the same. Get yours at 1AAuto.com and you'll be ready to rock and roll.
I'll take this inner ball joint. Take the nut off here. Just slide that in position. I've these two bolts, get these bolts lined up. Actually, it's a good idea to get the in board one in first. Get that lined up. This inside bolt, I'm not going to be able to get a torque wrench on, because the arm's in the way. Otherwise, you want to torque this 57 foot pounds. I'll do the same with that one. With a 18 millimeter socket and a torque wrench, I'll torque this bolt to 57 foot pounds.
I'll take this ball joint nut, get that lined up. I'm going to take the 22 millimeter wrench and tighten this up, but the ball joint stud is actually spinning, so I'll take a 6 millimeter hex bit and put it on my ratchet. That's going to hold the stud from spinning. I'll tighten this up. I'm going to tighten this down. Now, if you're able to get a torque wrench on there, which it's very difficult, you could torque that down to 57 foot pounds. We're going to line up the lower control arm, put the ball joint through here. Take the nut, get this started. All right, then I'm going to take a 19 millimeter wrench, tighten this nut right here. Now, it's next to impossible to get a torque wrench on here. Maybe, if you used a crow's foot, you might be able to torque this. You're going to want to torque this to 48 foot pounds. So, just do the best you can.
Now, I'm going to put the wheel on. Just line up the holes. Take one of the lug studs, get that started. I can grab the other ones, and I'll just tighten these down. Then, I'll lower the vehicle and torque them. All right, now I'm going to use the 17 millimeter socket and a torque wrench. I'm going to torque these lug bolts to 95 foot pounds. I'm going to torque them in a star patterns so that the wheel gets tightened down evenly. Then, I'm just going to go around again, just double check. We're good to go.
Thanks for watching. If you want the parts to do it yourself, check out 1AAuto.com, the place for DIY auto repair.
Tools used
What's up, guys? I'm Andy from 1A Auto. In this video, I'm going to show you how to replace the front outer tie rod on this 2001 BMW 325xi. If you need this part or other parts for your vehicle, click the link in the description and head over to 1AAuto.com.
All right, I'm going to loosen up these lug bolts. I'm going to use a 17 millimeter socket and a breaker bar. Loosen them up.
Now, I'm going to raise and support the vehicle. We're using a two post lift. If you're doing this at your house, you can use a jack and jack stands.
Now, we'll take these lug bolts out. Just use the socket to help you get them out. I'm going to just hold the wheel with my other hand so it doesn't fall. Pull the last one out. Then I can grab the wheel and slide it off.
First thing I want do is loosen up this jam nut right here. Just going to spray some rust penetrant on there, and let that soak for a little bit. This thing's pretty rusty, so let that soak. Then I'm going to take a 15/16s wrench. You could also take a 24 millimeter wrench. Loosen this up.
All right, that wasn't too bad. Give it a couple turns.
Next, I'm going to take this outer tie rod nut off. I'm going to use an 18 millimeter wrench. You can use a socket and a ratchet, or even a socket and an air gun. Just loosen this up. Normally they're not too tight.
So I switched to a ratchet wrench, makes it a little easier. And just make sure the stud isn't spinning. If the stud starts spinning, then you can use a hex fit to hold the stud from spinning. Or even if you are able to put a jack underneath here and just put a little bit of pressure. Sometimes that helps take that nut off.
So to separate the outer tie rod, I'm just going to use this front end tool. You can use something like this, or you can use ... There's a couple other methods you could do. Taking a hammer and trying to tap it on the top of it, and you just got to be careful you don't mushroom the end over. Otherwise, it's not going to go back in, unless you're replacing it, then it's not going to matter.
So I'll just take this tool, and just separate this. All you got to do is tighten it up. What I'm basically doing is pushing the stud down with the tool.
And there we go, separated. So make sure you don't stand too close when you're doing that and wear safety glasses. Then I can separate that.
So I want to loosen up the inner tie rod, or separate the outer tie rod from the inner tire rod. This is pretty rusty, so what I'm going to do is just slide the inner tie rod, I mean the outer tie rod, back in, and then just put the nut on loosely. Won't need to tighten that down or anything. And I'm going to try to loosen this up. I'm going to use some locking pliers, see if I can get this to spin.
If you're doing this, try not to get too close to the threads, where the nut is.
I'm going to try to loosen this nut up a little more.
All right, so that's moving. And just do this little ... There's a little sleeve on here, so just move that out a little bit.
All right, so I'm using some bigger locking pliers, or a pipe wrench. You can use a big pipe wrench. Just loosen this up this way. And it's a good idea to mark something on the inner tie rod so you know how many turns you twist this out. So I've already gone one turn.
All right, it's getting looser. So I've gone about five turns. What I'm going to do is just use some locking pliers. Lock this right here, take the other tie rod end off. Use some other pliers, try to take this off this way.
You just want to count how many times you go around. That's six turns. Eight. 16, 17, 18, 19. So 19 turns to take it off. So when you put the new one, on or if you're reusing the old one, you want to put it on 19 turns.
... can put a little anti-seize on this before I put the tie rod end on. Then it'll just be easier coming off if I ever have to take it off again.
Take this little cup. This is what squeezes the tie rod together to make sure it's tight so it doesn't move. Slide that on, and we're going to count 19 times. One, two, three.
18, 19. Okay, so that's where it was when we took it off. Wipe some of this away.
We'll take this end, slide this back into the knuckle. Take the nut and install the nut. Now I'm going to tighten up this nut. I'm just going to use an 18 millimeter swivel, and as you can see, the stud is spinning. So I'll take a five millimeter hex key and go right in the top of the stud. That's going to prevent it from spinning as I tighten this up.
All right, snug that up a little bit.
Then, if you want to use a torque wrench, you can torque this nut to 48 foot pounds. It's hard to get a torque wrench in this small location, so I'm just going to use an 18 millimeter wrench and just tighten it up. That's good.
And then take a 15/16ths, tighten up this jam nut. And if you can get a torque wrench on this, if you have a crow's foot, you can tighten this to 33 foot pounds. All right, that's good. Take off my locking pliers.
So whenever you're replacing any of these steering components, it's a good idea to go to a shop after you're done doing the job and have the vehicle aligned. Otherwise, you can have premature tire wear.
Now, I'm going to install the wheel. Line it up with the lug holes.
And I'll hold the wheel on, grab a socket with my lug bolt, get that started.
All right, now I can lower the vehicle and torque the lug nuts.
Now, I'm going to use a 17 millimeter socket and this torque wrench that we sell at 1AAuto.com. I'm going to torque these lug bolts to 95 foot pounds in a star pattern so that it torques the wheel down evenly.
And just go around again.
Thanks for watching. Visit 1AAuto.com for quality auto parts shipped to your door, the place for DIY auto repair. And if you enjoyed this video, please click the subscribe button.
Tools used
What's up, guys? I'm Andy from 1A Auto. In this video, I'm going to show you how to replace the front lower control arms on this 2001 BMW 325xi. If you need this part, or other parts for your vehicle, click the link in the description and head over to 1AAuto.com.
I raised the vehicle. We're using a two post lift. If you're doing this at your house, you can use a jack and jack stands. I'm going to remove the tire to gain extra access. It's going to make it a little bit easier.
I'm going to use a 17 millimeter socket and an air gun. You can always use a breaker bar. Take these lug nuts out, or lug studs out. When I get to the last one I'm just going to hold the wheel so it doesn't fall. Take the last one out, and grab the wheel, pull it off.
So, I want to take this nut off, and also the nut right here, but they're pretty rusty, so I'm going to use some rust penetrant, spray it down, soak it for a little bit, right there, and right there. Now I'm going to take a 18 millimeter wrench, go over this nut. I'm going to loosen this nut up. This will get a couple turns on the box side, then I'll switch to the open side and take this nut off, get that nut loosened up.
And sometimes you can't get it off because the axle's in the way, and we're just going to leave it loose like that. So, I'm going to separate the ball joint from the knuckle, right here.
You can do this a couple of ways. Sometimes there's a clamp that you can slide in there and it pushes down on the ball joint. What we're going to use is a fork. We're going to try that method.
You could also take a hammer and just tap on the knuckle itself. Just be careful. You don't want to break anything. I'm just going to use this pickle fork and a hammer. Don't worry about that. Slide that in there, and we'll separate it.
Now, the reason why you might not want to use a pickle fork is generally it rips the boot on the lower control arm, or on the ball joint. So, keep that in mind. If you're going to reuse the ball point, you might not want to use this method.
There we go, separated. Pull that nut out of the way. So, if you're doing this job and you don't have an impact gun, what you're going to want to do is take a 22 millimeter wrench, get on this nut right here, and you're going to want to crack that free first. Otherwise, we're going to loosen up these two bolts right here, just use an 18 millimeter socket, loosen these up, do the same on this one.
Those bolts are loose. I can take that one out. This one I can't get out until I break this free. Just take a pry bar under here, just pry this away and I can get the bolt out. Just got to twist this a little bit, pull that bolt out, and now we can get a gun on here, take that nut off. I'm going to take this nut off and just use a 22 millimeter socket and an impact gun. All right, got that off.
If you're going to reuse this ball joint, you're going to need to use a ball joint separator. What it does is clamps in here and pushes up on the ball joint. If you're not going to reuse it, then you can either use a hammer on here, or a pickle fork. So, I'm just going to use a hammer, try to break it free, if not, I'm going to use a pickle fork.
All right, so just hammering it off I don't have enough stability with the arm, so I'm actually going to use a pickle fork, slide it in here, just be careful not to hit the CV shaft. There we go. Now, I did just put the nut back on, just so it didn't go flying, just put it on a couple threads and slide it out.
So, I need to access these bolts underneath here. This shield is in my way, so I'm going to remove the shield. I'm going to use a eight millimeter socket, extension, and a ratchet, but I'm just going to hammer this on. These are pretty rusted. Tap that on, use the ratchet, loosen it up. Take that one out. There's another one up there.
All right, so I got this out. You may have to bend it a little bit to get this out. There may be another fastener right there. This one doesn't have that, but, so take that out.
So, that heat shield is just on the passenger's side, where the exhaust is. The driver's side does not have that heat shield there. So, if you're doing the driver's side, it's not as hard.
So, what we need is a 16 millimeter socket and a ratchet, and then we're going to take these two bolts out, right here. There we go.
Right, so the inside one, the one closer to the center of the vehicle, was getting pretty tight pretty close to the exhaust, so I had to switch to a ratchet wrench. So, just use a ratchet wrench on that [inaudible 00:06:44] one.
Oh, all right, and that's loose. They're both loose. Make sure you support the lower control arm so that doesn't happen. I'll take the wrench off and slide it out.
So, we need to separate this bushing from the lower control arm. A good idea to do before you take this off is just take a marker and mark this on the control arm so that you at least index roughly where it went before.
Then we're going to put the control arm in a vice like this, and there's different types of pullers you can use. You could try a different two jaw puller, a three jaw puller, or some other. Be creative. They do make a special puller for this. I don't have it, so I'm just using this front end puller, and I'm going to tighten this down. This is just going to separate this from the control arm, and it came right off.
Here's the old control arm. Here's the new control arm from 1AAuto.com. As you can see, the shape is the same, has the same machined components. The end to go into the bushing, this machined hole for the ball joint, and the other ball joint, comes with a ball joint and a nut. Take that off. This is just a cover for shipping. Get yours at 1AAuto.com and you can do it yourself.
So, I have my mark right there, so I want to slide this on like that, in this area, jus transfer the mark over to the new one, so that's good right there, so we know which way it goes. I have seen some people put grease on this. I don't think grease is a great idea, so I am just going to use a little bit of soapy water, because then it will evaporate eventually.
Slide this on. Take a piece of wood, and just use a hammer, and hammer it on.
Now, the measurement we want is from right here to the top of there. We want it to be 170 millimeters. I don't have a millimeters tape measure, so that's a little more than six and a half inches, so, just get it close. I'm just going to hammer it a little bit more. That's about six and a half inches, so we're good.
I just line this up, take the bolts, get them started. You might have to push this out of your way a little bit. All right, so I got those two bolts started, now I'll take my 16 millimeter ratchet wrench, get the inboard bolt snug first, and then the outer one.
I'm going to tighten these bolts down. If you can get a torque wrench in there to 44 foot pounds, it's a little tight on that other one, so I can at least torque the outer one.
I'll take this inner ball joint, take the nut off here, just slide that in position and these two bolts, get these bolts lined up. Actually, it's a good idea to get the inboard one in first. Get that lined up.
So, this inside bolt I'm not going to be able to get a torque wrench on because the arm's in the way, otherwise you want to torque this to 57 foot pounds, and I'll do the same with that one. With an 18 millimeter socket and the torque wrench, I'll torque this bolt to 57 foot pounds.
Now I'll take this ball joint nut, get that lined up. I'm going to take a 22 millimeter wrench and tighten this up, but the ball joint stud is actually spinning, so I'll take a six millimeter hex bit and put it on my ratchet, and that's going to hold the stud from spinning, and I'll tighten this up.
Now I'm going to tighten this down. Now, if you're able to get a torque wrench on there, which it's very difficult, you can torque that down to 57 foot pounds.
I'm going to line up the lower control arm ball joint through here. Take the nut, get this started.
Right, then I'm going to take a 19 millimeter wrench, tighten this nut right here. Now, it's next to impossible to get a torque wrench on here. Maybe if you used a crow's foot you might be able to torque this, but you're going to want to torque this to 48 foot pounds. So, just do the best you can.
Now we'll take this shield, slide it back in position, take the bolts, or the screws, get these started, and if there was any other bolts that you had that were keeping this on, put those back in. Just take an eight millimeter socket, extension, and a ratchet, just snug them up.
Good, now I'm going to put the wheel on. Just line up the holes, take one of the lug studs, get that started, and I can grab the other ones. Now I'll just tighten this down. And then I'm going to lower the vehicle and torque them.
Right, now I'm going to use a 17 millimeter socket and a torque wrench. I'm going to torque these lug bolts to 95 foot pounds. I'm going to torque them in a star pattern so that the wheel gets tightened down evenly, then I'm just going to go around again, just double check.
We're good to go.
Thanks for watching. Visit 1AAuto.com, your place for DIY auto repairs, for great parts, great service, and more content.
877-844-3393
Monday - Friday 8:00am - 9:30pm ET
Saturday - Sunday 8:00am - 4:30pm ET
Specify your vehicle's year, make and model to guarantee fit.
This part doesn’t fit a . Select from parts that fit.
If your vehicle isn't listed, search Steering & Suspension Kits