Hey friends, it's Len here at 1A Auto. Today, I'm working on a 2011 Hyundai Sonata. I'm going to be doing front struts. Going to be a fairly easy job. I want to be the guy that shows you how to do it. If you need this part or any other part, you can always check us out at 1AAuto.com, thanks.
Okay friends, first thing we have to do is make sure we have our vehicle supported. We're going to raise it a little bit off the ground, but what we want to do is make sure that the wheel is still on the ground, at least barely touching, with minimal weight of the vehicle on it, because we want to start loosening up these lug nuts while it's still on the ground. If you're using an air gun, well, you don't have to do any of this. But, for the purposes of this video, we're going to go caveman style.
Now I've got those loose. Let's make sure that the vehicle is properly supported as it should be, and then we'll go up. We're going to continue with our 21 millimeter, we're going to remove all these lug nuts. What I like to do is I'll get one so it's almost all the way off, maybe just a few threads on. If you're not sure how far on it is, you can just take it all the way off and then go a few threads on. Now I'm clear to remove all the rest of the four. I can take those right off and I don't have to worry about the wheel falling off, and then I can hold onto it without my tool in my hand, take off the last lug nut, put it down safely. Okay? That one's on pretty good. Now I'm holding my wheel so it can't fall down and hurt me. I'm going to take off this one last lug nut, there it is. Take down that. Hold my wheel with two hands, going to put it aside so it's nice and safe.
Okay, so we got it up in the air. We have our sway bar link right here. This connects into the strut assembly. We want to make sure we get this off. An easy way of doing that is using something like, you know, locking pliers, whatever you have access to. You need to be able to grip onto the back side there, there's a metal piece. You want to try to avoid the boot if possible. There we are, got that locked on. I'm going to take and remove this nut right here. For this one, it's a 19 millimeter and I'm going to use my air gun, but if you have a ratchet with a socket you can go ahead and do that. I'm going to grab my gun, put it on here, remove that nut, okay. Can take off my locking pliers, that out of the way. Perfect.
Now we're going to come over here, there's a 12 millimeter head here and another one down over here, that just holds these brackets. I'm going to remove those. I'm going to make sure we have plenty of slack to move things around with our ABS wire. I'm going to probably remove this one as well, that'll help things move. Because, once I remove these two bolts, this knuckle is going to be able to move around. It might go ahead and put a tug on our ABS wire, and I don't want to go and buy another one of these ABS wires due to a mistake, so let's skip past that. We'll go 12, 12, 12, nice and loosey-goosey, and then we're going to go ahead and move on.
I'm just going to mark our bolts. I've got one marked right here, I'm going to mark the other one right up here, okay. This is just going to kind of help us remember which way these bolts were, just in case one of them's a camber adjustment, we want to be sure that we get it kind of back to where it's supposed to go. All right, now we're going to move ahead. 17 on this side, 19 on this side. I'll hold this side with a wrench. This side, you can use a ratchet or your air gun, whatever you have. We'll move along.
Now I'm just going to take off this last nut here, there it is, same as the other one. Okay. Now I'm just going to drive both these bolts out, and we have to be careful because at this point, the knuckle will want to come down, which is also going to put a little bit of stretch on our axle, so we want to make sure that if it does come down, it doesn't come down too much, we don't yank on it too much. We just want it to be enough out of the way so we can shake this around and get it right out. Okay?
Grab my hammer. There you go. That's one, two. Let's look at them. They're both the exact same and there's no oblong to them, so we don't have to worry about any alignment adjustment, so that's great. We'll put these aside. There we are. Now we'll just shake this apart, just like that, perfect. Try to rest this aside so, like I said, it's not putting too much pull on the axle. It might be a great idea to use something like a ratchet strap or some kind of device, rope, whatever you've got, just tie it here, find some place to tie it so this doesn't pull away. We'll do that real quick and we'll move along.
Now we're going to remove these three upper nuts right here, okay. The first one I'm going to take all the way off and I'm going to put it on a couple threads so it'll hold it, then the other two I can take off. For this application, I'm going to be using a 14 millimeter. I've got my 3/8ths gun, you can use a ratchet, but basically it's a 14 millimeter turning to the left to remove these. Okay, get that cover out of the way. We've got our strut moving around nice and easy. I'm holding it up with my other arm. Take off that last nut, now I'm going to come underneath and I'm just going to take it right out through here. Now we've moved our left front strut assembly.
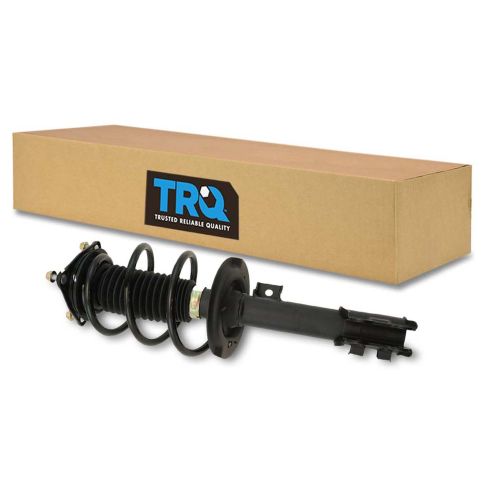
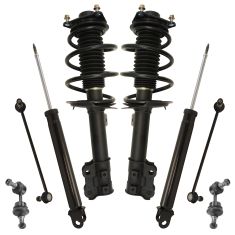
Here we go friends, quick product comparison for you. We have our 2011 Hyundai Sonata front strut assembly. All right, it's got the sway bar link mounting hole, we've got our coil spring, we've got the upper mounting right here, okay. We've got the lower mounting holes down there, perfect. Couple little pull holes there for cables and wires. It's all in the video. We'll notice we have the same exact thing on our quality 1A Auto strut right here. Sway bar link hole, wires and doodads, mounting down there. We got brand new nuts up here, so that's great. You always want to replace your locking nuts. There we go. If you need this part or any other part, you can always check us out at 1A Auto.com.
We've got our new strut, right. We'll notice that the distance between this stud and this stud is very long, shorter, shorter. We want to make sure that that matches up with what we've got going on up here. This distance is longer than those two distances, so we'll just make sure it matches up. If it doesn't, no problem, just turn it. This is just a strut cap, it's meant to spin. I'm going to go ahead, bring it up through the wheel well. Get it lined up, there we are. Just going to start these in. We'll torque them down after. Now I'm just going to bottom these out and I'm going to torque them after. Just grab the right tool here, 15 millimeter. All right, so I'm just going to take a little bit of copper Never-Seez, I'm just going to go across here. You can do that if you want, you don't have to obviously, it's your car.
Okay, I'm just going to remove this, get that out of the way. I'll take it right off of there in a minute. I'll lift this up, see if I can get it weaseled in. Okay. I'm going to put the bolt through from front to back. That's the way it came out, so that's the way it's going back in. Just have to wiggle it and jiggle it, that's cool. Do the lower bolt, same thing. If you need to, there we go. We don't have to worry about those crayon marks because it's non-adjustable, so that's no big deal. If you wanted to, you could use a little bit of thread locker on the back of these bolts, it's completely up to you. For the purpose of this video, I'm not going to worry about it. I'm going to grab my 17 millimeter wrench, hold these, and I'm going to tighten up these with the 19 millimeter. You can use your ratchet, do whatever you need to do. I'm just going to cruise along.
Okay, we're going to torque these up, I'm going to start with the top. 17 on the bolt side, 19 on this side. It's 58 foot pounds. Getting there. There we are. Now I'll do the same to the bottom. Here we go, I've got my two bolts for down here. These are just 12 millimeter heads, same thing I used to remove I'm going to use to install. Okay? There's nothing special about them. Just going to line it up, turn them into the right. Go ahead and do this one. Tighten this up. Got one more up here. We've got our bolt. See if I can get it in. Now we'll just go ahead and blast these with a 12 millimeter socket.
Now we're up to our sway bar link. This is what I was mentioning when I was talking about removing it. You want to try to grab on with your locking pliers right onto the metal. Okay? Once you have it on there, you know you're good to go. First, I'm going to put it back here. You can do it however you need to do it. If you want to put it on first, you can do that. We've got our nut, I'll start this one. You can use thread locker if you want to. I'm not worried about it on this video.
Now I'm just going to go ahead and try to tighten this down. There we are. Blast it in with my 19 millimeter. Get these out of the way. Perfect. We'll just get our little rope out of the way here and we're clear to put the wheel on. Once we get the wheel on, we'll get it down on the ground, we'll torque this up and then we're going to torque up the top. Okay? To do the top, you want to make sure you have the weight of the vehicle up there so it's pressing down, compressing that strut mount to the body of the vehicle.
Here we go, I'm going to lift up this wheel. I'm going to be careful not to go like this and lift with my back and hurt myself. I'm just going to take it, roll it right up my leg. I'm going to use my ab muscles, lift it up. Put if on here. I've got my hub cap, going to put it up on here, and then I'm going to hold these all together. So it can't fall down, I'm going to grab a lug nut, get them all started on, we'll snug them down a little bit and then we'll torque them.
Okay, here we go. We're going to torque these up with our 21 millimeter socket to 80 foot pounds. I'm doing a star pattern, super important. When you go around the second time, if you choose to, you can go however you want. But, to do the star originally is so that when you go like this, you tighten it here it goes on, if I was to go here it would push this side on, but what if it was kind of sitting off kilter, right? That would be bad. I went here, here, sucked it all in. Boom, boom, boom, make a nice pretty star and off we went. 80 foot pounds with a 21 millimeter socket.
Okay, I have got the complete weight of the vehicle on this strut now. I got the wheel torqued down, the vehicle sitting on the ground as low as it's going to get, so all the pressure is squishing between the strut cap and this. Now I can go ahead and torque this down to 43 foot pounds. I'm using a 53 ... 53, 15 millimeter socket, and I'm just going to go ahead and go around. These are locking nuts, so I didn't need to use thread locker. It's up to you if you want to. I'm just going to go around again, make sure it's good. Perfect. We'll put our little cover back on here, just pops on. There's nothing special about it. There we go. Great job everybody.
Thanks for watching. Visit 1AAuto.com for quality auto parts shipped to your door, the place for DIY auto repair. If you enjoyed this video, please click the subscribe button.