WARNING: Cancer and Reproductive Harm - www.P65Warnings.ca.gov.
Lifetime Warranty
This item is backed by our limited lifetime warranty. In the event this item should fail due to manufacturing defects during intended use, we will replace the part free of charge. This warranty covers the cost of the part only.
FREE Shipping is standard on Orders shipped to the lower 48 States (Contiguous United States). Standard shipping charges apply to Hawaii, Alaska and US Territories. Shipping is not available to Canada.
Expedited is available on checkout to the United States, excluding Alaska, Hawaii and US Territories as well as P.O. Boxes and APO/FPO/DPO addresses. Final shipping costs are available at checkout.
How to Replace Front Sway Bar Bushings 2002-09 Audi A4
Created on:
Tools used
Phillips Head Screwdriver
Jack Stands
Flat Blade Screwdriver
Rust Penetrant
Ratchet
Socket Extensions
13mm Socket
Floor Jack
1. Removing the Splash Shield
Raise and support the vehicle on jack stands
Remove the Phillips screws and flat blade fasteners from the splash shield
Lower the splash shield
2. Removing the Sway Bar Bushings
Spray the sway bar's bracket with rust penetrant
Remove the 13mm nuts from the sway bar bracket
Pull the sway bar down a bit
Remove the brackets and bushings
3. Installing the Sway Bar Bushings
Press the bushing onto the sway bar so that it meets with the frame
Tighten the 13mm nuts to the bracket
Lower the vehicle to the ground
Torque the 13mm nuts to 18 foot-pounds
4. Reinstalling the Splash Shield
Insert the splash shield into place
Tighten the Phillips screws and flat blade fasteners to the splash shield
Brought to you by 1AAuto.com, your source for quality replacement parts and the best service on the Internet.
Hi, I'm Mike from 1A Auto. I hope this how-to video helps you out, and next time you need parts for your vehicle, think of 1AAuto.com. Thanks.
Today, we're going to show you how to replace the stabilizer bar bushings. This is a 2007 Audi A4. This procedure is the same for A4s from 2002 to 2009, as well as some other Audi vehicles. Items you'll need for this include new sway bar bushing from 1aauto.com, Phillips and flat blade screwdrivers, 13mm deep socket and ratchet, penetrating oil, and you could do this with your vehicle just sitting on the ground but jack and jack stands make it a lot easier.
You want to raise and support your vehicle, and you need to remove this panel. Each side there's a Phillips screw here, and then there's a series of flat blade fasteners and all you do to remove them is turn them a quarter of a turn and pull them out. So there's one in the wheel there and there are quite a few just around the perimeter. Here, this vehicle's missing some of them: here and here.
Again, a Phillips screw here, as well as the one back up in here, and there's three more along the back of the panel closer to the engine. Once all the fasteners are removed, should be able to just pull this panel right down.
Stabilizer bar is held in by two brackets and the bushings are, obviously, inside the brackets. What happens is the bushing wears out and the bar starts chattering against the brackets or the frame. So each bracket is held in by two 13mm nuts and it helps if you just spray them with a little bit of penetrating oil before trying to remove them. 13mm deep socket, and they come apart fairly easily. Just to save some time, we'll break out the air tools.
Just pull the bar down some and pull off your brackets. Then the bushings pull off as well.
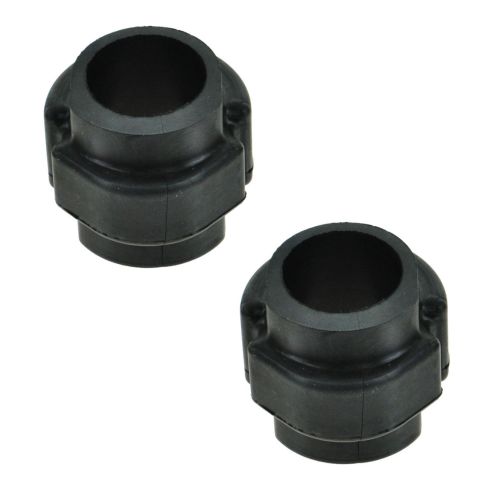
You can see the original bushing out of this 2007 Audi A4 and the new part from 1AAuto.com that's an exact replacement. It's going to go in there, going to install like the original and fix up your problem.
Reinstall, just open up the bushing, put it up in there and you want to just turn this so these indentations are flush with the frame or parallel with the frame so it goes up and in. Put the one on over here, line it up. Brackets in place. I am using an impact wrench, but I'm just going to carefully and slowly tighten up the nuts evenly.
Lower the vehicle down, make sure it's at the correct position before torqueing the bracket nuts. Torque the nuts to 18 foot-pounds.
Okay, put your panel back in place. Need to make sure that these go on the front side of your inner fenders and this stays underneath on both sides. The front in first. Make sure that goes up correctly, inside and front there. Just take a fastener with you and put it in place, hold it.
Thanks for tuning in. We hope this video helped you out. Next time you need parts for your car, please visit 1AAuto.com. Also check out our other helpful how-to and diagnosis videos.
1ASFK01202
In Stock
Product Reviews
Loading reviews
There are no reviews for this item.
Customer Q&A
No questions have been asked about this item.
Customer service
877-844-3393
Monday - Friday 8:00am - 9:30pm ET Saturday - Sunday 8:00am - 4:30pm ET
Audi is a registered trademark of Audi AG. 1A Auto is not affiliated with or sponsored by Audi or Audi AG.See all trademarks.
Enter Vehicle Year Make Model
Specify your vehicle's year, make and model to guarantee fit.
Year
Make
Model
Options
Drivetrain
This part doesn’t fit a . Select from parts that fit.