Common Mistakes Bleeding Brakes How to Do a Full Brake Bleed the Right Way and Why
Created on: 2021-08-20
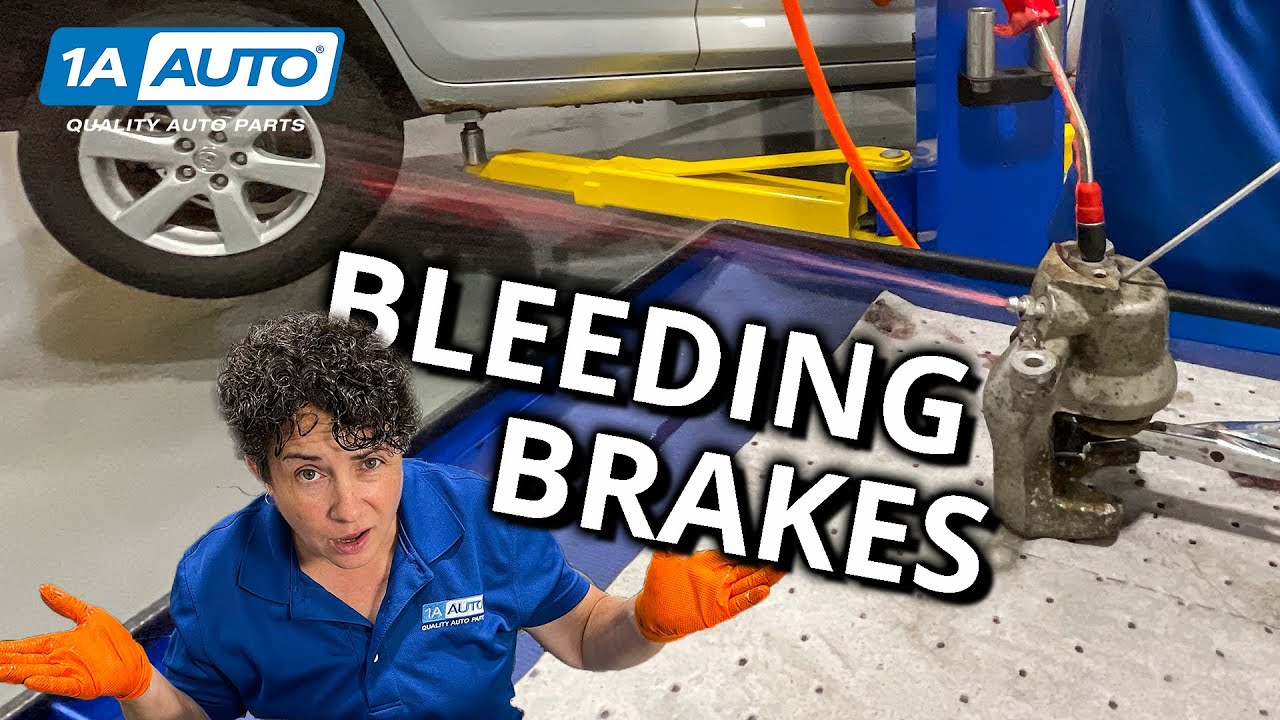
Sue guides you through bleeding brakes the right way, and why you might need to do it, with the correct order in mind!
Oh, hi, Sue here from 1A Auto, and I'm gonna tell you about common mistakes people make when bleeding their brakes. Oh, what the... I forgot to put the cover on.
So most cars that are registered in the United States, the master cylinder is over in front of the driver's seat. So, where that is located is the key to start when you bleed your brakes. Even if you only do front brakes, you gotta start from the rear. So there are all types of brake systems and all different ways to bleed them. It's not as easy as you think it is. We're all used to pretty basic breaks that we deal with every day. And it's usually right rear, left rear, right front, left front because the master cylinder is located right in front of the driver. So you always go to the shortest path of pressure last, which would be left front because the master cylinder is right there. But we can talk about several different ways people do it. So that would be a wrong way, right? If you didn't have that style, say you had a sports car that has six caliper pistons in each caliper, a Corvette comes to mind. Corvette has two bleeder screws on each caliper, left and a right inside the caliper. Three pistons on this side and three on that side, you would literally go to the right rear wheel, inner bleeder caliper first, then outer bleeder caliper second, I know. Then you're gonna go shoot up to the front and do the same scenario, then shoot to the back, left rear, do the inner and an outer, then shoot to the right front. There's a lot of air going on there. But yeah, if you went right rear, left rear man, you might cause a lot of overheating because air causes the brake system to overheat too because it's a lack of pressure. Pressure keeps it at a moderate system, moderate temperature, airflow going through makes things boil makes it come to a boiling point faster because it's supposed to be under hydraulic pressure.
So, I'm going to do a real basic little drawing here of what a car looks like. So you've got the front of the car, left front, right front, right rear, left rear. Those are the wheels. Each wheel has hydraulic fluid going to it. If your master even is over here, that's your master cylinder, okay, you could have brake lines that are gonna bleed off and just feed the front, that whole brake system has a union right there, it's gonna go that way. Then you're gonna have another brake line, that's gonna bleed just the rear. That's a normal brake system. That's the average brake system that we see, especially here in America. So what you would do is follow the lines.
Furthest lines go first. You always want to start at the furthest away from the master because you want all that fluid to go out and push the air out. And then it's going to compensate on the other side. And that's the shortest distance. So that would be last. Always follow the brake lines. If you have a specialty car, you have a car you don't know, you can always look it up. They give it to you on the internet, hopefully nowadays. But if it doesn't, and you're just gonna wing it by the seat of your pants, then go by the furthest wheel that the brake line goes to, and you can have a junction halfway. And then you're gonna have to make a decision, does it go to the left? Does the brake line feed the left rear wheel and then go off to the right rear? If that's the case, I personally would still bleed, I think the right rear. This is a big subject, isn't it? Leave a comment down below if you think you know the answers.
So here we have a car that I just did front brakes on. So here's a question, another question to you. If you do just front brakes, do you think you need to do the rear bleeder screws or bleed the rear brakes? Well, I'm gonna tell you, I did front hydraulics. So I want the best out of my car. And if I don't need rear brakes, but I did the front's, I'm going to bleed the rear also because I want to get this fluid equally new all the way around. Why would I want old fluid stuck in the back calipers and new fluid in the front? It just doesn't make sense to me. You've got a difference in temperature and boiling point at that point. That fluid is old. It's gonna break down. Do I want to lose my brakes on the road? Not this kid. So I looked at these. Yeah, they're rusted, they're rotted. Reality is I am gonna do them because we're gonna do them for video. But if this was my car and these rotors weren't rotted like this, plenty of pad on here, and the calipers work good, I still would bleed them because I want clean fluid at all four wheels.
So here we have a set of typical lines. This is a 2006 actually, so these lines come coated. The old days they didn't come coated. They were just open to the element, and they rusted, and they rusted pretty quick up here in New England. As you can see, these subframes I got a lot of surface rust on them. But these coated lines personally are my favorite because they save me a life of misery. Now these are factory junctions up there. A lot of people get those confused with like a universal union, and they think wow factory puts them in, I can put them in. Well, in reality is when you have a brake line that's rotted, and you connect it with just one of those unions and then you continue and not do the whole line it is illegal in some states. My state, I'd fail you in state inspection because it's dangerous. Do the whole line, do it right, that's just the way it is. This is an item. It's going down the road, if it's unsafe, it's unsafe. Follow the lines and you can see that there's two lines going to the rear. So that tells me that each cylinder here, caliper cylinder has its own brake line. That means that, well, I'm gonna do the right rear again, and then the left rear, just the way it's gonna be, one, two, three then four. That's how I'm gonna bleed these brakes. So brake lines, these are the type of lines that come now aftermarket instead of those stiff steel lines. I know you know if you've ever had to bend one, Lord, it just aggravates you [inaudible 00:05:59]. This is amazing. When this product came out, I was beyond joyful. Easy, no more excuses of why you don't do brake lines the correct way. You can bend these so easily. This is a 3/16 line. You can bend that and go around the edge corner. Just keep it away from moving parts and make sure it is fastened down. Don't want it vibrating or rubbing against metal. Brake line, that's one.
Common mistake though, I see them all the time. People just leave them flopping around, that's a mistake. This is a double flare toolset. So this is standard brake lines for a lot of your American cars or older cars, then you move up to the newer ages, and you've got a bubble flare tool. This is really important. You cannot do a single flare or double flare, shall I say on a bubble flare, looks completely different, and it will leak. Let me tell you, leak all over the place. You won't have a brake pedal. Another common mistake people make when they replace their calipers. Good caliper will come with copper washers. If it doesn't find them, track them down and get them. Some people take their old washers, and they think I can just put it on there and use my old banjo bolt. Well, let me show you something. They have record grooves in them. Because they put grooves on the top of the banjo bolts for the bleeding, that keeps the washer from moving because you don't want this washer to move, it's under a lot of PSI pressure for hydraulics. So they pinch them, and you tighten that down right. Look at the how warped this is. You think that's gonna seat right? That's so warped. Let me see if I can get a good shot of it right there. It's got a huge ring around it from where the bolt actually head sat down in it. Can't reuse that. People do though, seen it happen, and it slowly seeps out, slowly seeps out. Yeah, they're on the road out there with you.
So now I want to talk to you about first place to start, right at the beginning, master cylinder located up here in front of the driver's seat. This is what it looks like. It's a little reservoir in the front, aluminum, plunger underneath, and you get your steel lines that come out from underneath it. This particular one looks pretty clean. The fluid looks good. But you always want to check the condition of the fluid, and the condition of the cap. Make sure it's solid, not swollen, contaminated. Someone put the wrong brake fluid in there, this rubber piece will be all swollen, and it wouldn't work. And I can give a shout-out, I have to give a shout out, shall I say, to Mr. Lenny, Mr. Safety Man. Yes, wear your glasses when you're working with brake fluid. What I would do if I was doing a brake job on this and has over 50k, I would do a brake flush. Under 50k depends on where I live, mine kind of environment I'm in. If I use this brake as a delivery vehicle, absolutely. The more brakes are being used, the harder they get, breaks the fluid down.
So you can get yourself a turkey baster or one of these little plungers. What you want to do is you wanna suck out the fluid and then fill the reservoir up with clean fluid. Oh, what's that? Why am I not getting any fluid? You wanna know why? There's a screen in there, so you've gotta go in there and lift that screen out. That's stopping any junk from going in there. You can actually see it kind of discolored. There's a little bit of a film on there. So yeah, I'll be cleaning that. So now you can get your turkey baster or your device down in there and suck that fluid right out. This fluid looks really good. Maybe that's because I already did it. But this is what you would do. Okay. Dispose of this correctly. You can put it in a sealed container, bring it to your local garage. Even if it's a national chain. They'd be really mean people if they weren't saying, "Sure, just give it to me, I'll dispose of it." Then you're gonna fill this up with brand new fluid, and don't forget to look on the cap of what it calls for. This one says DOT four I'm sure, could say four or three, there it is. Use only DOT and they get this lovely piece of paper blocking it, DOT three fluid. So this one is three, great use three or four. Don't ever mix three, four, and five. If you watch Lenny's video, he'll tell you why.
Top it off with a clean fluid. Now I buy if I'm doing a brake flush, I'm gonna buy two to three of these jugs, good-sized ones. I'm gonna show you how to break your, don't break your... And I'm gonna show you how to do a brake flush by yourself with the brake fluid bottles that you get at the store. So I know I said I was going to teach you how to do this on your own with like an old water bottle and some hoses. But I did some research, we've already done that video, and you can watch it anytime you want. So this time, I'm gonna do it with the kit that we actually sell. We sell this kit, simple, easy. So either you can get a water bottle and go get to the hardware store and get the hose and seal it. That's fine. Or the kit comes with all the attachments and everything that you need. So, let's see how this works. All right, so we start always with the master. Like I said, first things first, you're gonna fill that, make sure it's full. But look what I just discovered. I was wondering why it was such a tough angle to get at. Look at this. This is awful nice of them. Easy access. Look at that, there it is. So the master is topped off. It's full. Make sure you put the cap back on. And then we're gonna raise the vehicle up. And we're gonna start on this one because the master is in front of the driver at the right rear.
So here we are at the right rear wheel, which is the passenger rear wheel. And here's the kit actually. This is what everything comes, you get two cans of brake fluid, and brake clean, and all the attachments and the hoses. So let's do it. So excited. I got a nice catch bucket underneath here. And first thing I'm gonna do is see what size bleeder screw this is. So there's a rubber boot on it, which you want to keep and reuse afterwards. So I'm gonna peel that boot off. And let's get the proper wrench, 8 millimeter. So 8 millimeter or 5/16s will work, 5/16s is going to be just a hair loose, but it'll work. Now I gotta set up my little system here. So I'm gonna open the can of brake fluid. Now they always have this film on it. And I'm pretty much a stickler for this. Because I've seen so many people leave it on there, and it floats inside the jar. It's a real tight seal. But there's a tight seal for a reason. Make sure you don't leave any popping down in there. And we're not gonna fill this up but we are going to... I'm going to put about a quarter to a half in there. Now the reason for this is when you're bleeding brakes by yourself then you're pumping the brakes up. So we're gonna put this system up, then I gotta go pump the brake slowly by myself. The straw in this cap is going into that fluid. So when I actually attach it to the car, and I push down on the brake, and I release the brake, that's when air is going to be retracted back into the system. But we're gonna retract fluid back into the system because there's the fluid. If you left this empty, and you let the pedal come back up, it's just gonna suck more air. You're gonna be there forever until you fill this up with brake fluid, then it's gonna actually start bleeding. So, I'm gonna go way ahead of the system, and I'm gonna put fluid in there, so I don't have to do this for hours. Now I'm just gonna connect someplace above the bleeder screw, the magnet. I'm going to put this hose on. And if the bleeder screw, if this fits over it, that's great. If it doesn't, it gives you attachments that I can attach to that, and then push right down in there and spin it in. Now I'm gonna open up the bleeder screw. Let's see what we get. I'm gonna do one full to one and a half turns. Look at that. The fluid came right out. Look at the air bubbles already. That's cool. So now, I'm gonna go pump the brake pedal. Okay, so now that I'm in the vehicle, my master cylinder is still full. My bleeder screw is open, and my bottle is supplied with fluid in it. I'm going to slowly push down all the way to the floor and then retract it in a steady pace. Do it again. Now I'm gonna get out. Check my right rear wheel.
Oh, hi, I didn't see you there. Perfect. So three times gives it just the right amount. It doesn't overfill it because if you pumped it probably one more time, it'd be right at the top. And I don't see any air bubbles in that line. So let's close it off. Take my 8 millimeter wrench. I gotta tell you this is my first time using this kit. I'm pretty impressed. I like that it's... it didn't make a mess. I didn't know if it would shoot out a little bit. So far, so good. Take that off. And I'm gonna empty it right into my catch basin because I gotta move on to the next wheel. Obviously, I'm not gonna try to empty it completely. That way, I don't have to keep adding good brake fluid to that. It's pretty clean, though. Now that I'm done in the right rear wheel, I'm gonna put my bleeder screw cover back on. Take off, take my little attachment and go to the left rear wheel, check my master cylinder, still plenty, it's right there at the actual max line. So we're doing good up here. We're at the left rear now, the driver's rear. So I'm gonna do the same thing, slowly go down to the floor, and retract it. Steady speed, three times total, that's number two. All right, here we go. Tighten up that bleeder screw. Now it's gonna be interesting. It's gonna be interesting to see the front caliper because those calipers have more fluid in them because they're a larger system. And I want to see how fast that reservoir fills up. Now we're on the right front, which is the passenger front. Let me take the lube off the bleeder. I'm gonna leave the wrench on the box end. Let's see how good this does. Oh boy, look at all the air in that one. And I'm gonna check my master one more time. So we're just a little bit below. But it's better to be safe than sorry. And I'm just gonna top it off. You know, I was a chef in my second life because I make a mess. Always replace the cover because it's gonna shoot up like a geyser. There you go. Okay, here we are right front. That's the passenger side in the front. We're gonna go down all the way to the floor. Well, the good news is all the air is out of the line. So that tells me that's a solid pump on the third one, more than likely there was zero air. And we're gonna snug this up, a little bit easier, leaving the box end on there. Make sure it's nice and tight. Got a mind of its own. Drain some more out, and then put the cap back on. And let's move up, not move up. Let's move over to the left front, which is the driver's side in the front.
Nice. Let's go pump the brakes. All right, last one pretty happy here, left front, all the way down to the floor. Back up. We're gonna do this three times. Feel like I'm one of the aerobics instructors. What's happening?
This one is sucking air back in.
So, see what I did here. This is how you do it wrong. I did not secure that black, little thong all the way in. So it was sucking air, actually, as I was doing the job, and I did it on the last wheel. But I did that, so you see, that's not what it's supposed to look like. The other wheels are perfect. So, like anything, maybe you get comfortable. Maybe you started getting a little too fast. Make sure that that's all the way in. So now that I know my hose is in this securely again, I'm going to do it hopefully the correct way. And there'll be no air sucking going into that hose all the way down. Don't forget, if you want to check every wheel, I would suggest checking every time you do one wheel checking this master because if you run out of fluid, that's a complete different nightmare that we don't want to get into. You actually might have to bleed the master cylinder. Just tighten this up, drain in the bucket. Put my boot back on. Make sure it's nice and tight, don't be afraid to make sure those are tight because you can't be a little loose on a bleeder screw. There's no such thing as ah, it's okay. No, it better be tight. So now we know we have a good pedal. Well, we don't know that, but I'm gonna start her up. I know that. No, I'm just joking. We're gonna start it up, check the brake pedal, if all is good, clean the bleeder screws and the area with brake clean, then we'll put the wheels back on.
All right, so before I start it up and check the brake pedal, I just came out and checked the master. And it is perfect. It's right there. Make sure the cover's on, and let's start her up. So what I want to do here is I want to pump the brakes up without it running. So that pedal is like it travels this much, and it's firm. Now I'm gonna start it up. So just in case you do have brake issues, and you don't know what they are, this is a good way also to test to make sure the brake booster is working. Firm pedal, start the car up, and the pedal should travel down once the vacuum gets that booster. Whoop, right down. Now this car hasn't been running, I don't know, a couple of weeks. So I'm gonna let it reach its idle tone. And I'm gonna pump the brakes up, and I should be really happy with them. So now I'm confident that my pedal feels great. And I'm gonna road test this. But before I do, clean it up with some brake clean, put the wheels back on, and we are out of here.
Don't forget to torque your wheels before you go for that road test. So we're outside, we're going to road test this little puppy. And I gotta tell you, the brake pedal feels great. So I'm driving down the road. Obviously, I'm not riding the brake but coming up to a stop sign. So what I'm gonna do there is I'm gonna check and confirm there's no air in the system. By coming to a stop, you see me applying the break. And I'm gonna make a mental note and feel where it holds. And I'm gonna sit here for a few minutes, and hopefully, no one's gonna bug me to go. And that pedal is not traveling. If that pedal was slowly sinking down, see if I put a lot of pressure on it. I'd show you, like, if it was slowly doing this. That would mean that there's air in the system, but that brake pedal is not doing that. I'm doing that. Let's do a panic stop. See what happens on a panic stop. I can't do a panic stop because there's a cop right here. So now I'm gonna do a kind of a panic stop. I'm not gonna lose my mind, but I wanna just... that's pretty good. I think our job's done. Let's go get some donuts. I'll buy you some munchkins. You've been pretty good guy.
Thanks.
So hopefully, I went over everything you need to know about hydraulics, brake hydraulics, that is. If I didn't, please leave a comment. I'd love to read them. I laugh a little bit. I kind of smirk, kinda like, what are they talking about? But you guys are great with your comments. I appreciate it. Don't forget, if you're not a subscriber, please subscribe. And don't forget to ring the bell because that turns on all your notifications, and you won't miss any of our videos. And obviously, my right blinker is not working. I don't know if it's the rear or the front. It's just great. Everything's top-notch, officer. Oh, there's the Bronco with the top down. That's the new Bronco. Yeah, yeah. That's the new Bronco.

Why Does My Wheel Wobble Bad Bearing
If you are experiencing wobbly or noisy wheels on your vehicle, check out this video to learn some of the causes, and how to diagnose them!
