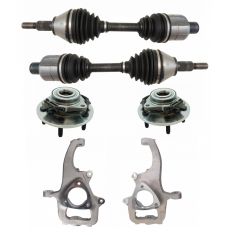
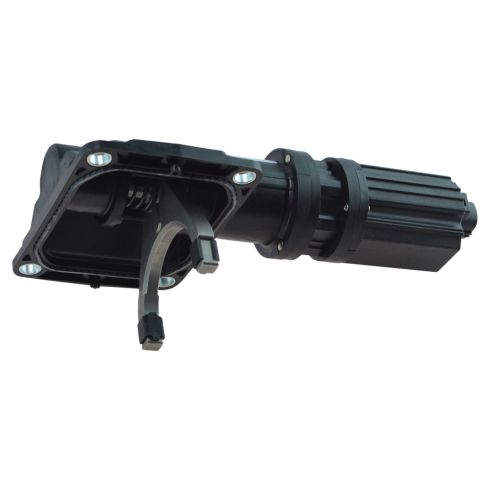
Hey friends, it's Len down at 1A Auto. Today we're going to be doing a very simple job. We're going to be replacing a four-wheel drive actuator on a 2016 Ram 1500 Bighorn. It's going to be awesome, fun. I wanted to be the guy who shows you how to do it. So if you need this or any other part, you can always come down to 1aauto.com and check us out. Thanks.
To replace this actuator it's going to be very simple. There's four mounting bolts. I'm going to reach up and I'm going to try to show you. Got one right about here. Right there. I've got one right here. I have another one here and another one there. That's four. And then right here is our electrical connector. This puppy should slide right out.
Here we go. I'm going to start by removing these four bolts. I'm going to start with the top. I'm going to be using a 12 millimeter socket. You can use whatever works for you. It feels like it's pretty long. It's nice and loose. Hopefully I can grab it by hand again. There it is.
Let's go for number three and four here. This one I'm going to leave partially in. I'll get it to almost the end there. Put it back in a couple threads, just so I can work on the last one without it actually falling out. I got it out. I'm going to go back in a couple of threads like I mentioned. It's probably pretty good. A little bit of gear oil coming out. Just make sure we catch that in our bucket.
Fluid came out. That means we're going to have to put fluid in. You're going to want to make sure that you have the right type of fluid for this. I'm going to hold on to it with my other hand. Take out my last screw. Now we're just going to see if we can figure out how to get this to an angle its way out. Might be a little bit difficult. We're going to see if we can do it anyways though. Looks like it's going to be very difficult. So we're going to have to do another process here.
What we're going to do now is we're going to try to loosen the power steering rack so hopefully we can maneuver it around a little bit to get that actuator out. What I'd like to do is I'm going to start with this one. I'm going to be using my 24 millimeter and I'm going to be using an air gun. You can use a ratchet or a wrench or whatever your preference is. I'm going to get this out and then I'm going to put it back in a couple threads, and then I'll come over here to this side. This one's going to come all the way out. Hopefully I can maneuver the rack up and down on this side enough that I'll be able to get that actuator out. That's the length of it. Like I said, it's going to get it back in a couple threads. Could even go in quite a bit I mean really. There we go. This one's going to come all the way out.
Now hopefully we can maneuver the rack far enough to be able to get that actuator out. If not, we might need to take out the other bolt and be able to get it down even further. We'll take a look. Looks like it's going to be still a tight one. We still need a little bit more throw. What I'm going to do is I'm going to just going to take this last bolt out all the way. I'm going to try to carefully bring this down, making sure I'm checking for any wiring, for tugs. Once I get it down, we'll be able to make our next assessment, see if we can get that actuator out. Bring it down. Bring that down. There we go. Let's see how this looks.
Looks like we've got a nice wide open view. Bring this out, over, down. That's what it looks like on the inside. Now we can see our locking mechanism very clearly. What we're going to do is we're going to lift up on this red. Looks like it's already in the unlock position. If it was locked, it would be that way. I'll just pull that up with my pocket screwdriver and then I'll push it on the pin, wiggle this around.
All right, so we got our pocket screwdriver. We're going to go in between here, try to lift this puppy up a little bit. Here it is. Okay. Now what I'm going to do is I'm going to try to push in on this. Once I get that pushed in, hopefully I can pry up on this a little bit and it should come free. Let's see what happens. Okay, that pushes in a little bit. Here we go. Holding onto our actuator. Now we've removed our four-wheel-drive actuator from the front differential.
Out with the old, in with the new. We'll do a little comparison here. Double check, make sure it looks like all the holes are going to line up. Looks fine. It's got the same connectors, same amount of prompts, four of them in there. It's got the same locking area. That's nice. You'll also notice that the new actuator comes with a rubber gasket, just as the old one did. It's very important to make sure water stays out of there and your differential fluid stays in. As you can tell, this is a quality 1A Auto part. If you happen to need this or any other part, you can always come down to 1aauto.com and check us out. Thanks.
Next thing I want to do is while this is out, I'm just going to clean up the surface area where the gasket's going to ride. Make sure there's no leftover gasket from the initial removal of the last one or dirt. Looks decent. I don't see that to be an issue. If there was anything on there, got in between this and the gasket, you could have a leak. You don't want that. Do the job all over again. Watch my video again. That would work.
I'm going to come back up and I'm going to put this in. We're going to make sure that we line this fork up, put it right inside this slot on the differential tube. Should go in nice and easy. Grab our two bolts that we have in our hand, or if you have all four, that's up to you. Just going to start it in there. Grab another one. You can go up to the top if you want. It's just easier for me to reach from this angle right here. I'm going to start this one in. We're going to do the same for the other two. We'll get these snug down. We'll grab the torque specification and we'll move on to the next step.
Okay, so we're getting close on this one. The way we're going to do this is we're going to start on the top left corner and work our way clockwise going around in a circle. You're not supposed to do a crisscross pattern on this. Once we get this tight, we'll move on and do all the rest of them. We're just going to snug them up. We have a torque specification form. We'll do that in one second. There we go.
We're coming in with our 12 millimeter socket and our torque wrench. We're just going to torque this to 21 foot-pounds which isn't very much. There's one. We're going to go clockwise like I mentioned before, just tighten down all four of these just like this. All right. I'm going to grab this one with a shorter socket real quick. There we go.
Now we'll just wipe it down. We can go ahead and connect this and then we'll recheck to make sure there's no fluid coming out. And then lastly what we'll have to do for this portion of it, it's to top off of the fluid and then get this power steering rack set back up in here. Once we get this all back up together, you're going to want to get it in alignment. We had the rack down. Things could be shifted a little bit. Your alignment could be off. It could cause premature tire wear. So definitely get an alignment after doing this. Here we go.
Okay, so looking inside our wiring harness, look for any funny colors, green, blue, purple, pink, any rainbow-y type colors are no good for this. This looks nice and clean. We'll look in there. Obviously that's clean. We're going to put the lock up because that's where it goes into. Click, push that right in. Make sure it's nice and secure. It's not going anywhere.
We got our two bolts right here. They're both the same exact bolts. So that's nice. We don't have to worry about mixing them up. We're just going to put one through here, one through there. We're going to have to come underneath and we're going to have to see if we can line up the bolt holes with the holes in the rack. Just make a little room a little bit. There's one. Just make sure I get it started so it doesn't fall down, hit me in the head. Do the same thing for the other one. You can start on whichever side you want. If you want to use a little bit of thread locker, that's up to you.
Now I can go ahead and tighten these down. There's a torque specification but first I'm going to get them bottomed out and then we'll go ahead and torque them down. Using our 24 millimeter socket now we can torque them. The torque for this using our 24 millimeter socket is going to be 133 foot-pounds. With our torque wrench we're going to go 133 and then plus 90 degrees. Once we get to the 133, we'll talk about what to do from there.
All right. Now for the next 90, all I'm going to do, I'm going to bring my ratchet up here and I'm going to bring it down as close to straight down as possible because we know if we went from here all the way over to there it'd be 180. If we went from here all the way around, it's 360. I'm just going to get pretty close and then I'm going to try to bring it down as far as I can. It's pretty good. Come over here, do the same thing, 133. All right, there we go. It's probably pretty good, definitely not going to come off. Now we can just top off the fluid and we should be all set to go.
What we want to do now is we want to check our fluid which is this fill plug right here. You don't want to pull this one. This is the drain plug. If you were servicing the differential, what you could do, pull this one first and then pull this one. Let the fluid drain into a bucket, collection bucket of course. Once it's all done, you can just put this back in, fill your fluid here. For the purpose of this video, we're just going to check it.
I'm going to be using my 8 millimeter Allen head and go right into the fill plug hole, free. Fluid may come out of the top here so make sure you're not under it. If you're wearing a glove, you can use your finger. If you can fit it in there. It's a pretty small hole. Or you can use something such as a pick or a toothpick or whatever you got, I don't know. I can't really get my finger in there. But essentially you want to check to see how the level of the fluid is. If you stick your finger in, you can go down a little bit. You want to get a little bit of fluid on the tip of your finger. You don't want it be in right up at the very top. You actually want to be like an eighth of an inch below. Some people even say a quarter of an inch. It's really preference at that point.
You can use a tool, something like this. I fabricated this out of a screwdriver. You don't have to. Like I said, you can use whatever you happen to have. Works best if it has a little bit of a bend though, so you can get in and around the corner down there. Down, pull it back out. I can see fluid on there. We know that it's full, at least it's full enough. You can drive it down the road to the point we can actually get more fluid. This requires 75W-85 differential fluid. So if you were going to add more, that's what you would use. Make sure you go to manufacturer specifications. For the purpose of this video it's good enough.
I'm going to go ahead and get this started back in. We'll tighten it down. Once we get it bottomed out, like that, all we're going to do is just give it a little bit more. That feels good. We don't need to go all the way up here. Bottom it out, just give it a couple more, and that's it.
Now all you want to do is just make sure that what we installed isn't leaking. You'd see gear oil coming down here if it was. Looks good. That means the seal's working. We made a good seal. We don't have fluid running down here, dripping onto the ground, causing contamination issues. Looks pretty good. If there was a mess, you just clean it down. You're all set to go.
Thanks for watching. Visit 1aauto.com for quality auto parts shipped to your door, the place for DIY auto repair. And if you enjoyed this video, please click the Subscribe button.
