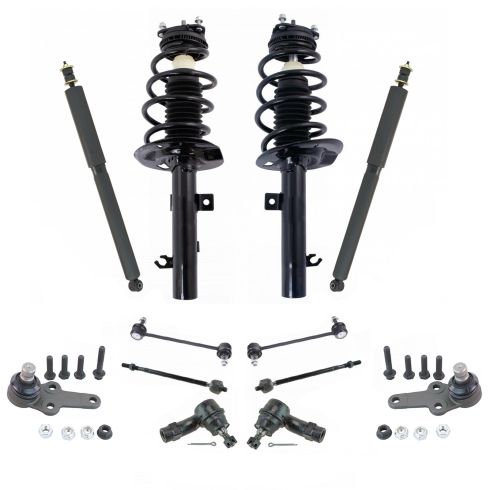
Kit Includes: (2) Front Sway Bar Links (2) Front Strut & Spring Assemblies (2) Front Lower Ball Joints (2) Front Outer Tie Rods (2) Rear Shock Absorbers (2) Front Inner Tie Rods
Quantity: 12 Piece
TRQ suspension kits are manufactured using premium raw materials and coatings for extended service life. Each TRQ suspension component is designed to be a direct, maintenance-free replacement to the stock unit. To extend the life of your steering and suspension components, TRQ recommends replacing components in pairs, sets, or kits. All products are fit and road-tested in our Massachusetts R&D facility to ensure we deliver on our promise of Trusted Reliable Quality.
Product Features
Application Specific Design: No modifications necessary
Anti-Corrosion Coated: Enhanced surface life
Pre-greased: No additional maintenance required
Kitted for Restored Performance: Improved road-feel and handling
Our direct fit gas-charged shock absorbers help restore your vehicle's handling and ride quality to just like new.
Replacing struts used to require specialized tools to compress, remove, and transfer the old spring and mount. Our Pre-assembled, complete strut & spring assemblies come with all new parts and make the job much quicker and easier for the do-it-yourself mechanic.
Strut & spring assembly contains:
Upper Strut Mount
Strut Bearing
Coil Spring
Boot & Bumper Kit
Gas-charged Strut
Install Tip: When replacing steering components, have a professional alignment performed afterwards. This ensures proper tracking and even tire wear.
Our steering and suspension components are pre-greased and sealed for long life and do not require the extra maintenance typically required by greaseable versions.
Item Condition:New
Attention California Customers:
WARNING: This product can expose you to chemicals including Chromium (Hexavalent Compounds), which is known to the State of California to cause cancer, and birth defects or other reproductive harm. For more information, go to www.P65Warnings.ca.gov
Lifetime Warranty
This item is backed by our limited lifetime warranty. In the event that this item should fail due to manufacturing defects during intended use, we will replace the part free of charge. This warranty covers the cost of the part only.
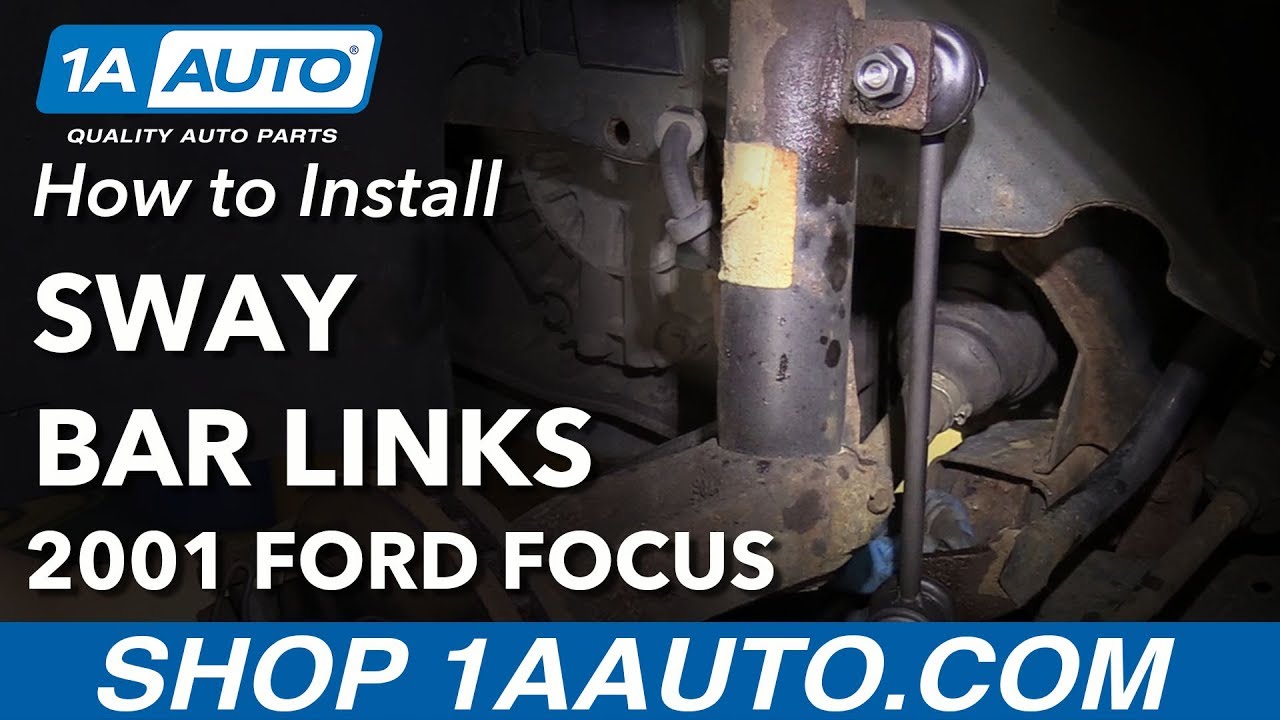
How to Replace Front Sway Bar Links 2000-09 Ford Focus
Created on:
Tools used
Socket Extensions
Torque Wrench
15mm Socket
18mm Wrench
Jack Stands
18mm Socket
19mm Socket
Ratchet
Floor Jack
1/2 Inch Breaker Bar
1. Removing the Wheel
Remove the lug nut covers with a 19mm socket
Loosen the 18mm lug nuts with the vehicle on the ground
Raise the vehicle with a floor jack
Secure the vehicle on jack stands
Remove the 18mm lug nuts
Pull off the wheel
2. Removing the Front Sway Bar Links
Loosen the upper sway bar link bolt with a 15mm socket and ratchet and an 18mm wrench
Remove the upper portion of the sway bar link
Insert the upper portion and gently tighten the nut
Loosen the lower sway bar link bolt with a 15mm socket and ratchet and an 18mm wrench
3. Installing the Front Sway Bar Links
Insert the upper portion of the sway bar link in place
Insert the lower portion of the sway bar link in place
Counter hold the upper portion with an 18mm wrench
Tighten the upper nut with an 15mm socket and ratchet
Repeat for the lower portion
Tighten the top and bottom nuts 37 foot-pounds of torque
4. Reattaching the Wheel
Slide the wheel into place
Start the lug nuts by hand
Tighten the lug nuts preliminarily
Lower the vehicle to the ground
Tighten the lug nuts to 98 foot-pounds in a crossing or star pattern
Tighten the lug nut covers
Hi, I’m Mike from 1A Auto. We’ve been selling auto parts for over 30 years!
We're going to be working on this 2001 Ford Focus. The first thing we're going to do is we're going to take the tire off. One thing to note, this has these little caps that go over the lug nuts. There's two that are missing on this vehicle, regular ones are 19 millimeter, but because the caps are missing, we're going to have to use an 18 millimeter socket to get those off.
So we'll use a 19 millimeter socket and a breaker bar. Just crack these free before we put the vehicle up. Now I'll switch to the 18. These are really tight, normally they shouldn't be this tight. We're using a two post lift to raise and support the vehicle. You can use a jack and jack stands. Now we'll take these lug nuts off, use a little ratchet and an 18 millimeter socket. Take this last lug nut off, take the tire off. Just hit it a couple times.
This one's kind of tight so we're going to hit it off with a hammer. So I put one lug nut on, that's to prevent the wheel from going falling off when I hammer it off with a dead blow. And I'm going to hit right here really hard on the tire and it will pop right off. Now we'll take this lug nut off and pull the wheel off. We're going to remove the sway bar link. These nuts are very rusty so what I'm going to use is some rust penetrant right here. Soak that down and then the one on the inside as well. Do that before we start, that'll help us out. I'm going to use a wrench on the back side of this sway bar link. There's a nut that will keep the stud from spinning so I'll use an 18 millimeter wrench that'll hold that while I take this nut out on the outside.
I'm going to use a 15 millimeter socket and a ratchet. I should be able to take it off by hand, you can pull the stud through like that. Now I'm going to use that 18 millimeter wrench on the back side again, on this bottom one, just like I did on the top and then I'm going to use a 15 millimeter socket and a breaker bar to get this nut off. Just get it loosened first. Once it's broken free I'm going to use my 15 millimeter socket and ratchet. Take this nut off, pull that off, we'll take the wrench off and then pull the link straight out.
Here's our old sway bar link, here's our new sway bar link from 1AAuto.com. Comes with new nuts, comes with the same lock so that you can that you can put a wrench on so that it's easier to install and remove. Get yours at 1AAuto.com and you'll be ready to rock and roll.
All right, so we're going to slide the new link in. We're going to have this bottom stud go towards the center of the car and then this top stud is going to come towards the outside of the car. You can lift up on this sway bar, just get them to both line up. Once they're both lined up we can put the nuts, get those started, get that one started, then we'll get the bottom one started down here.
All right, then we're going to tighten this up with our 15 millimeter socket and a ratchet and make sure you hold the stud with your 18 millimeter wrench. Now we're going to use the 15 millimeter socket on a torque wrench. We're going to tighten this to 37 foot-pounds. We sell these torque wrenches at 1AAuto.com. Tighten the top nut the same as the bottom. Right, that's snug. Now we're going to torque it with the torque wrench to 37 foot-pounds.
Pull our 18 millimeter wrench out. So this wheel and tire when coming off the vehicle actually took a lot of effort to get it off. One of the reasons why is because of the two dissimilar metals corroding. You had the metal from the hub and also the aluminum from the wheel corroding together. So we're going to take a wire brush, just lightly on the wheel go around and clean that up a little bit. You don't want to do too much. You really don't want to sand down the wheel and cause any damage to the wheel but just get a little bit of that off. Just like that and then over on the hub we can go all around the hub, clean all this corrosion off of here, and this will help getting the wheel on and off. One of the things to help prevent this from happening is using a little bit of anti-seize lubricant. I don't like to use a whole lot of this, just a little bit, and only on instances where it's really bad so we'll just put a little bit on there then next time we take the wheel off it will be easier.
Now we're going to throw the wheel up and it went right on. Put our lug nuts on, just tighten these lug nuts. I'm going to torque these lug nuts with a 19 millimeter socket and a torque wrench to 98 foot pounds. We sell these torque wrenches at 1AAuto.com. You're going to do it in a cross pattern so that it tightens the wheel properly. And I'll switch to my 18 millimeter socket for these other lug nuts.
Thanks for watching. Visit us at 1AAuto.com for quality auto parts, fast and free shipping, and the best customer service in the industry.
PSA31178
In Stock
Product Reviews
Loading reviews
There are no reviews for this item.
Customer Q&A
No questions have been asked about this item.
Customer service
877-844-3393
Monday - Friday 8:00am - 9:30pm ET Saturday - Sunday 8:00am - 4:30pm ET
Enter Vehicle Year Make Model
Specify your vehicle's year, make and model to guarantee fit.
Year
Make
Model
Options
Drivetrain
This part doesn’t fit a . Select from parts that fit.