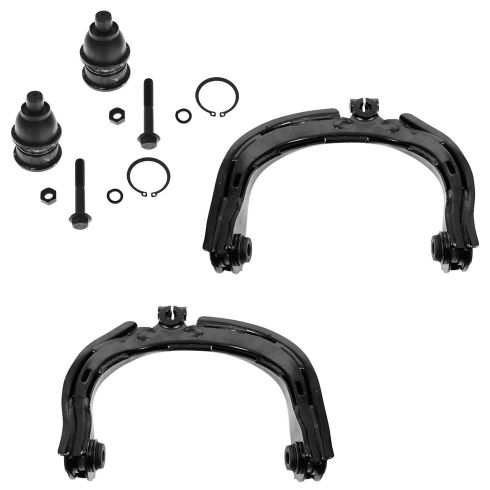
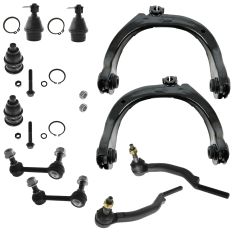
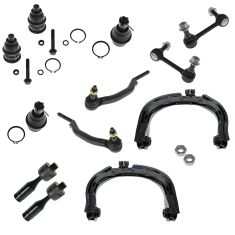
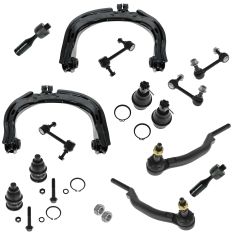
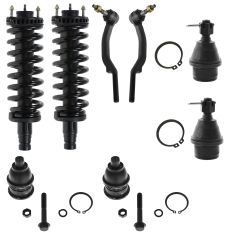
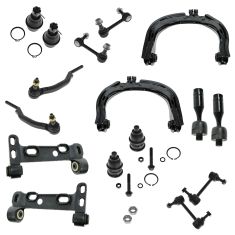
Kit Includes: (2) Front Upper Control Arms (2) Front Upper Ball Joints
Quantity: 4 Piece
Specification
Location
Front
Upper
Our control arms are designed to be direct replacements for the original factory parts. They are 100% brand new and require no modifications for installation. No special tools are required because all of the bushings come pre-installed.
Our steering and suspension components are pre-greased and sealed for long life and do not require the extra maintenance typically required by greaseable versions.
Item Condition:New
Attention California Customers:
WARNING: This product can expose you to chemicals including Chromium (Hexavalent Compounds), which is known to the State of California to cause cancer, and birth defects or other reproductive harm. For more information, go to www.P65Warnings.ca.gov
Lifetime Warranty
This item is backed by our limited lifetime warranty. In the event that this item should fail due to manufacturing defects during intended use, we will replace the part free of charge. This warranty covers the cost of the part only.
FREE Shipping is standard on orders shipped to the lower 48 States (Contiguous United States). Standard shipping charges apply to Hawaii and Alaska.
Shipping is not available to a P.O. Box, APO/FPO/DPO addresses, US Territories, or Canada for this item.
Expedited is available on checkout to the United States, excluding Alaska, Hawaii.
Final shipping costs are available at checkout.
How to Replace Control Arm 2002-09 GMC Envoy XL
How to Replace Ball Joint 2003-06 GMC Envoy XL
Created on:
Tools used
15mm Wrench
Torque Wrench
Hammer
15mm Socket
Rust Penetrant
Jack Stands
19mm Socket
Wire or String
21mm wrench
Flat Blade Screwdriver
Wire Ties
Ratchet
Floor Jack
Needle nose pliers
Wire Cutters
1. Removing the Wheel
Pry off the center cap with a flat blade screwdriver
Loosen the lug nuts with the vehicle on the ground
Raise the vehicle with a floor jack
Secure the vehicle on jack stands
Remove the lug nuts
Pull off the wheel
2. Removing the Control Arm
Apply penetrating oil to the 15mm bolt that holds the control arm to the steering knuckle Remove the 15mm bolt that holds the control arm to the steering knuckle
Pry the brake line from its clips with a flat blade screwdriver
Strike the control arm with a hammer to separate it from the steering knuckle
Secure the knuckle with wire ties, wire, or string
Apply penetrating oil to the two 21mm control arm bolts
Remove one 21mm bolt from the control arm
Loosen the other 21mm bolt
Push out the second 21mm bolt with a hammer and a flat blade screwdriver
Pull off the control arm
Strike the remaining bolt out of the control arm with a hammer
3. Installing the New Control Arm
Pry the brake line clips out of the control arm with a flat blade screwdriver
Push the new control arm into place
Start the two 21mm bolts into the control arm
Tighten the two 21mm bolts preliminarily
Remove whatever is securing the wheel knuckle
Put the control arm onto the wheel knuckle
Tap the control arm onto the wheel knuckle using a hammer
Start the 15mm bolt and nut that hold the control arm to the steering knuckle
Tighten the 15mm bolt to 50 foot-pounds of torque
Push the brake line clips onto the new control arm
Clip the brake line into the clips
4. Reattaching the Wheel
Slide the wheel into place
Start the lug nuts by hand
Tighten the lug nuts preliminarily
Lower the vehicle to the ground
Tighten the lug nuts to 100 foot-pounds in a crossing or star pattern
Reattach the center cap
Brought to you by 1AAuto.com, your source for quality replacement parts and the best service on the Internet.
Hi, I'm Don from 1A Auto. I hope this how-to video helps you out, and next time you need parts for your vehicle, think of 1AAuto.com. Thanks.
In this video, we're going to show you how to replace an upper control arm on this 2003 GMC Envoy XL. We show you on the passenger side, but the driver's side is the same procedure. The items you'll need for this are a new upper control arm from 1AAuto.com, flat blade screwdriver, 15mm and 19mm socket and ratchet, 15mm and 21mm wrenches, a hammer, torque wrench, pliers, and jack and jack stands.
Start out by removing your wheel and tire. Pry off the cap first. If you don't have the benefit of air tools, you'll want to loosen the lug nuts then raise and secure the vehicle on jack stands and remove the lug nuts the rest of the way. We have air tools, so we put the vehicle up on jack and jack stands, removed the lug nuts, and removed the wheel and tire.
Next, spray some penetrating oil on this 15mm bolt and then remove it using a 15mm socket and ratchet and a 15mm wrench. Now, remove this clip here. Ours is broken, so we're just going to use some wire cutters to remove the wire tie, but normally you would just pry the clip open with a flat blade screwdriver. Then, just pry this clip open and pull the harness free. You just use a flat blade screwdriver. Push in on the tab and it'll open up. Hit the upper control arm with a hammer to break it free. Hit it up and off the ball joint. Now, you want to secure your wheel knuckle. We're just going to use some wire ties to secure it. You could also use string or wire. You just want to make sure it's not going to move around too much.
Next, you want to remove these two 21mm bolts at the top of the control arm. Start off using a 21mm wrench and another wrench for some extra leverage. Just break both bolts free. Now we'll fast forward as Mike removes those bolts.You won't be able to remove them entirely, but you only need to remove them so that the bolt is not sticking out past the bushing. Sometimes, the bolts may get jammed and not move as far as you need them to. Just use a flat blade screwdriver and a hammer. You want to hit just underneath the upper control arm. The,n you can slide down the front and then remove that bolt the rest of the way by hand. Then angle it and remove the other bolt by hand. If it's jammed in there, you only really need one out. You can angle it and pull it out. Then just use a hammer to remove that other bolt.
As you can see, this upper control arm is in bad shape. You shouldn't have that much play. Now, just pry this clip out using a small flat blade screwdriver. On the right is the old upper control arm.
On the left is the new one from 1AAuto. You can see they are identical and they'll fit exactly the same. Push the back bolt in first and angle it into place. Tip the front of the upper control arm down and put the other bolt in. Then, angle it up into place. Then, just start both of those bolts in by hand until it secures the upper control arm into place. To start off, this bolt at the front, you won't be able to actually get the wrench onto it so just use a pair of pliers to tighten it in a little bit until you can get the wrench on it. We'll just fast forward as Mike tightens both of those 21mm bolts up. You're only really tightening these preliminarily.
Remove whatever you used to secure your wheel knuckle. Using a hammer, knock the upper control arm back down onto the ball joint and replace that 15mm bolt and the nut. Then just tighten it up and torque it to 15 foot-pounds. Push your clip into your new upper control arm. Re-clip the harness into it. Re-clip the harness into the clip on the wheel knuckle. Again, since ours is broken, we're just going to use a wire tie.
Replace your wheel. Replace the lug nuts and tighten them up preliminarily. Lower the vehicle. Tighten them the rest of the way and torque each of them to a hundred foot pounds in a crossing pattern. Have your vehicle back down on the ground with all the weight back on the suspension. Now you tighten up the two bolts that hold the control arm in and you want to tighten them to about roughly a hundred foot- pounds. I'm pulling them as tight as I can with that wrench. Then, the last thing you want to do is you do want to have your alignment checked and fixed after you perform this repair.
We hope this video helps you out. Brought to you by www.1AAuto.com, your source for quality replacement parts and the best service on the Internet. Please feel free to call us toll-free, 888-844-3393. We're the company that's here for you on the Internet and in person.
Tools used
Razor Blade / Gasket Scraper
15mm Wrench
Torque Wrench
Hammer
15mm Socket
Ball Joint Press
Rust Penetrant
Pry Bar
Jack Stands
19mm Socket
10mm Wrench
Grease Gun
Bearing Grease
Flat Blade Screwdriver
Wire Ties
10mm Socket
Ratchet
Floor Jack
Wire Cutters
1. Removing the Wheel
Pry off the center cap with a flat blade screwdriver
Loosen the lug nuts with the vehicle on the ground
Raise the vehicle with a floor jack
Secure the vehicle on jack stands
Remove the lug nuts
Pull off the wheel
2. Removing the Ball Joint
Separate the axle from its housing with a pry bar and a hammer
Unclip the brake line from its clips
Remove the ball joint retaining ring with a hammer and punch
Remove two 10mm bolts from the steering knuckle bracket
Apply penetrating oil to the control arm nut and bolt
Remove the 15mm nut and bolt from the control arm
Strike the control arm with a hammer to loosen it
Pull the steering knuckle forward
Support the wheel knuckle with wire ties
Cut off the ball joint boot with a razor
Fit a ball joint press to the ball joint
Tighten the press to press out the ball joint
Remove the ball joint press
Tap out the ball joint with a hammer
3. Installing the New Ball Joint
Push the new ball joint into place
Fit the ball joint press onto the ball joint
Tighten the ball joint press to press in the ball joint
Tap the ball joint in with a hammer
Tap the snap ring into place with a hammer and punch
If you are replacing the snap ring, put the new ring on with snap ring pliers
Push the steering knuckle into place
Push the control arm onto the ball joint
Tap the control arm onto the ball joint with a hammer
Start the 15mm nut and bolt into the control arm
Remove the wire ties from the steering knuckle
Push the axle into its housing
Tighten the 15mm nut to 50 foot-pounds of torque
Fasten the grease fitting onto the ball joint with a 10mm wrench
Add grease to the ball joint with a grease gun
Insert the two 10mm bolts into the steering knuckle bracket
Clip the brake line into place
4. Reattaching the Wheel
Slide the wheel into place
Start the lug nuts by hand
Tighten the lug nuts preliminarily
Lower the vehicle to the ground
Tighten the lug nuts to 100 foot-pounds in a crossing or star pattern
Reattach the center cap
Brought to you by 1AAuto.com, your source for quality replacement parts and the best service on the Internet.
Hi, I'm Mike from 1A Auto. I hope this how-to video helps you out, and next time you need parts for your vehicle, think of 1AAuto.com. Thanks.
In this video, we're going to show you how to replace an upper ball joint on this 2003 GMC Envoy XL and we show you on the passenger's side but the driver's side is the same procedure. The items you'll need for this are a new upper ball joint from 1AAuto.com; flat blade screwdriver; 10, 15, and 19 millimeter socket and ratchet; 15 millimeter wrench; hammer; punch; snap ring pliers, depending on the condition of your old ring around your ball joint; razor; ball joint press; jack and jack stands; and a torque wrench.
Start off by removing your wheel and tire. Pry off the cap first. If you don't have the benefit of air tools, you want to loosen the lug nuts then raise and secure the vehicle on jack stands and remove the lug nuts that way. We have air tools so we put the vehicle up on jack and jack stands to remove the lug nuts and remove the wheel and tire.
Using a pry bar or a large flat blade screwdriver, just insert it in between the axle and the axle housing and just hammer it to separate the axle. Now, remove this clip here, and ours is broken so we're just going to use some wire cutters to remove the wire tie, but normally you just pry the clip open with the flat blade screwdriver. There's a rotating ring that holds the ball joint in. You want to use a punch and a hammer and you can see we do it before we release the upper control arm. You want to get that retaining ring out. Next, remove these two 10 millimeter bolts. We'll fast forward as Mike does that. Just pull the wheel knuckle forward and just make sure your axle pulls free and then support your wheel knuckle with wire ties or string just so that it's not being supported by those harnesses. We're just going to cut off this boot around the ball joint.
With this little tool, we'll be able to press on the hard part of the ball joint and we actually have the augment ours with another little attachment. Then this cup goes around the outside of the ball joint there. Put the press on here. Now, the press will be pushing around the edge of the ball joint and down into the cup and the cup is holding. It's not hitting the ball joint. It's holding around the steering knuckle. It's very important that you line everything up straight. Go nice and slow. You can see the ball joint has been pushed down and out.
Take your new ball joint and push it up into place. Push that up in. You need a sleeve to go up on top and this can just contact right against the bottom of your ball joint. We use the press to push the ball joint up and in and sometimes it helps to just use a hammer. You put a lot of pressure on with the press then use the hammer to get the ball joint, and seed it all the way in. If your old ring is still in good condition, just hit it back into place. Otherwise, use snap ring pliers and put the new snap ring into place.
Push the wheel knuckle back and then just push your upper control arm down on to the ball joint and hammer it down the rest of the way and just slide that bolt through. Replace the nut and make sure you remove your wire ties or string. Push the axle back into place. We'll fast forward as Mike tightens this up. Torque this to 50 foot-pounds. Twist the grease fitting into place and tighten it up with a 10 millimeter wrench. If you have a grease gun, just top it off. Then, just put the bolts back into place and re-clip your harness. Our clip is broken so we're just going to use a wire tie and then just tighten up those two 10 millimeter bolts.
Replace your wheel and replace the lug nuts and tighten them up preliminarily. Lower the vehicle, tighten the rest of the way and torque each of them to a hundred foot-pounds in a crossing pattern. Once you have them torqued, replace you cap then you should be all set.
We hope this video helps you out. Brought to you by www.1AAuto.com, your source for quality replacement parts and the best service on the Internet. Please feel free to call us toll-free, 888-844-3393. We're the company that's here for you on the Internet and in person.
PSA62482
In Stock
Product Reviews
Loading reviews
4.82/ 5.057
57 reviews
5 Stars
4 Stars
3 Stars
2 Stars
1 Star
49
6
2
0
0
Control Arms for GMC Envoy
Paul
September 5, 2017
I installed the control arms on my 2004 GMC Envoy last weekend. I found that the 1A Auto video was very helpful for the passenger side. However, the video did not mention that the truck's body poses a significant challenge for removing the left bolt on the driver's side control arm. I read online that other driveway mechanics had been faced with the same problem. I don't intend to report how I addressed the problem, since I don't want to encourage others to use my very imperfect solution. It would help if 1A Auto updated its video to address this problem.
Heath
September 12, 2017
I like this product. Great fit and great price, more importantly, it fixed the problem.
UPPER CONTROL ARMS
BRIAN
November 20, 2017
Fit perfectly on 06 trailblazer looked identical to factory ones removed
Good product
R
December 30, 2017
Good quality part and a great price. Went on the Envoy with no issues and had the vehicle running smooth.
Upper control arm and ball joints for a 2002 GMC Envoy
Mark
February 1, 2018
The video was excellent doing the work was easy saved another 7 $150 in parts and labor by buying the parts through 1A Auto and watching their video
Parts
G
July 6, 2018
The parts were as described. Great fit easy installation. And good how to videos
D
September 14, 2018
The upper control arms worked perfect easy to install and came out good. The ball joint also works good and works properly. Just one comet when taking out and putting it back in take pictures of the correct pieces of the ball kit took .so you don't scrounge figure out how you did it to save time.
Upper control arms
Jared
October 2, 2018
Great product for a great price. I got bot upper control arms and ball joints for half of the price for one from advanced auto which came with no ball joints.??
Great product
J
October 2, 2018
Very good product would recommend to all my friends and family. Will be doing more shopping here
Control Arm
Steve
October 11, 2018
Excellent fit and fast shipping. Will continue to order from 1AAuto. Very good experience.
2008 Chevy trailblazer
R
October 14, 2018
Fast service and a quality product. Fit perfectly and vehicle rides and handles smoothly.
BEST PARTS AMERICA
Ashley
October 25, 2018
LIKE SHIPING AND ALWAYS I GET I ORDER BEST SHIPING
Excellent Product!
alexander
November 23, 2018
Great control arm! Truck rides smooth again, the ball joint are much better quality then the once I replaced a while back that I odder from eBay!
worth your money
fast shipper great parts
T
January 4, 2019
Could not believe the fit some others i ordered elsewhere did not fit and cost more than these. Fast shipper were here in days perfect fit. Will update later after use.
Great parts and delivery!
S
February 26, 2019
I received exactly what I ordered and got them quickly! I will definitely be ordering from 1aauto again!
Upper control arms. Chevy Trailblazer
J
March 1, 2019
Parts fit right into the proper places, was not that difficult to install using regular pump jacks and BJ Press.
Will probably buy more parts.
Quality parts
Dustin
March 12, 2019
Quality parts at a great price
As needed and expected
P
March 13, 2019
Direct fit, no modifications or adjustments needed. Remove/Replace advertised. Thanks for supplying the parts needed to complete the job.
very good price for the product
Pamela
April 13, 2019
items came fast and Price was great
To good to be true
MAHONGY
May 13, 2019
I tried it again and it can through 100% I love this website
Good place
Alicia
June 19, 2019
You can't go wrong with A1auto .
front upper control arm with ball joints
P
June 20, 2019
works great went on ease would by more parts from you all
Best price, great quality
Jamie
June 30, 2019
I cant complain at all about the price or quality of this set. Shipping was fast and my mechanic liked that everything was there, including the ball joint. I will definitely buy more here in the future
Upper control arms and ball joints
RaeDee
July 8, 2019
Install wasn't too bad. All parts fit as they should. Would have liked to see grease zerks on the ball joints though.
Tightened up the steering
Daniel
August 27, 2019
Replacement control arms was easier than pressing bushings. It tightened the front end up great. We will see how the longevity thing works out.!
great fit
Tom
September 5, 2019
In and Out easy . everything worked great and lined up correctly the first time. Excellent price and quality as good or better than originals
A1Auto delivers!
Melanie
September 28, 2019
part was East to find East to order was was perfect fit for my vehicle. Reasonably priced with fast delivery. Extremely happy with purchase and will definitely use A1Auto in the future. Thank you
Amazing quality perfect fit
Orlando-erroll
October 18, 2019
I've recommended 1aauto to everyone I know best company out there
Sturdy product
Eric
November 26, 2019
Direct fit and sturdy materials
Decent kit
P
December 19, 2019
Not a bad kit for the price. Control arms were able to be installed easily. The ball joints dont come already greesed & one of the bolts that hold ball joint in control arm had a crack on it. They do give you bolts with control arm for ball joints also but diameter was to small for hole. Had to reuse old bolt.
Joe
January 1, 2020
I have had great results with 1aauto for my control arms and many more part at a fraction of the price of auto part stores
First Purchase
J
April 29, 2020
My first experience with customer service was great! Very knowledgeable, very respectful. Quick, easy and accurate part ordering at a great price! I will definitely be a repeat customer.
You guys are awesome .i only had one delay from you guys but you're still awesome thank you very
H
June 19, 2020
Great job guys
Humberto
September 18, 2020
I do like the whole process since my purchase until the delivery and quality parts thank you.
Perfecto
W
September 18, 2020
Got them on time and with all parts included that were necessary!
Good Isuzu Ascender/Chevy Trailblazer control arms and ball joints.
Troy
February 23, 2021
These are made in China parts but are thick and heavy. I banged on them with a bih heacy hammer quite hard and they appear to be good tempered steel. No parts bent or chipped.They are a very good deal. I can do both sides of my wifes Ascender with these parts cheaper $ than I could do one side from local auto parts places. The Ascender rides so much smoother and no more clunking. Im 100 % happy with the parts and the YouTube videos made it a much easier job than it would have been without it. I saved several hundreds of dollars doing it myself.
Control arm and ball joint
Shaune
March 25, 2021
Very good product at a very good price. Ive never received a bad product from 1a auto.
lower control arm mounting brackets
William
April 20, 2021
I buy, they ship, I install them. What else is there?
Perfect!
Benjamin
May 10, 2021
Every part Ive ordered from here has been great. The prices are better than most part stores and shipping is quick.
Only part company Ill use!! 1A auto!!
Dan
July 26, 2021
What a great company! Easy to navigate on their website fast delivery right to my door all-around awesome company! If you need parts 1a auto is the only place to go!!!
I Wont hesitate to order from 1A Auto when I need parts again
John
August 28, 2021
Prompt delivery. Parts looked like OEM right down to the welds. I will not hesitate to order from 1A Auto in the future.
04 trailblazer
Richard
September 8, 2021
Good quality all parts fit, no problem
Simon
September 12, 2021
I love it thank you for asking. Another thing is that I love the time you send the parts it didnt take that long. Thinks a lot.
Plug and play, easy install, then front end alignment.
George
January 5, 2022
Arrived on time and they are installed and operating very well.
Great product
George
April 13, 2022
Everything matched up great! Perfect fit!
Steven
June 20, 2023
Rides like a charm
Upper Ball Joint
Michael
July 17, 2023
Good value, installed without issue, but unfortunately I didn't realize that the ball joints did not have grease fittings / greaseless. I chose not to use the both ball joints installed one and replaced the other with another Moog that was under warranty. Time will tell how the greaseless joint will hold up?
Great value
Terry
August 5, 2023
It is outlasting the OEM part.
Alfred
October 24, 2023
Control arms work great and very durable
Perfect fit.
Robert
February 14, 2024
Exact replacement for factory control arms and ball joints. Could not ask for more.
Good
Christopher
September 4, 2024
Good set as described and everything fit
2002 Chevy Trailblazer LTZ
Craig
November 2, 2024
The shipping was fast and the parts were a perfect fit. The videos are super helpful. The only slight knock I will give the ball joints is i prefer them to be able to be greased but time will tell.
Frank
December 30, 2024
Fit right in
Customer Q&A
Are the control arm bushings press on?October 12, 2017
Matthew P
10
I believe so, had a mechanic install them so I'm not 100%. I can tell you that had to replace both after just over a year.
October 12, 2017
Robert H
10
Yes they are.
October 12, 2017
Lawrence T
10
Yes, they are pressed on from our vendors.
October 12, 2017
Alex P
10
Yes they are, just make sure you remove the rubber housing before you insert them into press
October 13, 2017
Juaq G
10
Yes. To remove lower strut mount, loosen nut holding strut to control arm until threads are even with outer edge of nut. Use prybar on lower strut mount to pry off strut while hitting the nut with a hammer. I found this technique on YouTube.
October 13, 2017
Terry K
10
Yes..
October 17, 2017
Leon D
Did you have to do any modifications to the upper ball joints concerning the thickness or did it go right is without any modifications?November 25, 2018
G B
10
No I did not have to do any modifications
November 26, 2018
Johnny H
10
It go right on without any modifications
November 26, 2018
Alfredo N
10
Didnt need any modifications
November 26, 2018
Jonathan G
10
Shouldnt have to do any modifications. My mechanic never mentioned any modifications needed during the install.
2002 Trailblazer LS
November 26, 2018
Steven M
10
With my truck, it went rite in as a bolt on install, i did have it aligned when i was done, other than that, parts fit good
November 26, 2018
Anthony G
10
No modifications, but I had a custom made cup to push out the ball joint , nothing you can rent is the right size
November 26, 2018
TERRY N
Do the ball joints come with it ?March 24, 2019
E H
10
The ball joints are included in this kit.
March 24, 2019
Emma F
10
Yes
March 24, 2019
S P
Do the ball joints come with a zerk fitting?May 5, 2019
Sterling F
10
This will come presealed.
May 5, 2019
Emma F
Does it come with the ball joints as well??February 4, 2020
Jay S
10
This kit contains 2 front upper control arms and 2 ball joints.
February 4, 2020
Christa R
10
Yes and the parts installed smoothly
February 4, 2020
D S
In the instruction video it doesnt mention installation of the ball joints. Are they already attached?April 8, 2020
Walter L
10
Thanks for your inquiry. Written and video installation instructions are found on the product page under the "How-To & Tools" tab. These ball joints will not already come as attached to the control arms and will come separate as pictured.
We're constantly adding new installation video instructions. If we do not have one for your vehicle on the product listing page, please check again at a later time or check our Video Library to see similar repairs here: https://www.1aauto.com/videos
April 8, 2020
Emma F
Customer service
877-844-3393
Monday - Friday 8:00am - 9:30pm ET Saturday - Sunday 8:00am - 4:30pm ET
GMC is a registered trademark of General Motors Company. 1A Auto is not affiliated with or sponsored by GMC or General Motors Company.See all trademarks.
Enter Vehicle Year Make Model
Specify your vehicle's year, make and model to guarantee fit.
Year
Make
Model
Options
Drivetrain
This part doesn’t fit a . Select from parts that fit.