How To Fix Rust Holes In Your Car The Right Way
Created on: 2019-04-26
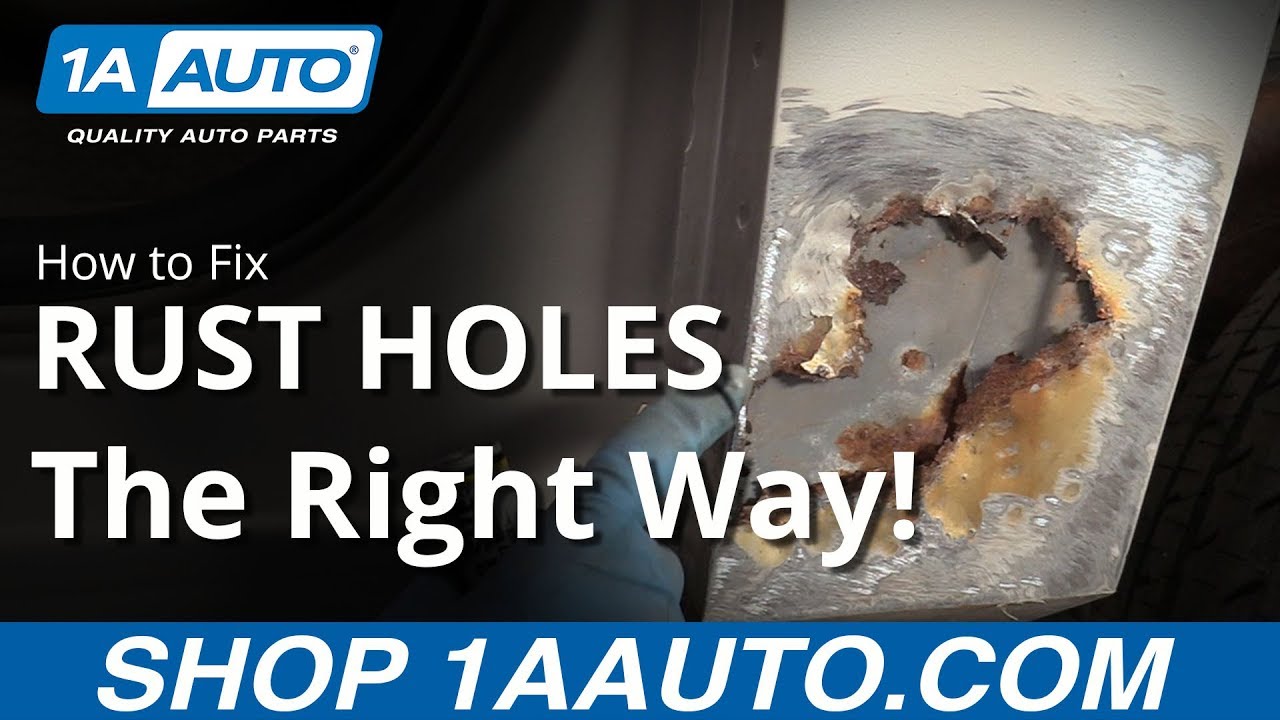
A rust hole in your vehicle's body could fail safety inspections! Learn how to patch that hole and make it look good as new with tips from 1A Auto experts!
-
step 1 :Removing and Patching The Rust Hole
- Always wear safety glasses
- Grind the paint off the area surrounding the rust hole
- Cut away the rusted section of body panel in an even regular shape
- Draw an outline on the replacement sheet metal using the cut away piece as a template
- Cut out the metal patch using the metal cutters
- Test fit the patch panel, trim to fit as necessary. Be careful of sharp edges
- Hold the patch panel in place with the welding magnet
- Tack weld the corners of the patch piece. Use protective gear, and keep a bucket of water or extinguisher nearby in case of fire.
- Finish weld the entire seam of the body and patch panel
- Grind the entire patch area to smooth out welds and prepare for filling
-
step 2 :Filling the Patched Area
- Clean the patch area thoroughly with acetone or other alcohol based cleaner
- Mix fiberglass body filler using the manufacturer's directions
- Spread fiberglass filler smoothly over entire patched area
- After allowing to dry, sand the body filler
- Apply a second coat of fiberglass body filler as necessary
- Mix finish body filler using the manufacturer's directions
- Apply a smooth coat of the finish body filler to the entire patched area
- After drying, sand the entire patched area
- Apply a second coat of finish body filler and sand as needed
- Sand the entire area smooth using fine grit sand paper
-
step 3 :Painting the Patched Area
- Mask off or cover with plastic sheeting the surrounding area to prevent overspray, leaving some room to blend the paint with surrounding bodywork
- Apply primer to entire patch area
- Lightly scuff sand the transition between the primed and surrounding area of the body
- Wet sand the patched area and transition to surrounding body
- Apply matched color paint over primed area, and blending it into the existing paint
- Apply the paint in several thin coats
- Wet sand, buff or clear coat the patched area as necessary to match the condition of the surrounding body
Tools needed
-
Hammer
Dust Mask
Safety Glasses
Plastic Sheet
Welder
Sanding Block
Spray Primer
Grinder
Bucket
Cutoff Wheel
Sandpaper
Gloves
Vacuum
Metal Cutters
Flat Blade Screwdriver
Spray Paint
Welding Helmet
Paper Towels
Welding Magnet
Acetone
Body Filler
Cardboard
Painter's Tape
Marker / Writing Utensil
What's up guys? I'm Andy from 1A Auto. In this video we're going to be doing something a little different. We're going to do some body repair. Now, this isn't going to be like restoring a 1964 Pontiac GTO, this is more like, we have a 10 year old vehicle that needs a state inspection sticker, and it won't pass with a hole in it, although the basics will be the same. And remember, if you need parts for your vehicle click the link in the description and head over to 1aauto.com.
Alright. I'm going to show you what's going on here. Basically this vehicle is about 10 years old and what happened here was, there was a little bit of rust in this area, and it just spread.
A lot of times when you get a little bit of rust, if you don't take care of it, it's going to get worse. So, what we're going to do is, we're going to cut out as much of the rust as possible and weld in a little piece of metal, and then fill it and paint it.
So, this panel is a little bit tricky, where you can see there's actually a corner edge. What you're going to want to do is peel away anything that's rubbery, or plastic, we're going to take this cover off here so that nothing melts or anything.
So, pull that away. And it's a good idea to disconnect the battery, so we'll disconnect the battery before we even get started. So, there's rust here, some more rust here. So, like, this would be a good time to take care of some of this rust. Grind it down, get as much of the rust away as possible before it ends up with a big hole in it.
Here's another area of rust. If you can catch it before it gets to the point where there's a hole in it, you can sand this down and just spray it. The rust will probably bleed through again eventually, but it's easier to just keep spraying it every once and a while, than to have to completely cut the panel and put a new patch in.
So, I disconnected the battery and I removed all the fasteners for this inner fender well. I'm going to pull this out of my way, so that I don't damage it. Then I don't have to tape it up either when spray painting it.
So, with that out of my way, now I can open the door. I just want to take this weather strip, get this out of the way, and just tuck it out of the way for now. So, that's good like that.
Alright, what I want to do next, before I cut any of the old metal out, I'm actually going to grind it down, because if I cut the metal out and then try to grind the area that I'm cutting, probably going to chew up my grinder. So, I'll keep the grinder away from any of the metal right there.
One thing you're going to want to do, is either get an air grinder, or an electric grinder. You can try to do this by hand, but it's going to take forever. So, I recommend, strongly recommend an air grinder. Now, take a screwdriver and just bang the metal. You want to get as much of the rust off as possible. So, don't be scared to take even a hammer, and find the bad metal.
See. This metal is really thin, so when we hit it with a hammer, it dings very easily. So, we know a lot of this area is bad. So, what I'll do is, I'll take the die grinder and start grinding away. Be sure you wear safety glasses when you're doing this.
So, I grinded this area all around here. Staying away from the rusty areas so I don't ruin my grinder, and actually, grinding right here, there's actually a pretty good amount of metal right there, which actually helps out a lot. It's kind of, hard to make a panel and make a corner, so I can actually just weld the new piece in right up to there.
I'll just trim this a little bit, and that'll make it easier. Just take a marker, just for my own reference, and I'm just going to cut along this line here. Actually, I got to grind that down a little bit more and I'll just cut here. Next I'm going to take this cutoff wheel and just trim around that spot that I want to replace.
You want to keep in mind when you're using the cutoff wheel, wherever your sparks are going, make sure it's not hitting anything flammable like the carpet, or any oily rags or anything.
Got this mostly off. Yep. And there's a lot more rust down there on the bottom. Peel it back. Be careful, the edges of this are going to be extremely sharp. So, I'm actually going to vacuum that out a little bit.
Just take a screwdriver and try to get some of that sand out of there. Now, if we're doing more of a restoration project where it's a car that we're going to care about, you'd want to get even more rust out. So, the way this panel is, there's a still a little bit of rust here and a little bit of rust on the bottom, so we'd want to go deeper to get rid of as much as rust as possible, but whereas this, we're just trying to get by, trying to make a quick patch repair for state inspection.
There's still good metal here. If we replace this panel it should last five to 10 years. Should be good with just that. Alright. So, now that we have this piece cut out we're actually going to use this to trace onto a piece of metal so that we are going to cut this metal out, and use this as our patch. Just take a marker and get this close on here.
So, I'll use these metal cutters and just cut this out. And that's the patch that we're going to use. Alright. So, now I'm test fitting the panel. Just going to see how it looks, and it looks pretty good right there. Looks like it goes over the edge a little bit on this side. Be careful, this'll be sharp as well.
So, I'm actually just going to trim it down a little bit, and there's a little bit of a curve right there so I'll just trim that a little bit. Just trim some of this off. See how that looks. Remember, it's better to just trim a little bit at a time, rather than taking a big chunk off.
It's looking pretty good. I want it as close to the edge as possible without being too small. So, my next step is, I'm going to just take this panel and take a die grinder, and just go around it and make the surface rough, so that the weld is going to stick to it a lot better.
And that looks pretty good. Alright, we have our panel, we have it grinded down. What I'm going to use is this magnet, and this is going to help me install this panel a little better. One thing to keep in mind, this rust underneath here, that's just surface rust and it's on the inner body, so it's not something of concern to me right now.
So, like I said, if we were restoring this we'd want to cut all of that rust out completely. I'm going to take this panel, and we'll just use this welding magnet. Just going to get this lined up there. And if I had multiples of these it would be ideal, then I could stick one up top, and stick one down below here, but I think what I'm going to do is, I'm just going to move it around where I need it. Right there, that looks perfect.
Alright, now I'm getting ready to weld this. You want to double check to make sure that you have the battery disconnected, when you're welding anything on the body you don't want to cause any of the modules to spike voltage or anything.
Make sure you wear the proper welding protective clothing. I have, you know, the welding gloves and a welding helmet. I'm going to take the welding ground and I'm just going to ground it over here. Make sure it's out of my way, where I'm grounding it.
Alright, this is a fairly inexpensive flex core welder, it's not the best. Other welders would work better than this, but this'll get us by. And here we go. I'm going to start with welding the corners.
I'll put a nice little bead right there like that, but you want to keep in mind, whenever you're welding you want to make sure you know where the fire extinguishers are, and it's always a good idea to have a bucket of water or a bottle of water so that If you do have a fire, then you can put it out quickly. I'm going to weld up the other corner right here.
I'm just moving my magnet so that I can get these corners lined up. Alright, what I want to do is, next is, just go around about every inch to two inches and just do a little tack weld, and what that's going to do is prevent the metal from warping. If I did a continuous bead then the metal is going to contract and warp, and then it's not going to be good. It's going to be harder to do more work on it, so if you go every two inches and then go back and go closer, it'll keep the metal cool and then won't warp on you.
I welded this up, as guys can see I'm not a professional welder. I can weld, just don't do it professionally. What you need to do, Is just go along and just, every couple inches go back and tack it, and I just kept going around, and around, and around, and around, and eventually I ended up with this mess, which it looks horrible now, but I'm going to take the grinder, grind it all down, make it look good, and then we'll skim coat it with some body filler and go from there.
After grinding it down it actually doesn't look too bad. There is a couple of little holes that I could go back and weld, and just touch up a little bit, but overall, it really doesn't look that bad. Our panel is welded in, it's actually looking pretty good right now.
Remember, this is where we started and this is where we're at, so it's nice and solid right now. What I want to do is, make sure there isn't any high spots. So, what I can do is, I can take one of these hammers, these are body hammers. We actually sell these at 1A Auto, and if there's any high spots I can actually tap them down, because afterwards when I go to put a little bit of body filler in here, if there's any high spots when I go to sand it down, we're not going to be able to sand down those high spots.
So, you want to make sure that those are lower on the panel. I am going to take my grinder, and before we do the body filler I want to grind up a little bit more, because I want to add the body filler to about an inch above where we welded in the panel. So, I'm going to go a little bit higher. Don't be scared to go even higher than you would have thought.
Before we put some body filler on this panel I am going to take some acetone and a rag, and I'm going to clean it, or some kind of alcohol type cleaner. Get all the grease off, or anything that's on there. That should be good. You're going to want to make sure before even doing this, that the whole panel's all scuffed up so that the filler will actually stick to it good.
Next I'm going to take some of this body filler, this is a fiberglass based body filler. This is going to give us strength and it's going to fill in any of the little imperfections that are there, and it's strong so it's going to be good if something hits it, or something it's not going to crack right away. It's not like a regular body filler.
So, we'll use the regular body filler as a skim coat for the end just to make it look better. So, you're going to want to follow the directions on the actual body filler on how to mix it. They say to use a piece of cardboard, but put some type of plastic over it. I personally just use a piece of cardboard, but for the video I'll use a piece of plastic.
But anyway. So, I take about a three inch round circle and then spread the hardener down the center of it. Now, you don't want to mix it in a circle like a cake or anything, because otherwise you're going to get air bubbles. So, you just want to fold it over and it's going to change color, and it's green right now, but when it mixes with the red it should get more of a brown color once it's fully mixed.
Alright, that looks pretty good. Now I'm going to start applying. Try to press it in real hard, get any air bubbles in. Any air bubbles out of the filler. And like I said before, this is for strength. It doesn't really have to look too pretty, although the smoother you get it, the less sanding you're going to have to do.
Alright, so, if I look at this pretty close it doesn't look great, but like I said, I'm not that concerned. I am going to sand this a little bit, and then we're going to put a finish coat of body filler on it. It's still pretty tacky. It normally takes about 10 minutes before you can sand it and stuff. But it looks like I did a pretty good job. It looks pretty flat. It doesn't look like there's any high spots. As far as my metal work goes, I think I did okay.
Okay, it's been about 10 minutes now so what I'm going to do is, take a sanding block with some coarse sandpaper, I'm actually going to sand it down a little bit. Now, I don't have to go crazy with this, because I am going to skim coat it with a nice coat of body filler after, just so it looks good. I'm going to wear a dust mask.
Another tip, if you were working outside you could actually have a fan behind you blowing the dust away. I'm inside so I'm going to have to clean this up after. So, I can't have a fan here, but if you were outside that's a good tip. Put a dusk mask on. Alright.
And it's a good idea when you're sanding, to sand on angles. You can go back and forth a little bit, but for the most part just sand angles and that'll be good. So, the reason why you're going to sand cross like that, is because you don't want to have any waves in this, because if we just sanded like this forever and then down here last, and then this, then it's going to be very wavy. So, if you do it in crosses it won't be wavy.
So, looking at this up close, so, this section got nice and smooth and it's a little more bumpy right here. I have some low spots here, so I'm actually going to give it one more coat of the fiberglass filler right there so it fills in some of that little gaps and stuff, and then we'll do a final coat of the final body filler.
Alright, so I'll take my sanding block again and of course, sandpaper, the sandpaper I'm using is 80 grit. You could probably use 36 grit or even a lower grit, but the coarser you use, probably the better, the more it's going to cut into it. Alright, so after sanding that down with some 24 grit or 36 grit sandpaper, we did some cross sections. There is a couple of low spots, which is okay. I'm just going to use the finish body filler for that, to fill those in, but it came out pretty good.
So, at this point it's looking pretty good. There's a little bit of metal right there, which that'd be good to have a little bit of the fiber glass filler over it, but it'll be okay for now. Okay, so, once your filler has dried and your scraper is stuck on the cardboard, you can just grab the scraper, peel it off. As you can see, the dried body filler comes right off. You can just peel it right off, which that makes it a lot easier than wiping it off.
I mean, you can wipe it off with some alcohol or some acetone, but this is a lot easier to scrape off. Just like that. Scrape all this stuff off, and then I can reuse this scraper for the other side. Now I'm going to go over mixing the body filler. Now, this is going to be the exact same procedure as the body filler with the fiber glass in it. This just happens to be a final coat body filler.
I'm just going to take a screwdriver, open up the can. Now the cans are going to be similar. You are going to want to follow the directions on the filler that you have, but for the most part they're the same. Take a paint stirrer, I'm just going to stir it up. Make sure you get it nice and stirred up good.
Alright, now this can's not too old, so it's not too bad. If you have a can sitting on the shelf for a while you're going to have to stir it more. So, this looks pretty good. Just take a good amount, put it on like that.
Go in a circle about three inches in diameter, and about a quarter of an inch, to half an inch high and then I'm going to take the hardener. I want to make sure I get all the air bubbles out of the hardener. Get the air bubbles out. Push the cap down, and then I'm just going to squish the bottle around. Squish the tube around, and this is just going to mix up the hardener.
You're going to want to do this for awhile. I believe it says, probably about three minutes of doing this. It's going to change per body filler. Now we're going to take, and make ... If you take a line, go straight all the way across, then it's probably good. Maybe a little bit less. It says about three inches across.
And before I mix that up I'm actually going to put the cover back on. Okay, so I'm over near the car, the reason I'm going to mix it over near the car is, I don't have much time to spread it once it's actually mixed up. So, I'm going to use a spreader, a nice clean, fresh spreader. Even if it's used already, you know, as long as it's clean you're good.
I did take a piece of cardboard and put a piece of plastic over it. The body filler recommends that you spread it on something that's not porous. They actually make different types of palettes that you can use. Like a plastic plate, or something. I don't have a plastic plate, so I have cardboard and plastic. It'll work just fine.
So, I'm going to mix this up. I'm just going to take my spreader, get underneath here, and I want to fold it and I want to make sure I press any air bubbles out of it. We want a nice, this body filler is going to be a nice pink color when I spread it out. You want it to be all one color.
Now, when I do this on my own I don't use the plastic underneath, I use the cardboard. I know you're not supposed to, but that's just how I do it, and it seems to turn out fine, but they recommend doing it on something that's not porous. Okay.
So, that looks pretty good. So, now I'm going to take some and I'm going to spread it. Now, I did clean this area before doing this. Just took some acetone and a rag, and just wiped it off. Spread it. I'm going to press into it really hard, because I want to get any air bubbles out.
And this is just like, a final coat of body filler. Just so it looks good. So, it's nice and smooth. It actually looks pretty good. I'll go back and sand it after. I'm not spreading it too thick. The thicker you put it on, the more you're going to have to sand. So, if you just put it on nice and thin, you should be good. Looks pretty good right there. Alright. Now we'll just let that dry.
Again, I'm going to take my spreader once I'm done putting the body filler on, and just press it onto my cardboard. I'm just going to let that dry and I'll just be able to peel it off after.
Now I'm going to take my sanding block now that this has dried for over 10 minutes. I'm going to use some sandpaper, not quite as coarse as the 24 grit or the 36 grit. I'm going to use 80 grit for this to start, and then work my way up and keep going. I can go to 100 grit, 120, and you know, so on.
Just take it and do the same thing. Just do crosses. Okay, at this point I don't see any extremely low spots, so what I'm going to do is switch to this DA sander, which is a dual action sander. It doesn't spin, it kind of, orbits a little bit, so it makes it so it's less dangerous, less likely to do any damage while I'm doing this. Put my mask on again.
And it's okay, I'm going to try to feather this into the paint up top, so this will make it an easier transition. So, our patch is coming along pretty good here. What I'm going to do is, give it one more skim coat. I see some areas where there's a little bit of roughness in the body filler, so I want to skim coat it one more time and sand it real fine with some finer sandpaper. You can see right there, those are where the scratches are from the higher grit sandpaper, and the body filler actually fills those in. So, we want to make sure we don't have any of those scratches in there.
So, the more time you spend on each individual step, lets say when we start with the metal work, if you do a good job putting your patch in there and making sure the metal is pretty even, the less time you're going to have to spend on putting the filler in, and then when you're putting the filler in and you do a nice, smooth coat, less time you're going to have to spend sanding. And then when you go to sand, if you spend a good amount of time sanding, you start with the 80 grit and work your way up to 100 grit, 110, 220, and then even wet sanding if you're on that level of how good you want the paint to look, then you spend a lot of time doing that, then your outcome's going to be a lot better.
Okay, so this is dry now. Now, this looks really good. This was the final step of the body filler, the final coat. So, I'm going to sand it down with the DA. I'm going to use 220 grit sandpaper on the DA, and if you were doing this by hand, like I said before, you start with the 80 to 100 and then when you're on your final coats you're going to use a more fine sandpaper, like a 200, 220, something like that to make it smooth, and ready for paint.
After finishing with the DA it looks pretty good. It's nice and smooth. You can feel around, see if you feel anything that you don't like and go back, and either add more filler or keep sanding. I will say this, as far as body work goes, using a DA is one of my most favorite tools. It's the most satisfying, I think, when you're going from something that's pretty rough and you make it nice and smooth, and you can see the, almost the end product coming to life. This is my favorite part. So, there you go.
Before we prep this for priming it, we're going to want to blow off some of this dust. There's dust all over the place. So, we're going to take a blowgun and just blow some of this dust off. Get it out of the way. If you don't have a blowgun you could use a leaf blower, or a fan, or something you can do to try to get as much dust away as possible.
Then I'm going to take some acetone and some rags, and I'm going to clean off all this area. I'm going to wipe pretty high up here, because I'm going to want to mask off up high. It's good if you have a body line to mask off at the body line, because then the paint difference might not make as ... You might not see it as much, which is good. I don't have a body line here, so we're just going to try to feather it in as good as possible.
So, I want to mask up some of this area so that we don't get any primer or paint all over the vehicle. So, what I'm going to do is, I'm going to take some masking tape and I'm going to tape right along here. Now, some people don't like to put a tapeline, because then you're going to have to try to work out the tapeline. I don't plan on painting up here. I don't think I'm going to get much paint up there.
I'm going to try to blend it as good as possible so that it doesn't get up there. If, like I said before, if you had a body line you could tape it up to the body line, and that'd be a good transition, because then it'll be harder to notice a difference in paint color, because matching the paint's very difficult sometimes, but if I blend it up here I don't think I'm going to have a problem. But if I do, that's alright. I'll deal with it then.
I feel like prepping the vehicle is better before, than worrying about it after. So, we'll do that. Tape that right there. And then inside here I'm going to tape up, because I don't want to get any paint inside the vehicle. So, just tape over here. And you want to make sure I put a plastic bag over the tire, you don't want to get paint on the tire. So, make sure you cover up the tire and wheel somehow.
Okay, so I have this all taped up. I have my tire and wheel covered, I have the inside door taped up. No paint or primer should get in there. And up here is all taped up with plastic. You can use pretty much any type of plastic, household plastic. You could use newspaper if you have to.
In this video we're going to be using a rattle can for the paint and the primer. We're not using professional paint and primer, but we're still going to get a pretty good outcome at the end. We want to check the directions on the primer and see what the appropriate temperatures are for outside air temp. You're going to want to make sure you do this more on a warm day if you're doing it outside, or if it's in a controlled environment, make sure it's warm in the garage.
What I'm also going to do is, take a bucket of warm water and I'm going to soak the primer can in the bucket of warm water for about 10 minutes before I actually spray. It'll just make the paint and primer stick better. I'm going to do the same with the actual paint as well, and before I'm ready for that, I'm actually going to wipe this down one more time with some of the acetone and a rag.
Just in case any dust got on here or anything, just wipe it down. This area. If I had a tack cloth, you could also use that. Use a tack cloth and get any dust off as possible. You don't want any dust on here. Alright, so, we're going to get ready to prime. We want to make sure we're in a well ventilated area. If you're in a garage make sure you have a door open, or you have a fan exhausting out the fumes, and make sure you wear a mask. You want to protect yourself, you don't want to cause yourself to pass out or anything. Make sure it's a mask that works with paint.
There's different types of primer. We're happen to use a ... Using a sealer primer. They make filler primers if you were trying to get a nicer finish, then you can go back and wet sand it, and make it look real nice, but we're not as concerned about that. We want to just make it more functional, but we still want it to look good just, it doesn't have to look as good as if we were using a filler primer.
Now, if there's any areas that you need to fill in more primer, you're going to want to do those first. Like the edges and stuff, and then you can go back and do the center later. And you're just going to want to do a sweeping back and forth. Make sure you stop after you get past it.
I'm going to try to shoot more down, because I don't want it to get up into this area. So, when I'm sweeping back and forth I want to hold the can about eight to 10 inches away from what I'm actually aiming at.
Alright, now I'm going to let that dry for about 30 minutes and double check, make sure everything looks good and then I should be able to move onto paint. So, we didn't use a filler primer, so I'm not going to wet sand this afterwards. I am going to take a scuff pad and just lightly sand this area where the transition is for the primer, to the good paint. So, I'll just use the mask. Just lightly scuff it up a little bit. That's just going to make the good ... The new paint stick to this a little bit better.
Alright, so the scuff pad I used was a little too harsh, so there's a little too many lines in it. I didn't really like the way it came out. So, I'm just going to use some 400 grit sandpaper. I could use this wet, but I'm not going to. I'm just going to use it dry. Put my mask on. Just going to sand this area a little bit right here where the transition is.
And if you do it gentle enough with your fingertips you're not going to get finger lines or anything, or you could take a sponge, you could stick a sponge under here and just use a sponge, but I'm just doing this nice and gentle. Just wipe it down again. But to get a smoother finish I am actually going to wet sand this. I didn't really like the way the SOS pad came out, and there was some lines in there. So, we'll just take some wet sandpaper. I'm using 400 grit and some water. Just lightly go back and forth.
You can use a sponge if you want to get a little bit of a better job, because you don't want to get finger marks in the ... While you're sanding it, but I'm just doing it very lightly. Like that. And if you bleed through any of the metal you're going to want to re-prime it. Ours looks pretty good.
Take a rag and wipe it off. So, when I sanded this down I actually sanded it down a little bit too far, so I'm actually going to do a couple more coats of primer, and then sand it again, and get ready for paint. Okay, now that, that primer is dry, I gave it a couple coats, I'm going to take some wet sandpaper, I have 400 grit, if I had some scuff pad that was a little less harsh I could probably use that, but I'm just going to use wet sandpaper.
And what I'm doing is, I take a sponge and just put it underneath the wet sandpaper that way I'm not going to get my fingers in this, and then just wet it. Make sure you wet the ... You could actually take a spray bottle and spray this down a little bit, and that'll help. Just like this.
Now, just take a nice, clean rag and wipe this away, and get ready for paint. Alright, so, I was able to get the right color in a rattle can, so we're going to get ready for paint now. Make sure that it's a well ventilated area, and put your mask on. Alright.
And I had this sitting in a bucket of warm water for a while, so the paint's nice and warm. I'm just, pretty much going to do the same as how I was primering it. It's good to take a little test and do a test area. You could take a piece of cardboard and just check it. So, this paint seems like it's the right color.
And the same thing, about eight to 10 inches away. And you don't want to spread it on too thick, because If you do it too thick then it's going to end up ... You're going to end up having runs. You don't want any runs, so you're better off doing more coats with less.
So, I'm just going to make sure I do thin coats, let it dry in between, wait the appropriate time in between coats, per the can and it should come out pretty good. Now, with the paint I'm actually going a little bit higher than I went with the primer. I still don't want to go all the way up to the tape mark, but just a little bit higher than where I was.
Okay, so I did about three or four coats on this and it came out pretty good. You want to double check and make sure you don't have any spots that look kind of, thin. And it's looking pretty good. I would say the color matches perfect. Take my clear coat, I want to shake it for about a minute.
Alright, so once this is mixed up pretty good I'm ready to spray it just like spraying the paint. Just hold it about a foot away. A little less than a foot away. And what I'm going to do with this, I'm actually going to go a little bit higher with this, than with the paint so it blends even better into the good paint.
I'm just not going to go all the way up to the tapeline. Alright, I'm going to give it another clear coat. If you look at it to the side a little bit you can see where it's shiny and where there's some thinner spots. Just go back and gently blend it in.
Alright guys. So, as you can see I am all set. It's all finished. It looks great. If you can remember, we had this big gaping hole right here that we cut out, patched in the new patch, put the body filler on, primed it, and painted it, sanded it, and everything looks great. Now, I could take it a step further and wet sand this and buff it, but I got to think about the condition of the rest of the car. So, if I did that right here, the rest of the car is going to look dull and I don't want to have to do the whole car.
So, at this point I'm going to leave it. I'll be able to get an inspection sticker, I'll be good to go. Hope this video helped you out. I'm going to remove this inner fender well. There's multiple fasteners around there. Son of a [BEEP]. So I disconnected ...

Rusty Rotted Rocker How to Replace a Truck Rocker Panel
In this video, Andy replaces a rocker panel on our GMC Yukon.
