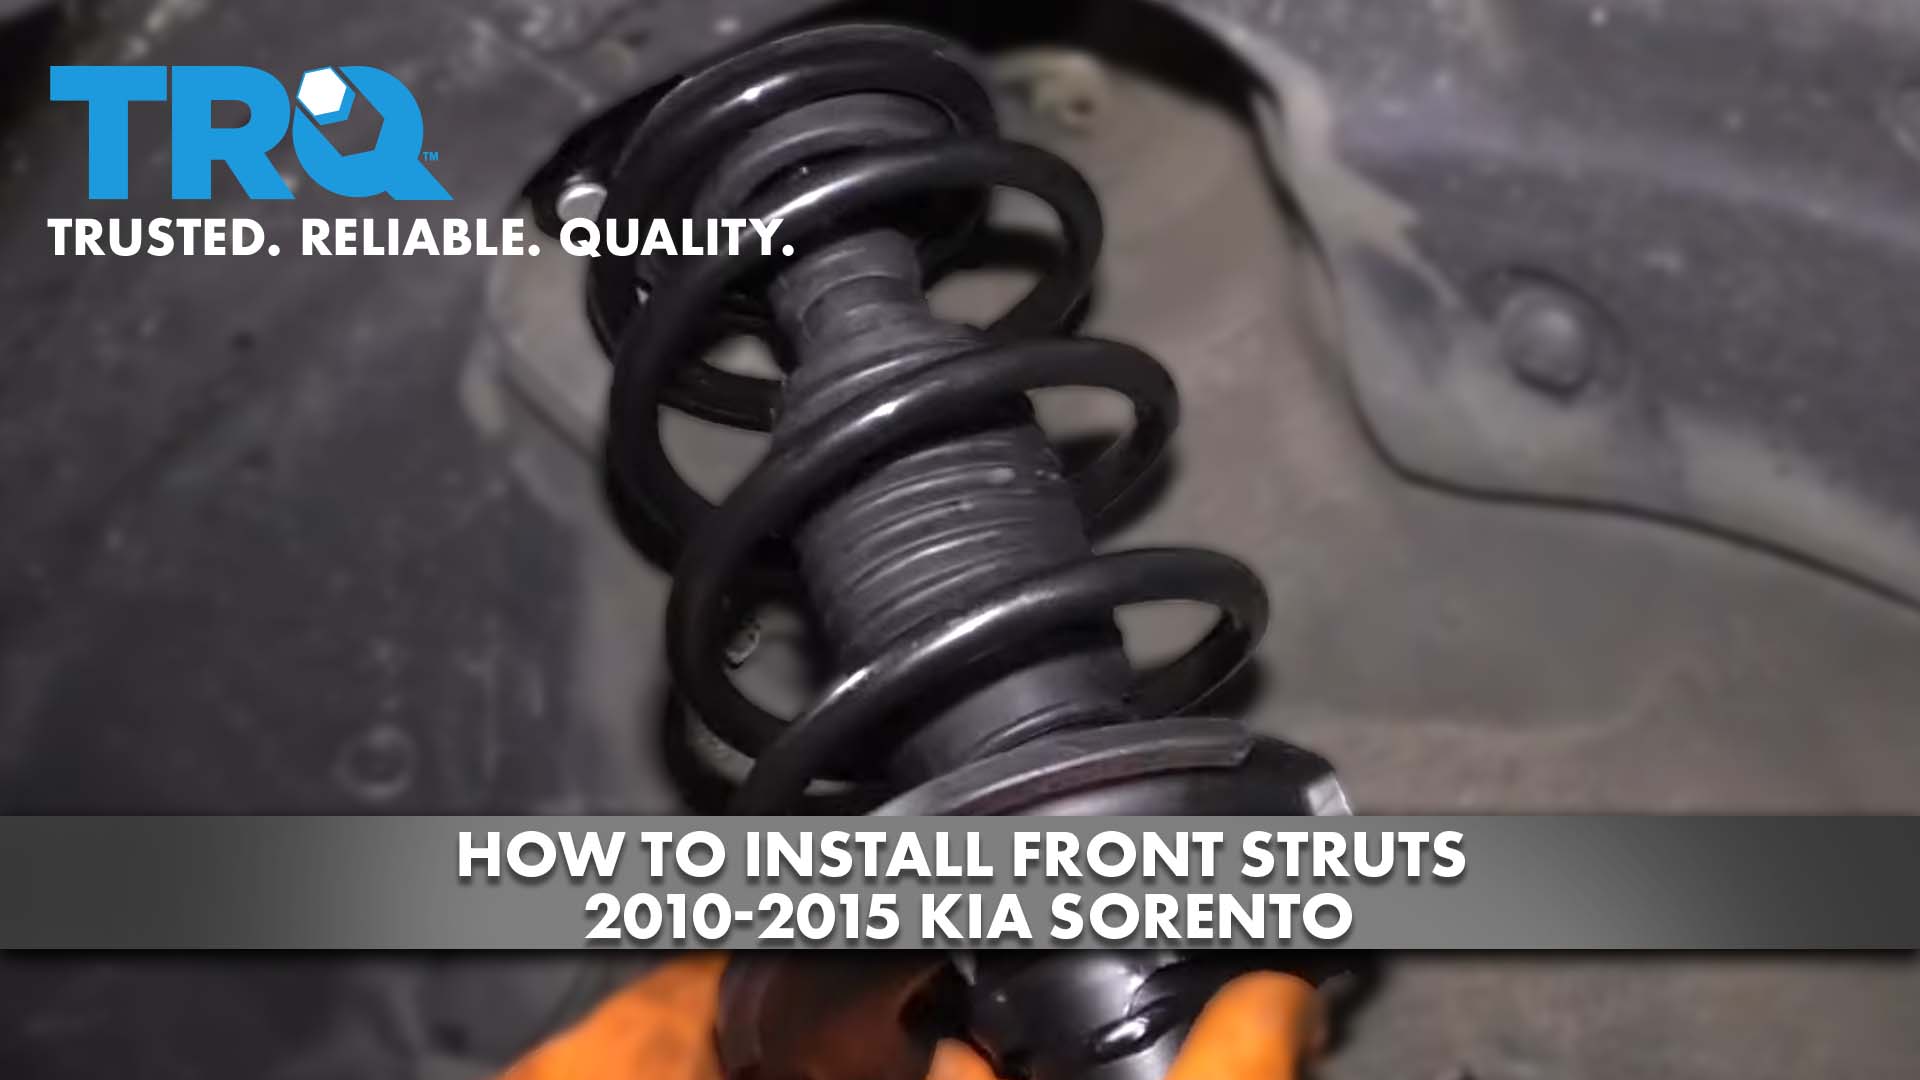
How to Install Front Struts 2010-15 Kia Sorento
Created on: 2020-06-05
This video shows you how to install new front strut assemblies on your 2015-2020 Kia Sorento.
Tools needed
-
12mm Socket
Hammer
Socket Extensions
14mm Socket
17mm Wrench
Pry Bar
17mm Socket
Jack Stands
Trim Tool Set
21mm Socket
Flat Blade Screwdriver
Socket Driver
Wheel Chocks
Floor Jack
1/2 Inch Impact Gun
Okay, friends, so before we get started on this job, it's important to remember you're gonna wanna get yourself a four-wheel alignment afterward.
So to get started on this job, one of the first things we're gonna have to do is get right over here. This is where the nuts are gonna be that hold the shock to your body. If you were to look underneath this plastic, that's where they're gonna be. So, you can grab this little tool, come right in here, just pop this. Now, if you were to take a peek in there, you're gonna be able to see those mounting nuts. This is a very easy way to get to them, and it's the least amount of work. There is another way that you can get to them. If you wanted to, you can take off this whole plastic cowl right there. Something to keep in mind about that though, is you're gonna have to remove your wiper arms as well.
Now, assuming you're gonna be removing the whole plastic cowl, like I said, you're gonna have to remove your wiper arm. If you were to come right underneath this plastic cap, you can lift this up. So, now we'll take special note of the area where the wiper blade is gonna be sitting because that's where we're gonna wanna put it back to. Now, you're going to remove your 14-millimeter nut. Set that aside. So, now you just wiggle this around. It should wanna break free, and then draw it right up and off. Do the same to the passenger side. If you were to come along the bottom corner of the windshield, you're gonna find this little rubber flap. Just go ahead and grab onto that, pull it right off. Do the same to the other side of the vehicle. If you were to look along the front area of this cowl, you're gonna see these little push clips. When you look at them, you're gonna see a little dot in the center. If you press down on that center part, you can go ahead and lift up on the outer part and set these aside. Do the same down the line. Now, if you come along the passenger side, you're gonna see this little rubber hose. That's for your washer nozzles. It's gonna pump the washer fluid through. Just go ahead and grab onto it, give it a little wiggle. You don't necessarily wanna draw it out any further than that. But if you come right here, you can separate the hose from the plastic, nice and easy, don't tear it. Set that aside someplace where you can remember to reconnect it.
Let's go ahead and pull this away from the windshield a little bit. And then we're just gonna lift it up carefully. If you feel as though anything sticking down like this area right here, we're just gonna see if we can pull that up and out without destroying it in any way. There we are. We're gonna have to do the same to the other side real quick. Just give it a little wiggle. Should wanna break free. Okay. Go ahead and remove your cowl. The next thing I like to do is just loosen all three of the nuts for the shock. You don't have to make them very loose, just break them free. I'll do the same to the other side of the vehicle.
The next thing you wanna do is raise and support the vehicle so your front wheels are off the ground. We're gonna remove our 21-millimeter lug nuts on both sides of the vehicle and remove the wheels. Now that the wheel is off, we have a clear view of our sway bar link right here. Let's go ahead and remove this nut right there using a 17-millimeter. If you were also to use a 17-millimeter wrench, you can go in on the backside and you should find an area where it'll set right in. Hold that wrench, remove the nut. Wiggle that around. There we are. The next thing we're gonna do is remove this 12-millimeter bolt right here. Go ahead and set that bolt aside. Make sure that you have plenty of slack right there. The next thing we're gonna do is remove these bolts right here. You're going to use a 17-millimeter wrench on the bolt side and then a 19-millimeter to remove the nuts. Go ahead and give those bolts a little spin. Make sure they're broken free. Something to pay attention to before you remove both bolts is after you do, this is gonna wanna pull away. You wanna make sure it doesn't pull too far because you could damage your axle, and/or put a tug on your ABS wires or brake hose. Go ahead and give these a light bonk. Okay. Just wiggle this around so you can pull the bolts out. Now, pay special attention. Like I said, this is gonna wanna come down. You can ease it down and then separate the two and just set it aside. Just be careful, like I said, not to put a tug on anything.
Next thing we're gonna do is remove these three 14-millimeter nuts. You just wanna make sure you're holding on to that shock so it doesn't fall down and cause damage. One, two. All right. Here we go. Hold on to that shock. Now, we're gonna carefully let it down and remove it. Go ahead and grab onto your shock. We're gonna grab it and put it up through the holes in the body. I'll see if I can get it lined up here. I like to use a little bit of thread locker but we'll call it your prerogative. Just bottom out these nuts. Now, let's torque these to 54 foot-pounds. We're gonna grab those bolts, and we're gonna lift this up and slide it in here. And then we'll put our bolts through from the front to the back. Just move it around a little bit and lined up. Okay, that one's started. Awesome. Little bit of thread locker. Go ahead and take those nuts. Start them right on there.
Gonna go ahead and hold the bolt side with our 17-millimeter, and we're just gonna snug up these 19-millimeter nuts. It's gonna be time to torque these down. Torque them to 130 foot-pounds. Check my wrench just in case. This one. Torqued. Went ahead and I'm gonna replace the bolt here. Start that in there. Okay. Snug it up. So, now we're gonna get the upper portion of the sway bar link into here. If for some reason it doesn't wanna match up, you could just use a little bit of leverage. I'm gonna carefully come in between the tie rod and the sway bar, bring it down so it lines up. And go ahead and slide it through. Take your nut, start it right on there. Now, it's gonna be time to bottom this out. Let's take our 17-millimeter. This on here. Now, we're gonna torque this to 87 foot-pounds. There it is.
All right. So, now it's gonna be time to get the wheel up on here. But before we go ahead and do that, just double-check everything. Make sure that you torqued everything that needs to be torqued and, of course, your ABS wire and your brake hose is nice and secure. Once you've done that, go ahead and grab your wheel. We're gonna start on all the lug nuts, bottom on them out, and then we'll torque them to manufacturer's specifications. Now, it's going to be time to torque your lug nuts to 80 foot-pounds. Go criss-cross. Torqued.
Be time to get the cowl back on. If you were to look down along here, you're gonna see some little hooky-dos. Those need to go underneath the windshield. Carefully bring this up here one side at a time. Squeeze it by. Okay. Get this lined up. Now, I'm gonna tip it up and then slide it forward. Feels good. Feel along the top. If it feels like it's raised away from the windshield, more than likely you didn't get the hooky-do underneath the windshield. This feels great. My holes are lined up. Let's continue.
Just take a look at it. Perfect. Grab this, slide it in. Have our handful of little push clips here. You wanna make sure you have them in the unlock position. That means that the center tab is up. If it's pressed down, just go ahead and force it up. Line it up in the hole, lock it in. Do the same down the line. Put that last clip in. Let's make sure we get this hose back attached. Slide it right in, give it a nice tug. Perfect. Time to get these corner pieces in. Just gonna get it up here. Should all press together fairly easily. Work it in. Perfect. Do the same to the other side.
Now, it's gonna be time to get the wiper arms back on here. In case you happen to mix them up, you can look right down along here. You're gonna see a DR for the driver side and on the other one you'll see a PA for passenger side. Or if you were to look at the wiper blades, the driver side is gonna be the longer of the two. With that said, gonna come right over here. Set this approximately where it was on the windshield. Press it down like that. Now, we're gonna start on our nut. Now, we're gonna snug it up. Make sure it's nice and snug. Do the same to the passenger side.
Okay. So, now that we have those on, let's go ahead and test them to make sure they come up to the right height. We're also gonna test the squirter. You wanna pay special attention to up at the top to make sure that the wiper blade doesn't come over and hit up against the body. And of course, down on the other side, you wanna make sure that it doesn't come over and hit anywhere over there as well. This looks great. Let's get our little caps back on here. Perfect. Give this a wiggle. Everything is secured. Our hose is definitely on. Perfect. Close the hood. Take it for a road test.
Shop Products


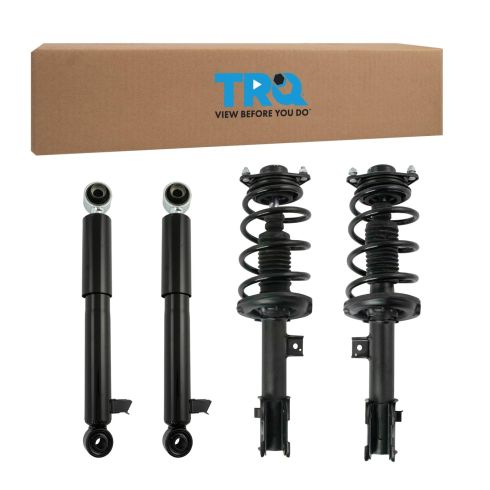
Hyundai Santa Fe Sport Kia Sorento Front & Rear 4 Piece Complete Strut Assembly & Shock Absorber Kit TRQ SKA34394
Part Details:
- 4 Piece
- (2) Front Strut & Spring Assemblies
- (2) Rear Shock Absorbers

How to Replace Rear Shocks 2000-04 Nissan Frontier and XTerra
Check out this video and learn how to replace the rear shocks on your 00-04 Hyundai Elantra. 1A Auto shows you step by step!
