How to Install Pocket Style Fender Flares 2002-08 Dodge Ram
Created on: 2016-06-29
This video will show how to remove the Hemi badge and prepare and install new fender flares on the 02-08 Dodge Ram
-
step 1 :Preparing the Extension Style Fender Flares
- Remove the 3M tape as you press the seal into the flare
- Cut the seal when you reach the end of the flare
- Turn the wheel out of the wheel well
- Insert the fender flare into place and find where the bolts align with the flare
- If your Hemi badge is in the way, go to step 2
- Remove the Phillips screws/8mm bolts from the wheel well
- If you have a rusty wheel arch, go to step 4
- If you do not have a rusty wheel arch, go to step 3
-
step 2 :Removing the Hemi Badge
- Mark the fender's position with a piece of tape
- Heat up the adhesive on the badge with a heat gun, hair dryer, or let it sit in the sun
- Pry the badge off with a flat blade screwdriver wrapped in tape
- Scrape off the adhesive with a rubber razor blade, plastic putty knife, or your thumb
- Wipe the surface with an adhesive remover
- Adding a thin layer of wax can help remove scrapes and blend the area
- Return to step 1
-
step 3 :Installing the Rugged Style Fender Flare
- Place double-sided body molding tape on the back of the badge
- Cut the ends and carve the badge to fit with the tape
- Remove the backing and adhere the badge to the vehicle in a higher position
- Insert the fender flare into place
- Loosely tighten the bottom screw to the fender flare
- Align the flare with the body line
- Tighten the rest of the hardware into the wheel well and flare
- If necessary, use the self-tapping screws and clips to tighten the flare into place
- Repeat the process on the other side
-
step 4 :Removing the Scaling and Bubbling Paint
- This step is only necessary for trucks with rust on the wheel arch
- Score around the perimeter of the rust/paint bubbles with a razor blade
- Scrape off any scaling with a flat blade screwdriver
- Sand down the area
- Treat the body with rust-preventative coating or paint
- When finished, go to step 3
Tools needed
-
Sandpaper
Flat Blade Screwdriver
Double-Sided Tape
Phillips Head Screwdriver
Putty Knife
Heat Gun
Rust Penetrant
8mm Socket
Ratchet
Utility Knife
Brought to you by 1AAuto.com, your source for quality replacement parts and the best service on the Internet.
Hi, I'm Mike from 1A Auto. I hope this how-to video helps you out, and next time you need parts for your vehicle, think of 1AAuto.com. Thanks.
In this video we're going to show install fender flares on this Dodge Ram. This one's a 2008 and this particular type of pocket style fender will install the same on 2002 to 2008 Dodge Ram 1500s and 2003 to 2009, 2500s and 3500s. You'll need a new fender flare kid from 1AAuto.com, flat blade screw driver, Philips screw driver, utility knife, 5/16ths socket with a ratchet and, depending on your installs, you may need an 8mm socket, heat gun, double sided tape, adhesive remover, sandpaper and rust preventative paint.
There are some Phillips head screws and some 8mm screws at the bottom of the fender inside the wheel well. Before installing your fender flare, you want to take the supplied seal here, and remove the 3M tape from the roll. Remove it little by little. Lay the edge onto your flare flush and walk that seal on there. Just work that right along the flare, remembering to press your adhesive on the outside edge here. When you finish working the seal to the other end of the flare, cut it flat and start the next flare.
Supplied in our kit is a bag of faux hardware and a T40 Torx driver. What you'll need to do to make these look right is take the T40 Torx screw. Install it into each hole on the flare. Flip it over. Use a washer and you nyloc nut with a 5/16ths socket, your T40 Torx driver supplied with the kit, as well as a well as a 1/2 inch wrench. Tighten them together. Repeat this step throughout each hole throughout all four fender flares.
Test-fit your flare. Some of these larger flares will require you to relocate or remove this badge. There's a few different ways to remove these badges, but the safest and probably the easiest way is to use a heat gun, or, if you don't have one, a high temperature hair dryer to heat up the adhesive on the back of the badge. Use a rubber scraping or prying tool, or, if you don't have any, you can wrap a few thick wraps of electric tape around a flat blade screwdriver to reach back there and pry it off without damaging your paint. Make sure to get it nice and hot without getting it so hot that it may bend or warp the plastic. When the badge moves easily, it should be warm enough that you can carefully remove the badge from the fender.
There's a few different ways to remove this adhesive, from using a rubber razor blade to a plastic putty knife to anything that'll scrape and not damage the paint. One of the simpler methods is to roll the thicker adhesive up with your thumb or your fingernail, peel the bulk off, and then wipe it with an adhesive remover. Our badge came off pretty clean, but if you still have remnants of the lettering from paint that hasn't seen the sun in the life of the vehicle, adding a thin layer of wax to the area the badge was removed from can help fill in fine scratches and blend out the area so it looks smooth. Remove the adhesive from the back of the badge the same way.
Line up your fender where it's going to go on the truck and use a piece of painters tape to mark the top edge of the fender so we know the height. We can reinstall our badge. We're going to use some double-sided body molding tape on the back of our old badge. Make sure you press it on nice and firm so the tape actually sets. Using a sharp razor blade, cut the end flush with the emblem. Lay enough down on the other end to cover the badge completely. Same thing. Trim off the excess tape here. If you really want to, you can cut out all the stuff inside of the badge here but, even from the factory, they just go right across it with the black tape regardless of the color of the vehicle.
Now that we're all coated, we can peel the backing off and adhere it to our vehicle. Remove the backing from the molding tape. Make sure that the surface you're going to be mounting it to is clean. We know that the bottom of our tape line here is above the fender. We can see that the top of our tape line is at the bottom of this body line, so we'll just go ahead and use the body line as a reference. You can use the residue from the old badge to see about how far off it was off the door.
Re-adhere the badge to the fender, and now we can install our flares without covering the emblem. On your flare up on the truck, our flare matches up with the bolt hole at the bottom. The top front in the 11 o'clock position. We'll remove this Phillips head screw and these two 8mm. Cutting your wheel on the passenger side to the right or the driver side to the left when working makes accessing this bottom bolt a lot easier. Install your fender and start the three screws by hand. You don't want to tighten these down until all three screws have been lined up, and we know we have the fender in the position we want it. Line up your fender to where you want it and tighten down all your hardware.
Our truck, like many trucks of all makes and models, has rust over the rear tires, on the wheel arch, and on the side of the bed. It's very common for these to rust out, and people to buy fender flares to try to cover over them and hide that rust spot. What a lot of people don't do is take the time to remove the scaling and bubbling paint. They’ll coat the rust so the fender flare not only hides it, but keeps it from getting worse. We'll show you how to do that.
Start by taking a fresh, sharp razor blade, and cut around the edges where the bubbling is—just score it. Take a flat blade screwdriver and scrape away all of the bubbled paint up to our score marks. The score mark keeps that chipping controlled so it doesn't break off into our good paint where there's no need to scale it off.
This guy is a little harder to see, but we do have a rust bubble starting right here. Before that gets any worse and expands or goes through, let me score those edges with the razor blade as well. While there was no rust under this bubble, that deformation in the paint would allow water to set in and eventually make our truck look like this, so we'll finish scraping off all our scaling, and then we recommend you sand it and treat it with the rust preventative coating or paint of your choosing.
Line up the body tabs in your flare, and see where everything lines up. In this case, we'll remove our two 8mm screws in the rear, and use the two holes in the front fender for our plastic retainers.
Line up the holes and start reinstalling your hardware. Remember to leave it loose for now so we can line everything up before we lock our flare into place. See here, our body line doesn't really line up well. This is why we leave all of our hardware loose, because simply sliding it up and pushing it in closes that gap. Tighten our hardware.
Go ahead and install your fender flares on the opposite side of the truck in the same way that we showed you on the passenger side. With just a little bit of work to move the fenders around, make sure that you take the time to line them up properly. These fenders look like they were installed from the factory.
Thanks for tuning in. We hope this video helps you out. Brought to you by www.1AAuto.com, your source for quality replacement parts and the best service on the Internet. Please feel free to call us toll-free, 888-844-3393. We're the company that's here for you on the Internet and in person.
Shop Products


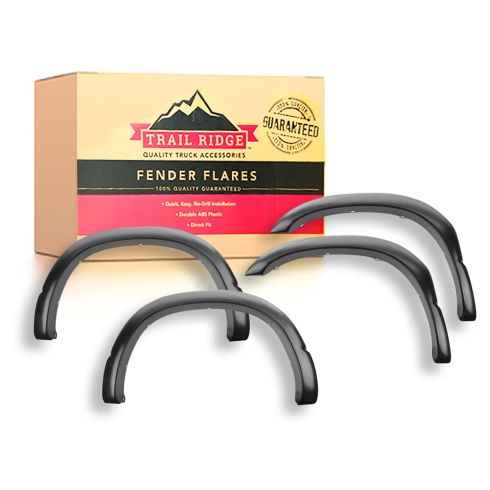
Dodge Ram 1500 2500 3500 4 Piece Fender Flare Kit Trail Ridge TF10098
Part Details:
- Rugged Style
- Paint to Match
- Black
- Direct Fit
- Durable ABS Plastic
- Quick, Easy, No-Drill Installation
- 4 Piece
- (4) Fender Flares

How to Install Rugged Style Fender Flares 2002-08 Dodge Ram
New Fender Flare Kit from 1AAuto.com How to install a rugged style fender flare on 02, 03, 04, 05, 06, 07, 08 Dodge Ram
