How To Replace Rear Wheel Bearing Hub 2000-05 Buick LeSabre
Created on: 2012-05-04
Watch this video to learn how to replace the rear hub and bearing on your 00-05 Buick LeSabre.
-
step 1 :Removing the Wheel
- Pry off the center cap by hand
- Loosen the lug nuts with the vehicle on the ground
- Raise the vehicle with a floor jack
- Secure the vehicle on jack stands
- Remove the lug nuts
- Pull off the wheel
-
step 2 :Removing the Brake Pads
- Remove the 12mm bolt from the brake caliper
- Remove the 13mm bolt from the bracket
- Pry the brake pads out with a flat blade screwdriver to push the caliper pistons in
- Pull the caliper aside
- Remove the brake pads
-
step 3 :Removing the Brake Rotor
- Remove the two 15mm bolts from the brake caliper bracket
- Pull off the brake caliper bracket
- Pull the rotor off
- If the rotor will not come off, strike the center of the rotor with a hammer to loosen it
-
step 4 :Removing the Wheel Hub
- Disconnect the ABS sensor wiring harness
- Remove the four 13mm bolts from the hub
- Strike the hub with a hammer to loosen
- Pull off the hub
- Pull of the brake backing plate
- Clean the hub mounting area with a wire brush
-
step 5 :Installing the New Wheel Hub
- Hold the backing plate in place with the open end facing the front of the vehicle
- Put the hub into place with the ABS sensor connector facing the front of the vehicle
- Start one bolt into the hub
- Start the other three bolts
- Tighten the three 13mm bolts into the hub to 60 foot-pounds of torque
- Connect the ABS sensor wiring harness
-
step 6 :Installing the New Brake Rotor
- Slide the rotor on
- Thread one lug nut to hold the rotor in place
- Put the caliperbracket back into place
- Start the two 15mm bolts by hand
- Tighten the bolts to 60 foot-pounds of torque
-
step 7 :Installing the New Brake Pads
- Install the new brake pads into the caliper bracket
- Put the caliper on
- Thread the 12mm bolt by hand
- Tighten the 12mm bolt to between 12 – 15 foot-pounds
- Insert the 13mm bolt into the bracket
- Remove the placeholder lug nut
-
step 8 :Reattaching the Wheel
- Slide the wheel into place
- Start the lug nuts by hand
- Tighten the lug nuts preliminarily
- Lower the vehicle to the ground
- Tighten the lug nuts to 100 foot-pounds in a crossing or star pattern
- Reattach the center cap
-
step 9 :Testing the Brakes
- Pump your brakes repeatedly until they feel firm
- Test your brakes at 5 miles per hour and then 10 miles per hour
- Road test the vehicle
Tools needed
-
12mm Socket
13mm Socket
A Piece of Pipe (for leverage)
15mm Wrench
Socket Extensions
Torque Wrench
Hammer
15mm Socket
Jack Stands
19mm Socket
Flat Blade Screwdriver
Ratchet
Wire Brush
Floor Jack
1/2 Inch Breaker Bar
Brought to you by 1AAuto.com, your source for quality replacement parts and the best service on the Internet.
Hi, I'm Mike from 1A Auto. I hope this how-to video helps you out, and next time you need parts for your vehicle, think of 1AAuto.com. Thanks.
In this video, we're going to be showing you rear hub replacement on this 2000 Buick LeSabre. This process is the same for the LeSabre, Park Avenue, Pontiac Bonneville, Oldsmobile Aurora as well as a few other GM vehicles. The tools you'll need are jack and jack stands; and 12, 13, 15 and 19 mm sockets. You'll need ratchets and extensions. You'll need a breaker bar or a pipe for some extra leverage on some of those bolts, a large flat-blade screwdriver, hammer, torque wrench, and a wire brush.
Pull firmly on this hubcap. If you don't have the benefit of air tools, you'll want to have your vehicle on the ground. Loosen the lug nuts first. Then raise and secure the vehicle and remove the lug nuts the rest of the way. I'll just fast-forward here as I remove the lug nuts and remove the rear wheel. Remove this bolt here. It's a 12 mm bolt. I'll fast-forward here. As you can see, it took a little bit of force, but that bolt should come out pretty easy. Use a 13 mm socket, and remove this bracket right here as well. Now take a good sized screwdriver. You can put it right here and pry out a little bit. That will help reset the piston, help loosen up the caliper. Now you pull this up, and you actually slide your . you want to make sure that your caliper slides okay. Now just pull the pads right out the front, and the back.
If you did want to replace or turn the rotors, you'll want to remove this bolt, and then this bolt down here further. For this, I'm going to use a larger wrench. Actually, I'm even going to take a piece of pipe, put it on my ratchet. It just gives me a little extra leverage and pull back. I'm just going to pull nice and easy so it will start turning. For the bottom one, I've got a 15mm wrench. It's a little bit of tight quarters. I'm actually going to take an 18mm wrench and hook it on here. That's going to give me some extra leverage here. Again, just pull nice and easy so the bolts start to come loose. I'll speed it up here again. Actually, as you can see, after just a couple turns, I'm able to reach up in there and take that bolt out most of the way with just my fingers. We want to get this other bolt off. Then this whole rack assembly. It just flips right up and off. I'll put it up here for now. The rotor is frozen. The best thing is a large hammer. Hit the center of the rotor here. It comes off.
To remove the hub, you probably will first want to unplug your ABS sensor. That's right back here on the back of the hub. Just pull this tab up and unplug it. Then there are four bolts that hold the hub. Actually, you just access them right through one of the holes, and you spin that around to the next one, to the next one et cetera. It looks like we've got a 13mm socket with an extension and my ratchet. With some force they come off. After showing you that you can loosen them and take them off by hand, I then go to the trusty impact wrench and just take them off the easy way. Then once you have all the bolts out, you just want to use a large hammer. Hit it from the front and side. Then hit it on the opposite side, and just keep repeating until you get it loosened up. Take a wire brush, and clean out some of the corrosion inside here.
Here's a new hub from 1A Auto. It's going to go in there just like the original. You want the connector to face the front of the car. It's going to go in there like this. The opening of the backing plate faces the front as well. I just want to place it in there. Put your bolt through and into the hole. Start one bolt in. I'll speed up the film here as I start all four of the bolts in first, and then use my impact wrench again to preliminarily tighten them up. You do want to torque these bolts. Now I'm ready to use the torque wrench, and I'm going to tighten these to 60 foot-pounds. That one didn't want to come off. I'm just going to speed it up as I tighten up the other two. Now back in here, let's make sure we reach our ABS sensor.
Reinstall our disk. Actually, I just like to put a lug nut on here. It just holds everything in place. Bring our bracket down and force it inside here, down into place and start our large 15mm bolt. I'm going to speed things up here as I start the first bolt, and then the other bolt, and then just preliminarily tighten them with my ratchet and wrench. On the bottom, I can't get a torque wrench on here, so what I'm going to do is make it tight with my wrench first. Once I get it tight with the single wrench, then I hook my other wrench on and pull it tight using extra leverage. Now on the top, I use a torque wrench and torque the top bolt to 60 foot pounds.
Then simply pull your caliper up with the back one in. Put the front one on here. Put your caliper down in place. As you're pushing the caliper down, you might need to push this back like that. Then you want to torque this anywhere from 12 to 15 foot pounds.
I'll speed it up here as I remove that lug nut, put the wheel back on. Start all the lug nuts by hand first. Then you want to just preliminarily tighten the lug nuts before you put the car on the ground. Now use a torque wrench and torque your lug nuts to 100 foot pounds. Use a star pattern as the order in which you torque them. Anytime you take the brakes apart, make sure that you pump your pedal a whole bunch of times until it gets firm. Then, do test-stops from 5 and 10 miles an hour. Make sure that brakes are working correctly before you road-test your vehicle.
We hope this video helps you out. Brought to you by www.1AAuto.com, your source for quality replacement parts and the best service on the Internet. Please feel free to call us toll-free, 888-844-3393. We're the company that's here for you on the Internet and in person.
Shop Products


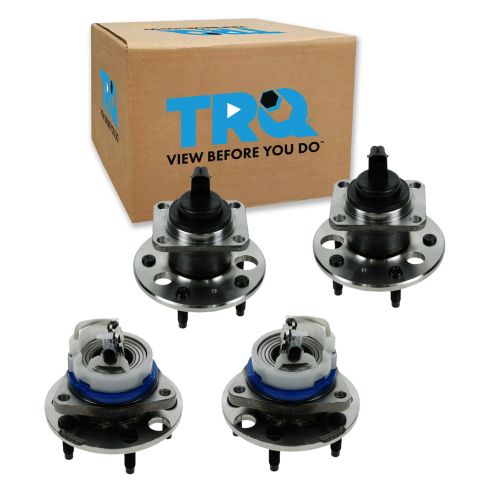
Buick Cadillac Pontiac Olds Front & Rear 4 Piece Wheel Bearing & Hub Assembly Set TRQ BHA53660
- 4 Piece
- (2) Rear Wheel Bearing & Hub Assemblies
- (2) Front Wheel Bearing & Hub Assemblies
- Ball

How To Replace Rear Wheel Bearing Hub 1984-96 Chevy Corvette
Replace the wheel hub and bearing on the 84-96 Chevy Corvette with the steps in this how-to video
