
How To Install Replace Taillight Honda Accord Sedan 4 door 2003-05 1A Auto
Created on: 2010-05-18
Check out this video! You can learn how to replace the tail lights on your 03-05 Honda Accord Sedan. 1A Auto will show you how.
-
step 1 :Removing the Rear Bumper
- Pry out the screw caps on the bumper.
- Remove the 10mm bolts on the bumper, the 6 Phillips screws in wheel wells.
- Remove the two plugs under the bumper. If they won’t pull out cut them and replace them with a nut and bolt.
- Pull the bumper out on each side.
- Pull the bumper from the car.
-
step 2 :Removing the Taillight
- Remove the two 10mm bolts under the taillight.
- Remove the panel to access the taillight bulbs.
- Twist out the light sockets.
- Remove the three 8mm bolts on the back side of the tail light.
-
step 3 :Replacing the Taillight
- Remove the bracket from the bottom of the old taillight and put it on to your new taillight.
- Line up the pin on the taillight and push it into place.
- Replace the five bolts on the taillight.
- Twist the sockets back into the taillight.
- Replace the taillight cover.
-
step 4 :Replacing the Rear Bumper
- Clean off the foam bumper.
- Replace the bumper cover.
- Push it in under the taillights.
- Push in the sides of the bumper.
- Replace the Phillips screws in the wheel wells.
- Replace the 10mm bolts and covers.
- Replace the plugs.
Tools needed
-
Flat Blade Screwdriver
Phillips Head Screwdriver
8mm Socket
10mm Socket
Ratchet
Brought to you by 1AAuto.com your source for quality replacement parts and the best service on the internet.
Hi, I'm Mike Green. I'm one of the owners of 1A Auto. I want to help you save time and money repairing and maintaining your vehicle. I'm going to use my 20 plus years' experience restoring and repairing cars and trucks like this to show you the correct way to install parts from 1AAuto.com, the right parts installed correctly that's going to save you time and money. Thank you and enjoy the video.
In this video we'll show you taillight replacement on this 2005 Honda Accord Sedan, same as any 04 to 07 Sedan. The taillights do differs but the procedure is the same. This is pretty easy, you do have to remove the rear bumper cover but it's only hold on by a few screws and fasteners. You only need a flat blade screwdriver, Phillips screwdriver and 10mm and 8mm wrenches or sockets and ratchets.
To remove a taillight on this vintage Honda, you need to open up your trunk hood and then there's a couple of little plates here that you can use a little screwdriver to pop it off which exposes the 10 mm bolt, you remove those, and then there's two Phillips screws here and here as well as a screw right up in here that you need to remove. Underneath there's a couple of pins or clips, one there and one there. For those screws it helps to have a Phillips screwdriver like this. Here, I'm just going to kind of speed through taking those screws out and then those two 10mm bolts.
It turns out that probably the what should be the easiest part of this is the hardest because these clips have gotten dirt in them and stuff. It's basically they're not coming out the way they should which is to pull the center pin out and then pull the whole thing out so I'm going to cut it off. As I show you later in the video you can reach up in there easily enough and just use a nut and bolt to refasten. Once the bolts, pins and screws have been removed let's just pull out the sides. It is a little scary but it will come apart. Get back to it again on the other side, and then your bumper comes right off.
Once you have the bumper cover off, its five bolts, there's two 10mm bolts right here, one and two, and then the cover, you just pull this cover off. if you just look in to replace your bulbs you can twist them out but if you need to replace your taillight because you've been in an accident or something, here's one bolt and then there's two others, I'm not sure if I'll be able to see, I can barely see one there and then there's one, here it is down right here, two. Those are 8mm also standard 5/16 works.
Here again, we'll just kind of fast-forward you through removing those 10mm bolts there and then the 8mm bolts inside the trunk. Then once you have those 5 bolts out the light comes right out. If you put a new assembly in, you want to remove that screw and trench for this bracket over to it. I'm just going to take it out, it seems loose to me, as if you want taking that much more.
Then when you put it back in there's a pin here, there's a pin right here on the light that goes into this hole here, so you want to makes sure that goes in correctly, you kind of see it from the top. This light should be up nice and tight. Put the bolts back on. Remember to put your bulbs back in and then this, the large tab goes on here and then make sure you press in there. Okay, so before putting the bumper cover back on I'm going to sweep this styro-foam to come off and you can pull it off. I'm going to sweep out here, let's clean it up. Put this styro-foam back on then the bumper cover. The right side, we'll keep it look it up and get this and you go and prep underneath the taillights here, be sure it's underneath it. The taillight is good, push it right in. Let's make sure it's pulled forward, push that in. Make sure it's over the wheel. Do the other side. Put the screws in, your 10mm bolts and covers and your two plugs underneath and you're all done.
When I took this apart I actually broke this pins that go up in there to fasten this so you can just use a nut and bolt. There's plenty of room to get your hands up in there and fasten it this way and obviously tighten that up.
We hope this helps you out, brought to you by www.1AAuto.com your source for quality replacement parts and the best service on the internet. Please feel free to call us toll free 888-844-3393, we're the company that's here for you on the internet and in person.
Shop Products
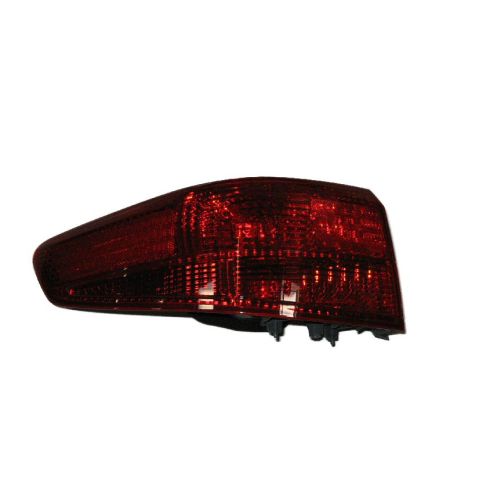
2005 Honda Accord Sedan Driver Side Outer Tail Light DIY Solutions LHT06094
Part Details:
- Features and Benefits

How to Replace Cargo Light Assembly 2010-16 Cadillac SRX
How to replace a cargo light to the 10, 11, 12, 13, 14, 15, 16 Cadillac SRX
