How to Rebuild Small Block Chevy 350 5-7l Cylinder Heads
Created on: 2017-03-24
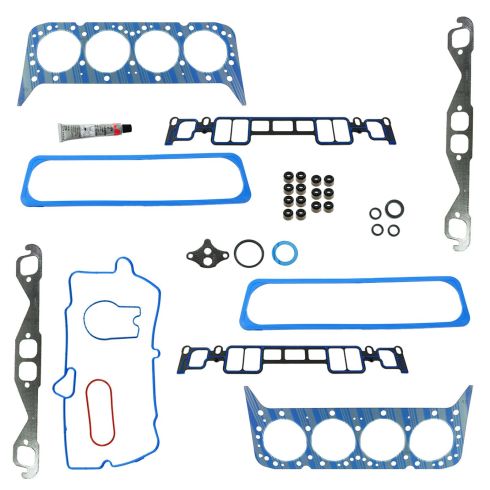
Buy the 350 / 5.7L small block Chevy Top End Gasket. Watch the 350 / 5.7L Small Block Chevy Head Gasket Time Lapse Video. The complete 350 / 5.7L head gasket replacement.
-
step 1 :Removing the Valve Train
- Compress the valve spring with a valve spring tool
- Remove the two sides of the retainer with a magnet
- Slowly decompress the spring
- Remove the spring and spring retainer
- Lift up the block and remove the valve
- Mark cups for each valve with cleaning solution
- The smaller of the two valves is the exhaust
- Drop the valve in its own cleaning solution
- Let the valves soak
- Repeat the process for the rest of the valves
-
step 2 :Cleaning and Painting the Block
- Clean the surface and chambers with a wire brush
- Lay the engine head on its side
- Mark off the gasket surfaces for the head gasket, the intake and exhaust, and the top side where the valve train is with painter's tape
- Cover the ports and top of the engine heads with painter's tape
- Mask off the top side and the bolt
- Find a well-ventilated and warm area
- Paint the engine with Chevy Orange Engine Enamel Paint
- Allow 10-15 minutes between coats
-
step 3 :Cleaning the Valves
- Check the valves and soak overnight if needed
- Clean off the valves with a wire brush
- Add valve grinding compound to the side of the valve
- Insert lube into the valve guide
- Insert the valve into place
- Suction the valve grinding tool
- Grind the valve a full 360 degrees
- Wipe off the valve and continue to grind at least three layers
-
step 4 :Cleaning the Engine Surface and Installing the Valves
- Wash out all valve seats and ports with mineral spirits
- Pop the valve stem seals off of the head with pliers
- Place the valve into the guide
- Apply assembly lube to the valve stem
- Seat a new gasket onto the valve stem
- Press a 12mm impact socket and hammer it on to the valve stem with a rubber mallet until it bottoms out
- Press the valve up once the gasket is in
- Apply the spring tool and retainer over the stem
- Compress the spring
- Add the retaining pieces to the stem
- Carefully release the spring
- Repeat this process for the other valves
Tools needed
-
Razor Blade / Gasket Scraper
12mm Socket
Magnet - Extendable
Engine Assembly Lube
Dust Mask
Valve Carbon Cleaning Solution
Brake Parts Cleaner
Safety Glasses
Valve Grinding Compound
Valve Spring Removal Tool
Side Cutters
Gloves
Rubber Mallet
Drill Bit Set
Paper Towels
Drill
Mineral Spirits
Rubber Vacuum Hose
Painter's Tape
Wire Brush
Hi, I'm Mike from 1AAuto. We've been selling auto parts for over 30 years! We're dedicated to delivering quality auto parts, expert customer service, and fast and free shipping, all backed by our 100% satisfaction guarantee. So visit us at 1AAuto.com, your trusted source for quality auto parts.
In this video, we have the cylinder heads off of the small block Chevy 350 with a 5.7-liter Vortec from our '96 Sierra. We're going to show you how to overhaul the head or rework it by removing all of your valves and replacing the stems, as well as regrinding or lapping the valves to make sure they seal nice and tight against the cylinder head. This process can also be used to change your valve springs, keepers, and retainers, although we did reuse our original ones.
If you like this video, please click subscribe. We have a ton more information on this and many other vehicles. If you ever need parts for your car, you can follow the link down to the description over to 1AAuto.com.
Here are the items you'll need for this repair: valve spring removal tool, engine assembly lube, valve carbon cleaning solution, valve grinding compound, orange engine enamel paint, 12mm impact socket, valve grinding tool, magnet, small hammer, rubber mallet, side cutters, brake cleaner, wire brush, paper towels, painter’s tape, razor blade, drill, drill bit, piece of hose, safety goggles, dust mask, gloves
We'll remove the valve springs and valves from our cylinder head. What I've done to keep these organized, again, because everything needs to go back exactly where it came from, is I've labeled cylinder one exhaust on this cup and filled it with a valve carbon cleaning solution. We'll remove all this, allow it to soak, remove everything else, finish cleaning our head, paint it, grind our valves, change our valve seals, and then reassemble.
There are a variety of different valve spring compresses tools available, as well as some do-it-yourself methods that work just fine, especially on these simplistic motors. This tool is a universal overhead valve style and works on a wide variety of vehicles, so we'll show you how this one works. Any other valve spring tool should work just fine.
We'll hook the jaws into the lowest coil we can. Spin the compressor down and compress the spring. Now if your valve retainers stay stuck in there's like ours did, just give it a sharp little tap with a hammer, it should free them right up. Using a magnet or pick, do not put your fingers in here as these tools can fail, and if they do, that spring has got a good bit of tension on it, it is not somewhere you want your hands to be. Collapse the spring until you have good access to the keepers there. I like using a magnet, just snag them, pull them out. These are two pieces, so remove each side. If you're reusing the old ones, be sure to keep them organized.
We'll now very carefully and slowly back off the tool. Once the pressure is off the spring, we'll remove the tool. Remove the spring and spring retainer. Those don't have to go in the solution, but we can clean them up a little bit while they're out. Push down, lift up, and remove your valves. This engine, like most others, has a smaller exhaust valve than an intake valve. Now we're take that valve, drop it in the solution, make sure it's deep enough to cover all that carbon buildup. We'll leave these to soak while we pull apart the rest of our springs and valves. The process is the same on both the intake and exhaust side, so just go right along and keep them all organized.
Just to show you the importance and the fact that this stuff really works, the valve on your right has been soaking for about 10 minutes now. I haven't scrubbed it or anything other than just swirled the cup around a little bit, and you can see the difference in cleanliness and buildup between that and a valve that we just removed. All the right keeps to make sure that our engine runs smooth and free.
Now our valve train is removed from our cylinder head. We're going to clean out the combustion chamber and the gasket surface, spray it all down, mask it off, and repaint it GM orange. Now, we're going to use a wire brush and some solution to go ahead and clean all the dirt, debris, grease and carbon off of the gasket surface and out of the combustion chambers. It's very important much like your ports that you don't use power tools or heavy abrasives to do this, as this is a machined flat surface.
Unless you're taking this to get decked or machined flat, you're going to want to make sure that you leave all the stock material intact while only removing the dirt, debris, and buildup. Don't be afraid to get in there and clean out the ports a little bit more, especially now that you've removed the valves. There's a lot more room to get in there and clean. Once the surfaces are cleaned, mask off gasket surfaces to the head gasket, the intake, and exhaust, as well as the topside where the valve train is, so we can paint our heads in the original orange color, make them look good as new. Once all that's on, just trim the edges nice and tight with a sharp razor blade. The only areas we're really concerned about are the combustion chamber that we just cleaned, the gasket surfaces, the cylinder head, as well as the intake and exhaust manifolds. The intake side, we can just mask off completely, because the manifold will sit on there so we won't actually see any of the unpainted surfaces.
If you really want to, you can carefully tape off just the ports where the gasket touches on the exhaust side, or you can mask it all off, really just a matter of preference. We'll just set those up the same way we're doing this. There are a few options once you've masked off all the ports as far as the spark plug holes are concerned. You could use your spark plugs if you're replacing them anyway, or if you're reusing them and don't want to have to clean off the porcelain and the contact, you can just take some rips of a clean paper towel, wad them up, put them in the threads there to keep the paint out of the combustion chamber.
The last thing we need to do before paint, since we've already cleaned off and degreased our entire cylinder head, is to mask off the topside as well as the bolts. We've masked off our tool cart, and our engine has already been cleaned and degreased, and now we're going to spray it with some Chevy orange engine enamel paint. This paint is designed for the high temperatures created when an engine is running. Be sure to wear proper safety equipment, and only do this in a well ventilated and warm area. Allow about 10 to 15 between coats for the paint to flash before laying another. We're probably going to do two or three coats on this to get it looking nice. Yours may require more or less depending on the condition of the steel and the type of paint you use. For the last coat of paint, we're going to go on a little thicker and let it sit a lot longer.
Again, this is a cylinder head. Don't be worried about imperfections in the paint, runs, fish eyes, the fact that you can see the texture of the rusted head underneath. It's really just to pretty it up a little bit, it's not like you're painting a body panel. Put the last coat on nice and thick to make sure we cover up any of the light spots. While the paint on the other side is drying, we'll redo this cylinder head the same way we did that one. Now we've got our bank two cylinder head, all stripped down. We'll allow our valves to soak in the meantime. Depending on the condition of your valves, the soak times will vary. We're going to let them sit while both heads are stripped and being painted. Take them out, clean them off, and if they need to, we'll soak them again, likely overnight. To give you an idea of why this is important, look at all the dirt and debris floating around just from the valves soaking without us actually scrubbing it or cleaning anything off. You can imagine how much dirt and debris really comes off of here when you wire them down.
We'll repeat this process on the rest of our valves. Now, we'll grind the valves to make sure that they seat and seal nicely to our cylinder head. You want to get some valve grinding compound onto the backside of the valve. We'll put a little engine assembly lube down into the valve guide to make sure that our valve moves nice and freely. Suction your valve grinding tool to it. You may need to wet the grinding tool to get it to suction to the valve appropriately, and then we're just going to spend some time working it back and forth. Make sure you rotate it around a little so that it grinds in in a full 360 degrees, because the valves do rotate while they're running. Once in a while, pull out the valve and wipe it off.
That is starting to cut in some, but we want three distinct layers in the bevel of the valve and the seat to make sure that it's ground in and sealing nicely. As with all things, there's always a faster way of doing this. We're going to coat the valve stem in grease, and some more valve grinding compound on the seat of the valve. Send it through. In our case, we'll be using a drill bit and a piece of rubber hose. Slide the rubber hose over the drill bit and the end of the valve stem, and then run it with the drill and tap it up and down while you do this. Add compound as necessary. This is especially important that you don't use too much with this method, because you'll just send it flying everywhere.
Occasionally remove the hose and the valve, clean it off, and take a look at your cut. You can see there's no strong cut definition to the uncut valve, it's just blurred coloring, there's no obvious layers that was on our cut valve while we do have some minor pitting we'll want to clean up. You can distinctly see the three cuts. The same is true of the seats.
We'll repeat this process on all of our valves, clean the head out thoroughly again to remove any compounds from the head, and then reinstall our valves. Wash out all of the valve seats and ports one more time to get all the valve grinding compound out of there. That stuff is pretty aggressive and it is not something you want running through this engine. Using a pair of side cutters, pop all of the valve stem seals off of the head. We'll start with our cylinder one exhaust valve. All we're going to do here is take our freshly cleaned and ground valve and I'm secretly going to clean it because I haven't done that yet. Place that valve into the guide, it's okay to let that sit down a little. We'll put some assembly lube on there. This is because we've cleaned all the oil and residual residue ut of the head by taking it apart and cleaning it with our mineral spirits. This lubricant is just going to make sure that the part is lubricated until engine oil gets through there and starts doing its job. We'll get a thin coat on there, and a little more on the top. That's going to help seat our new gasket, which we'll carefully slide onto the stem.
We'll then take a 12mm impact socket or anything else you have that fits over there nice on the edges and not the rubber portion of the seal. A rubber mallet. Just tap that on until it bottoms out. Once that new seal is in, we can push our valve up, reinstall our spring and retainer, clamp them down with our spring tool. We'll then slide our valve keepers into the opening on the retainer. Lift up to engage them and then let the pressure off our spring. We now have a properly sealed and functioning valve again. We'll repeat this process all the way down the cylinder head until we have everything back in place. You can now reinstall the cylinder onto this side of the block.
Thanks for watching. Visit us at 1AAuto.com for quality auto parts, fast and free shipping, and the best customer service in the industry.
Shop Products

How to Replace Intake Manifold Gasket 1999-2003 Pontiac Grand Am PART 2
This video will show you how to replace the intake manifold gasket on your 99-05 Pontiac Grand Am. Part 2.
