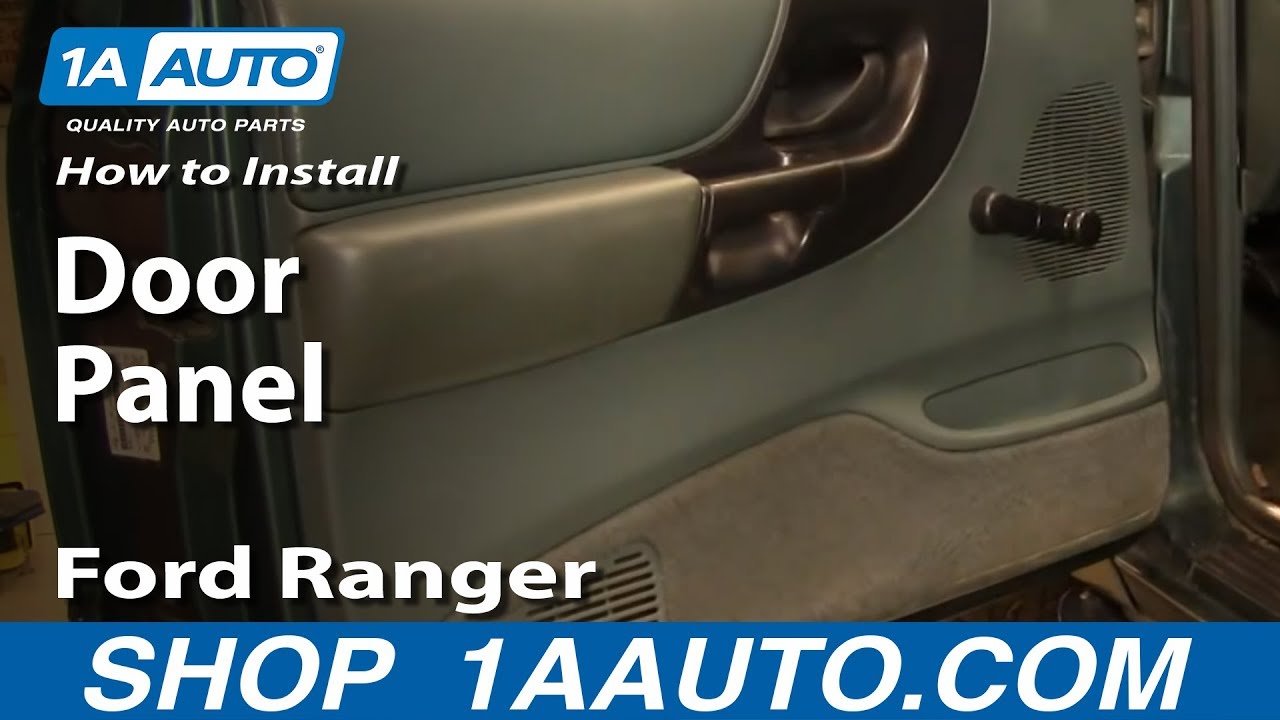
How To Remove Door Panel 1993-97 Ford Ranger
Created on: 2011-10-17
If the door panel is busted or broken, or you need to access other components like the window regulator, this video will show you how to remove and install
-
step 1 :Removing the Door Panel
- Pry off the window crank screw cover with a flat blade screwdriver
- Remove the T20 Torx screw from the window crank
- Pull off the window crank
- Remove the two Phillips head screws behind the door pull
- Pull off the door pull panel
- Remove the Phillips head screw behind the door pull panel
- Remove the Phillips screw at the bottom of the door panel
- Lift the door panel up and off
-
step 2 :Reinstalling the Door Panel
- Lift the door panel into place
- Insert the Phillips screw at the bottom of the door panel
- Insert the Phillips head screw behind the door pull panel
- Push on the door pull panel
- Insert the two Phillips screws behind the door pull
- Snap on the window crank
- Insert the T20 Torx screw into the window crank
- Push on the window crank screw cover
Tools needed
-
Flat Blade Screwdriver
T20 Driver
Phillips Head Screwdriver
Brought to you by 1AAuto.com, your source for quality replacement parts and the best service on the Internet.
Hi, I'm Mike from 1A Auto. I hope this how-to video helps you out, and next time you need parts for your vehicle, think of 1AAuto.com. Thanks.
In this video, I'm going to show you how to remove and put back on the door panel on this 1996 Ford Ranger. This truck has manual windows and no power locks or anything like that. The only tools you'll need are flat blade screw driver, Phillips screw driver, and a T20 Torx driver.
I'm actually going to go right in behind, and with a screwdriver pry out lightly. See, this comes out. I want a T20 Torx screw driver. We'll fast forward as we remove that screw and take that crank handle off.
Underneath here, you can see there are two Phillips screws. You want a smaller number 1 screw driver. Fast forward again as we remove those two Phillips screws. Now, you want to pull your panel right off. Then there's another Phillips screw right here. There's a screw at the bottom of your door panel. You might have to dig through your rug a little bit to get at it. Remove it. Take, now, the panel, lift it up, and take it off.
Put the door panel back on. Put it on, and clip it over your door lock first. Push it into place and down. Put this screw in first. Take this a little line-up tab right down here. Make sure that goes in. Fast forward through putting those two Phillips screws back in. You want to tighten those firm but don't over tighten them. There's a little washer on the window crank tool. Put that into place with the T20 Torx screw.
We hope this video helps you out. Brought to you by www.1AAuto.com, your source for quality replacement parts and the best service on the Internet. Please feel free to call us toll-free, 888-844-3393. We're the company that's here for you on the Internet and in person.

How To Remove Front Door Panel 2002-05 Mercury Mountaineer
How to remove or replace the interior door panel trim on your vehicle. You need to remove the door panel for a number of different repairs, for example door handles, window regulators, power window motors, door locks and more. This video, will help you do this on 02, 03, 04, 05 Mercury Mountaineer
