How To Remove Front Door Panels 1994-2001 Dodge Ram
Created on: 2011-09-16
In this video, 1A Auto shows you how to remove and replace the front interior door panel trim in a 94-01 Dodge Ram.
-
step 1 :Remove the door panel
- Remove the 10 mm bolt in the inside door handle.
- Unscrew the three Phillips screws in the door pull.
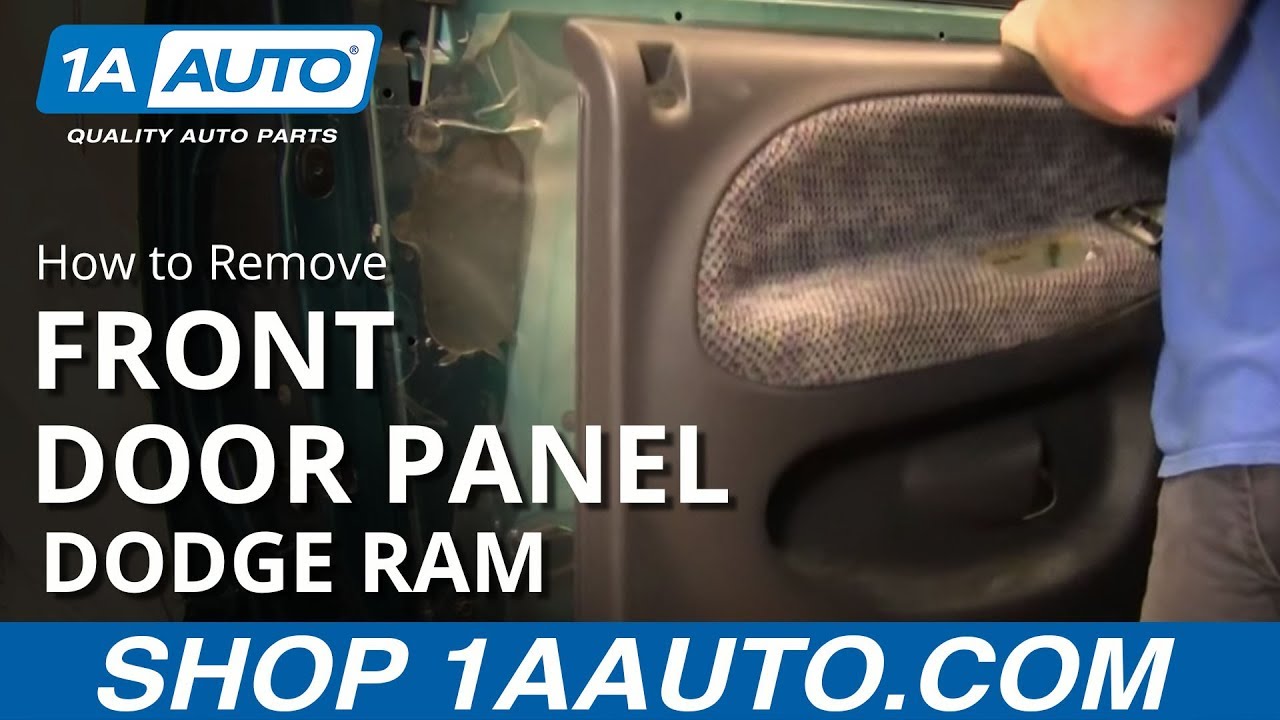
- Use a putty knife to pry off the door panel.
- Unplug the wiring harness.
-
step 2 :Put the door panel back on
- Clip the door panel in, threading the wiring connectors through the door pull.
- Fasten all the Phillips screws.
- Plug in the wiring harness to the switch panel.
- Clip the switch panel and top of the door pull down.
- Connect the door latch with the lock and latch rods.
- Secure with a Phillips screw.
- Clip the triangle panel down.
Tools needed
-
Socket Extensions
Flat Blade Screwdriver
Phillips Head Screwdriver
Putty Knife
Ratchet
Needle nose pliers
Brought to you by 1AAuto.com, your source for quality auto replacement parts and the bets service on the internet. In this video, we're going to show you how to remove and reinstall the door panel on this '98 Dodge Ram, same as any '98 to '01 and similar to the '94 to the '97. Tools you'll need are a 10 millimeter socket with ratchet and extension, a Phillips screwdriver, and a putty knife or a door panel clip tool. You may use both, I do use both because the door panels are kind of on their tight, then a flat blade screwdriver as well as needle nose pliers if you have some issue with the door panel clips as I did.
We'll start out. Behind the door handle, there's a 10 millimeter or T30 Torx bolt and then two Phillips screws in the door pull cap and then a Phillips screw up at the top corner. We'll fast forward. We'll use a 10 millimeter socket with a ratchet and extension on the door handle bolts and then Phillips screwdriver on the other three screws. As you can see, the ones inside the pull cap can be a little bit challenging but we pulled through them. These panels are always or usually nice and tight against the doors. I start with just a putty knife and slice in and then slide it down. You'll feel a clip. You pull with both your hand on the door in the putty knife and you'll feel a pop a little bit. Then you take a door panel clip tool. If you don't have one of these, continue with your putty knife. Stick it in. Feel for another clip. Pull it out. Pull it up in. You want to keep repeating. You repeat pulling those clips all the way around the edge of the door, up the back and then also back up the front. Now here, I'm reaching up.
There are a couple of clips kind of up the top, more towards the center of the door panel. You can reach up in like that, try and get them with a clip tool or just pull the door panel from the top. Once you're on the back side here, there's a little button. It will be easiest to take a flat blade screwdriver. Push down on the button. Pull out on your lead. Then up here your mirror switch, there's a button right on the inside. Pull it up and out. It comes off. I could see here surprisingly none of my clips came out so I'm going to use my door panel clip tool. Now, I'll use the needle nose pliers. Pull them the rest of the way out. Then you either go on like that or slide in like that. On the back side, you could see we replaced all our clips. Put it into place. Connect our mirror first. Connect the power window switch. Then we'll replace our locks through. You can kind of peek behind to make sure the pins are lined up with the hole and then just push them in all the way around. Just kind of speed up, put in that top screw. I apologize I didn't do a very good job filming that. Just kind of in the way. Then put in your door pull cap and replace the two screws for that. Once that's done then you take your door handle and your 10 millimeter bolt, put that back in. Tighten it nice and firm then you should be all set.
We hope this helps you out. Brought to you by www.1AAuto.com, your source for quality auto replacement parts and the bets service on the internet. Please feel free to call us toll-free, 888-844-3393. We're the company that serves you on the internet and in person.

How to Diagnose Fix a Vehicle That Doesnt Have Heat
How to diagnose a vehicle that does not have heat.
