How To Remove Fuel Tank 1991-96 Buick Regal PART2
Created on: 2012-10-15
This is the second part of how to change the fuel tank on your 88-96 Buick Regal. Check out 1AAuto.com for the first half of the video!
-
Continuing the Repair This is Part 3 of a three-part video Please consult Parts 1 and 2 for prior instructions Perform the steps outlined in Parts 1 and 2
step 1 :Removing the Old Gas Tank Straps
- Spray penetrating oil on the gas tank strap bolt
- Remove the bolt with a 15mm wrench
- Put the bolt in a vise and remove the clip
- Put the new straps halfway in place
- Loosely tighten the 15mm bolts two or three turns
-
step 2 :Installing the New Gas Tank
- Insert the gas tank in place
- Start to jack up the fuel tank correcting the position
- Connect the wiring harness on the gas tank
- Jack up the fuel tank
-
step 3 :Reconnecting the Fuel Lines
- Insert the first 15mm bolt into the gas strap
- Tighten the fuel filler hose and the fuel vapor hose clamps
- Connect the fuel filter line and push its bracket in place
- Connect the two fuel lines
- Insert a few gallons of fuel into the tank
-
step 4 :Testing the Fuel Pump
- Connect the fuel pump relay
- Turn on the vehicle to see if the fuel pump comes on
- Start the engine
- Turn the vehicle off
- Check underneath the car for any leaks
-
step 5 :Reinstalling the Gas Tanks Straps and Exhaust
- Pry down on the exhaust a little with a pry bar
- Tighten the second 15mm bolt to the remaining gas tank strap
- Finish tightening the gas tank straps
- Insert the heat shield and replace the 7mm bolts
- Insert the exhaust pipe into place
- Replace the exhaust pipe hangers
Tools needed
-
15mm Wrench
Flat Blade Screwdriver
Pry Bar
18mm Wrench
Jack Stands
Floor Jack
Brought to you by 1AAuto.com, your source for quality replacement parts and the best service on the Internet.
Hi, I'm Mike from 1A Auto. I hope this how-to video helps you out, and next time you need parts for your vehicle, think of 1AAuto.com. Thanks.
This is Part 3 of a three-part series: Removing a gas tank; replacing the setting unit and fuel pump; re-installing. This is the Re-installing part. We're doing this on a '96 Buick Regal. It's the same as any '91 to '96 Regal, Grand Prix, Cutlass Supreme, as well as the Lumina sedan.
To get the old straps out, I'm going to have to get the bolts that hold them. If I move those out of the way you can see the bolt right there. I'm going to go up in from behind and spray as much penetrating oil on the backside of that as I can get same thing on the opposite side. I'm going to get these straps off. I put a 15mm wrench on here, and then I'm going to use an 18mm to get myself some extra leverage. I'm going to fast-forward: on this one I used a wrench, and then hooked another wrench to it for some extra leverage. There's no great way with these straps because of where they are.
When they installed these tanks originally, they had the rear suspension out. This car is crusty and rusty as it is, so I didn't want to dare let the suspension down to try and get the straps out. You just have to go at it with wrenches, and it takes a little while. I'm doing this side, and I also took apart the other side. Another option is break the old straps off, and then that makes it sometimes a little easier to get to the bolts. Take these clips out, and then you can bring them down and free them up. I put the clip here in the vice. I can just take some penetrating oil, use a real wrench, nice and easy, get it nice and free so I can put the bolts in most of the way by hand once I'm under the car.
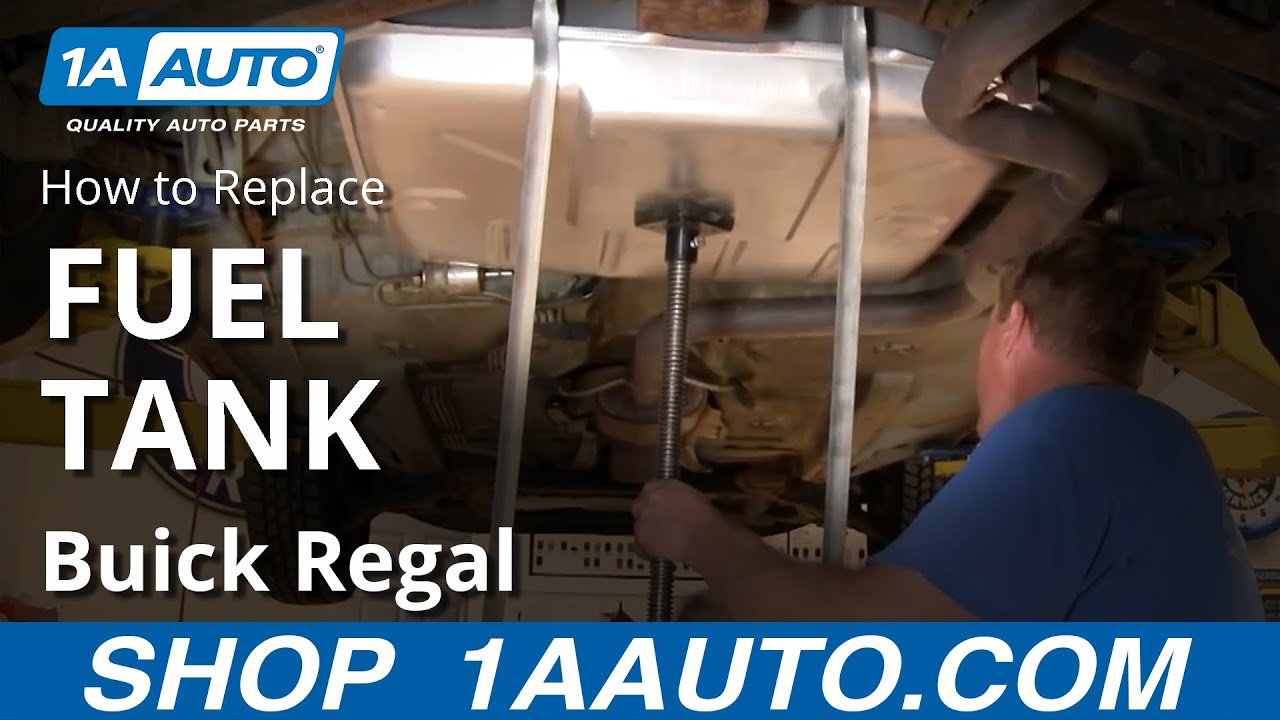
I reinstalled the straps loosely with the bolts only in two or three turns. You see I still have my jack underneath. I come underneath with the new tank right up there from the side, just like the old one came out, and start running it back up. Speed it up, here, as I get the tank going up in place. While the tank is still kind of hanging down some I'm going to reach up in here, and I can connect my smaller hose. Make sure it's on there nicely, and then also the larger hose has enough slack that I can push it on. Fast-forward again here as I continue to raise it. Check around. Make sure the tank is going up straight up and into place. It's not getting caught on the exhaust pipe or fuel filter or anything like that.
I'm going to reach up here to pull my hook connection over. Reconnect that. Speed it up here, again, as I just finish up raising the tank into place. Make sure you jockey it into position correctly. This next step is probably the most physically demanding. You're starting the front strap bolt in, but it usually requires quite a bit of force to get the bolt up into the clip. If you're doing this on your driveway, lying on your back and kind of bench-pressing the wrench up is probably the way to go. The tank tends to wander forward a little bit so I'm going to try and push it back. I bring my bolt up in, push it right in, start that in.
Before I go any further I re-connect my filler neck and as well that other tube, the vent tube, and tighten those clamps up. Here I'm going to reconnect my fuel filter, then put its bracket back into place, and then re-connect the other two lines to the front. I know I only have one strap on there, and that strap is not even tight. I'm just putting in a few gallons, and then I'm going to plug the fuel pump relay back in, and do a test to make sure the fuel pump is working and all our systems are working okay.
You heard me turn the key on, and the pump came on. I did it again, and now I'll start the car and let it run. A running car is a very good sign. Go underneath, check for any leaks, and then finish up.
Here you can see how my jack is supporting the strap and the tank at the same time. I'm using an air ratchet because it's a lot easier to get in. I want to get an extension past that pipe so you can see I'm using a crowbar to pry the pipe down and get my wrench up in there; but then I push up and hold them tight which pushes up on the wrench, which then pushes up on the bolt which goes into the clip. At this point I can tighten up the bolts on the front strap. You'll take your 15mm wrench and go in from the back.
This is the most time-consuming and monotonous part of the whole repair. It took me almost as long to tighten these two bolts as it did to do everything else. You get the wrench in there and can turn it about an eighth turn at a time. You turn a little bit, turn the wrench over, re-position it, and just keep repeating. This is probably the worst part of the repair. It might be the part where you start asking yourself why in the world am I doing this. If you stick with it you'll get through it.
Back up at the front once you've got the straps all tightened up, make sure your lines have plenty of room coming through. There's usually a little indent in the body so they come through. Make sure you transfer the little rubber pad from the tank. That protects the edge of the tank from chafing those lines. Then put the heat shield back in place above the exhaust pipe. Put the three bolts in place, the 7mm bolts that hold it. I did remove the little doughnut hangers that hold the exhaust pipe up so I could pry it down. I'm just replacing those.
We hope this video helps you out. Brought to you by www.1AAuto.com, your source for quality replacement parts and the best service on the Internet. Please feel free to call us toll-free, 888-844-3393. We're the company that's here for you on the Internet and in person.
Shop Products


Chevrolet Buick Pontiac Olds 2 Piece Fuel Tank Strap Set TRQ FSA07874
Part Details:
- 2 in
- 39.875 in
- 2 in
- Black
- 2
- 39.875 in
- No
- 2 Piece
- (2) Fuel Tank Straps

How To Replace Fuel Tank 1983-97 Ford Mustang PART 2
As part 2 of a 2-part video, this video will show how to prep and install and a new gas tank in 83-97 Ford Mustangs
