
How to Replace 130 Amp Alternator 2002-05 Mercury Mountaineer
Created on: 2014-10-11
Watch this video for detailed instructions on how to replace the alternator on your 02-05 Mercury Mountaineer.
-
step 1 :Disconnecting the Battery
- Disconnect the negative battery cable with an 8mm socket and ratchet
-
step 2 :Disconnecting the Radiator Hose
- Remove the two 11mm nuts from the engine cover
- Pull the engine cover up and off
- Unclip the hose from the engine cover
- Have a drain pan ready
- Loosen the radiator hose clamp with pliers
- Pull off the radiator hose
-
step 3 :Removing the Serpentine Belt
- Attach a 1/2" ratchet to the serpentine belt tensioner
- Turn the tensioner to loosen the belt
- Have an assistant pull the belt off the alternator
- Slowly release the tensioner
-
step 4 :Removing the Alternator
- Disconnect the alternator wiring harness
- Pull back the alternator wire boot
- Remove the 10mm nut from the alternator wire
- Remove the four 10mm bolts from the alternator bracket
- Loosen the two 10mm bolts from the bottom of the alternator
- Lift the alternator up and out
-
step 5 :Installing the Alternator
- Put the alternator into place
- Line up the alternator bracket
- Start the four 10mm bolts into the alternator bracket by hand
- Tighten the two 10mm bolts into the bottom of the alternator
- Tighten the four 10mm bolts into the alternator bracket
- Connect the alternator wiring harness
- Put the alternator wire into place
- Push on the alternator wire boot
-
step 6 :Installing the Serpentine Belt
- Attach a 1/2" ratchet to the serpentine belt tensioner
- Turn the tensioner to loosen the belt
- Have an assistant pull the belt onto the alternator
- Slowly release the tensioner
-
step 7 :Installing the Radiator Hose
- Push on the radiator hose
- Slide the radiator hose clamp on with pliers
- Press on the engine cover
- Fasten the two 11mm nuts onto the engine cover
- Clip the hose into the engine cover
-
step 8 :Connecting the Battery
- Connect the negative battery cable with an 8mm socket and ratchet
Tools needed
-
Flat Blade Screwdriver
1/2 Inch Ratchet
8mm Socket
Drain Pan
10mm Socket
Slip-Joint Pliers
Assistant
11mm Socket
Brought to you by 1AAuto.com, your source for quality replacement parts and the best service on the Internet.
Hi, I'm Mike from 1A Auto. I hope this how-to video helps you out, and next time you need parts for your vehicle, think of 1AAuto.com. Thanks.
In this video, we're going to show you how to replace the alternator on this 2003 Mercury Mountaineer with the 4.6 liter V8 engine and the 130-amp alternator. The items you'll need for this are a new alternator from 1AAuto.com; flat blade screwdriver; 1/2" socket bar or ratchet; and an 8mm, 10mm, and 11mm socket; and a pair of pliers.
Start off by loosening up this 8mm bolt for your negative battery cable and pulling the negative battery cable free. Then, remove these two 11mm nuts. Lift the engine cover up and off. Then open up the clip on the back and pull the hose free.
Using a pair of pliers, just push the teeth together on this hose clamp and slide it back. Then twist that hose free. You may get some coolant coming out here so you want to have a drip pan underneath. Now it helps to have an assistant here because you now have to remove the belt from the alternator. Using a 1/2" ratchet or socket bar, just reach up here and stick it into the tensioner. If you don't have an assistant, you can just remove the belt from down here, but then you're going to have to go through the process of putting the belt on all the pulleys again. Just loosen it up with a piece of pipe for some extra leverage, and have your assistant just pull it off the alternator and carefully release the tensioner. Then lift up on this tab on this harness and disconnect it. Pull back this boot and then remove this 10mm nut. You just pull the wire off and set those aside. Then remove these four 10mm bolts and loosen these two 10mm bolts down here on the bottom of the alternator. We'll fast forward as Mike Does that. Now the alternator will lift up and out.
On the left, is the old alternator. On the right, is the new one from 1A Auto. You can see they're identical and they'll fit exactly the same. Take your new alternator and we're just going to put our old one back in because it worked perfectly fine. Just put it back in. Set it down onto those lower bolts. Line up the bracket and replace those four 10mm bolts. Then you want to just get them started by hand first. Then you'll want to tighten up the two lower bolts. Then after you tighten the two lower bolts, tighten up the top bolts. Reconnect this harness. Put this wire back in place and replace that 10mm nut and tighten it up.
We're ready to put the belt back on. Just take a check, look down, and make sure that the belt is still around the crank pulley way down here. Remember your belt diagram is here so just check it. Now again, if you have an assistant, have them hold the belt while you go down below and loosen up the tensioner. If your belt does fall off, then you can refer to our serpentine belt video for this same vehicle and see how to put it back in place. Once you loosen the tensioner, have your assistant put it back onto the alternator. Then slowly release the tension on the tensioner and remove your ratchet.
Take this hose and push it back into place. Then using your pair of pliers, just slide that hose clamp back up in place. If it doesn't pop open on its own, use a flat blade screwdriver to just hit the tabs separately. Take your cover, push it back down into place. Make sure those clips push back in. Then replace those two 11mm nuts and tighten them up. Then push that hose back into the clip and close the clip. Reconnect your negative battery cable and tighten it back up. Then you're all set.
We hope this video helps you out. Brought to you by www.1AAuto.com, your source for quality replacement parts and the best service on the Internet. Please feel free to call us toll-free, 888-844-3393. We're the company that's here for you on the Internet and in person.
Shop Products
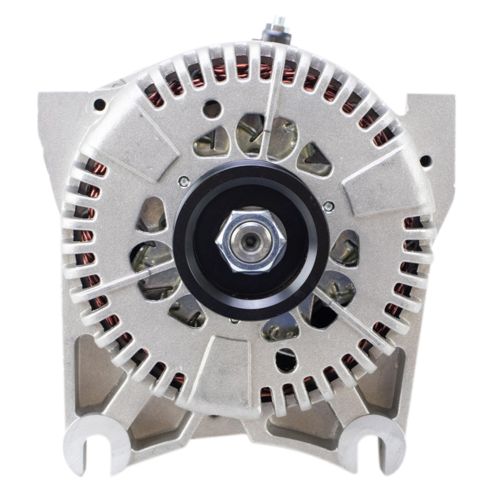
Ford Lincoln Mercury Alternator TRQ ALA94451
Part Details:
- Yes
- 12 VDC
- 130 A
- Serpentine
- 6
- 30.5 mm
- FORD
- Clockwise (Right)
- No
- No
- Internal
- Yes
- No
- 39.5 mm
- 1.22 in
- 1.57 in

How to Replace Alternator 1996-99 Buick LeSabre
Check out this helpful video from 1A Auto on how to replace the alternator on your 96-99 Buick LeSabre.
