
How to Replace a Radiator Fan 2001-05 Honda Civic
Created on: 2016-05-03
This video will show the instructions for removing the cooling fan, including steps for draining and refilling the coolant
-
Before starting this repair, make sure that your engine is cool
step 1 :Draining the Coolant
- Make sure the engine is cool
- Place a drain pan beneath the coolant drain plug
- Twist the coolant drain plug
- Let the coolant drain
- Remove the radiator cap
-
step 2 :Removing the Battery
- Loosen the negative battery cable with a 10mm wrench
- Loosen the positive batter cable with a 10mm wrench
- Pull the clip from the mounting bolt
- Remove the mounting bolts with a 10mm wrench
- Remove the battery mount
- Remove the battery cover
- Lift the battery up and out
- Remove the lower battery retainer
-
step 3 :Removing the Coolant Overflow Bottle
- Remove the 10mm bolt from the coolant overflow bottle
- Lift the reservoir up and out, unclipping the hose as you go
- Pry off the retaining clip from the lower hose
- Twist and pull the hose off
-
step 4 :Removing the Radiator Cooling Fan
- Place a drip pan underneath the coolant hose
- Remove the 10mm bolt from the ground wire
- Loosen the coolant hose clamp with pliers
- Remove the coolant hose
- Remove the two 10mm bolts from the radiator fan assembly
- Disconnect the fan assembly wiring harness
- Disconnect the coolant temperature sensor
- Pull the radiator fan assembly up and out
- Remove the center cover from the old fan
-
step 5 :Installing the Radiator Cooling Fan
- Insert the center cover to the new fan
- Insert the cooling fan down into place
- Connect the fan wiring harness
- Tighten the 10mm mounting bolts to the top of the fan
- Reconnect the coolant temperature sensor
- Insert the coolant hose into place
- Tighten the coolant hose clamps
- Tighten the 10mm ground bolt
-
step 6 :Reinstalling the Coolant Overflow Bottle
- Insert the hose into place
- Tighten the hose clamp to the hose with a pair of pliers
- Clip the hose to the bottle
- Insert the coolant bottle into its slot
- Tighten the 10mm bolt to the bottle
-
step 7 :Installing the Battery
- Insert the lower battery retainer
- Insert the battery into place
- Replace the battery cover
- Insert the battery mount into place
- Reinstall the 10mm bolts
- Connect the positive battery cable with a 10mm wrench
- Connect the negative battery cable with a 10mm wrench
-
step 8 :Refilling the Coolant
- Tighten the drain plug
- Insert a funnel into the radiator opening
- If you are reusing coolant, filter the coolant with a t-shirt
- Replace the radiator cap
Tools needed
-
Flat Blade Screwdriver
Phillips Head Screwdriver
Rust Penetrant
10mm Wrench
10mm Socket
Ratchet
Brought to you by 1AAuto.com, your source for quality replacement parts and the best service on the Internet.
Hi, I'm Mike from 1A Auto. I hope this how-to video helps you out, and next time you need parts for your vehicle, think of 1AAuto.com. Thanks.
In this video, we're going to show you how to replace your radiator fan, which is the passenger side fan. This is a 2003 Honda Civic, same for 2001-2005 Civic. Items you'll need include a new radiator fan from 1AAuto.com, a 10mm wrench or socket ratchet extensions, Phillips and flat-head screwdrivers, standard pliers, penetrating oil, and a 10mm wrench.
Loosen your negative battery cable with a 10mm wrench. Pull it up and off and remove it. I've got a larger wrench to hold on to the bolt from this side. Then loosen it up and disconnect your positive cable second, pull it off, and you just kind of push them down so they don't come back and hit the battery. 10 millimeter bolt to remove here, and then a 10 millimeter nut here.
We're lucky enough. I did spray it down, but the way it was put together is actually just a hook at the bottom, so you can unhook that and pull the retainer up and off. Then, this little protective cover comes up and off as well.
Now you can lift your battery up and out. Remove the rest of your battery retainer.
There's a 10 millimeter bolt holding the reservoir right here. Remove the bolt with your socket, and ratchet, and extension. Lift it up and out, and just un-clip the hose as you go. Okay, there's just a little wire clip. Sometimes you can actually just use your fingers and pull it off towards the bottle, and then a pair of pliers will help you just break this hose loose. Then twist and pull it off.
We're going to remove this 10 millimeter bolt to remove the ground strap and get it out of the way, then use pliers to pinch the clamp, remove this hose, and pull it up out of the way. Then, there's two 10 millimeter bolts that hold the fan assembly: one here, and then one back over here. Then you want to disconnect the connection as well. Just a tab here to press. Sometimes you pull this. It should slide down and off, but press the connector and disconnect.
10 millimeter socket with the ratchet extension. Pair of pliers, squeeze the clamp, pull it back, twist the hose to break it free, pull it off. You may want to have a drip pan underneath, just to make sure no coolant comes out and drips on the floor.
Now we'll remove the two bolts that hold the fan. Anything that you can do to give yourself a little more space, which one thing is to disconnect this coolant temperature sensor. Just has a tab on the side. Press the tab and we'll pull it off. I just pulled the hose up out of the way.
The fan pulls up, and then you can slide it some to the side. You may have to reach down and push your lower hose a little bit. It's just a kind of matter of working it out.
The original part from the vehicle, new part from 1A Auto. You can see they're exactly the same. Just pull this cover off and slide it onto the new one, and it's ready to install.
Two pegs on the bottom here go down into the holes here. Pull the coolant hose and your lead up and out of the way. Put your fan down in kind of diagonally.
Just a matter of push on the lower hose a little bit, and continue to feed it down in. Then, this upper corner, you just have to get around the brace. To get this around, just move it out a little bit. A little bit of force, push it in behind, and then it kind of goes down in. Make sure this hose that goes to the coolant bottle's out of the way. Then you just have to kind of lift it up and try to feel for, you can kind of reach down there, feel one of the pegs, feel for the hole, and get it to slide down in place. Once you do that, the holes should line up pretty well with the holes in the radiator to mount. Connect the connector.
Then, this bolt goes in. 10 millimeter socket and ratchet with an extension, just tighten them up. Plug in your coolant sensor. Put your hose back on, and refit the clamp. Put your clamp strap back into place.
You may not need to take off the ground strap, but ours was in kind of rough shape, so we didn't want to hurt it anymore. Put the clip in place, hose down on. Again, a lot of times you can just use your fingers on this clip. Sometimes, you might want to use a pair of pliers. Lower it down in place, clip the hose in as you go. There, this one goes in there. Down in, and then clip this in up here.
There's a tab here, on your bottle, and that tab goes down into a slot right here. Replace the 10 millimeter bolt.
Battery in place; put this down in. The hook goes down and in. Reinstall your 10 millimeter bolt, and tighten it up. Reconnect your positive cable first and then your negative cable. Tighten up, and tighten.
Thanks for tuning in. We hope this video helped you out. Next time you need parts for your car, please visit 1AAuto.com. Also check out our other helpful how-to and diagnosis videos.
Shop Products

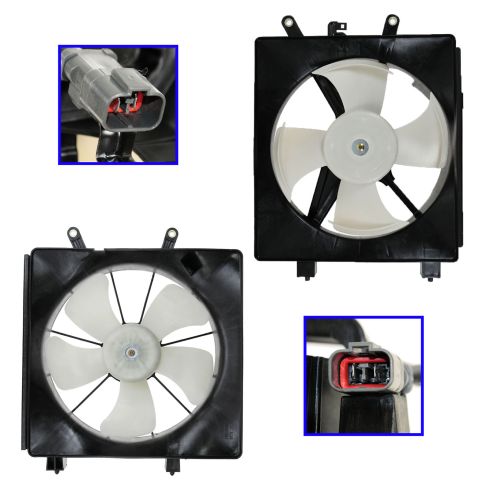
Honda Civic Engine Cooling Fan Assembly with A/C Condenser Cooling Fan Assembly 2 Piece Set TRQ RFA81509
Part Details:
- 2 Piece Set
- (1) Radiator Cooling Fan Assembly
- (1) A/C Condenser Cooling Fan Assembly

How To Replace Radiator Cooling Fan 2002-06 Nissan Altima
Replacing the radiator cooling fan? This repair is not as complicated as you might think. Learn to do it yourself with this video!
