How to Replace ABS Speed Sensor with Harness 1999-2004 GMC Sierra 2500
Created on: 2011-06-24
If a bad sensor is triggering the ABS light on your 99-04 GMC Sierra, you can learn how to replace it yourself by watching this 1A Auto video
-
step 1 :Remove the wheel
- Use a 21 mm socket to remove the plastic covers and loosen the lug nuts.
- Raise and secure the wheel and remove the lug nuts.
-
step 2 :Remove the brakes
- Unbolt the two bolts with your 18 mm socket and ratchet.
- Use a breaker bar if necessary.
- With a large screwdriver, pry the caliper apart and off.
- Unbolt the caliper bracket with a 21 socket.
- Pull off the brake rotor.
- Secure the brake caliper out of the way.
-
step 3 :Remove the ABS sensor
- Use an Allen wrench and a pair of pliers to unbolt the ABS sensor.
- With an adjustable wrench, disconnect the ABS sensor cable from the strut.
- Disconnect the wiring harness and the ABS sensor.
-
step 4 :Install the new ABS sensor
- Plug the ABS sensor into the wiring harness and anchor the cable back down using an adjustable wrench.
- Bolt down the ABS sensor to the hub.
-
step 5 :Reinstall the brakes
- Mount the brake rotors.
- Put the caliper brackets back on and bolt down with a 21 mm socket.
- Torque the caliper brackets to 110 ft lbs
- Using a large flat blade screwdriver to pry open the caliper enough to get it mounted onto the caliper bracket.
- Torque the 18 mm caliper bolts to 85 ft lbs.
-
step 6 :Put the wheel back on
- Put the wheel on and hand tighten the lug nuts.
- Lower the vehicle
- Use a star pattern to torque the lug nuts to 120 ft lbs.
Tools needed
-
Adjustable Wrench
21mm Socket
Flat Blade Screwdriver
8mm Allen Wrench
18mm Socket
Slip-Joint Pliers
Ratchet
1/2 Inch Breaker Bar
22mm Socket
Brought to you by 1AAuto.com, your source for quality replacement parts and the best service on the internet.
I'm Mike Green. I'm one of the owners of 1A Auto. I want to help you save time and money repairing and maintaining your vehicle. I'm going to use my 20 plus years of experience restoring and repairing cars and trucks like this to show you to correctly to install parts from 1AAuto.com. The right part installed correctly, that's going to save you time and money. Thank you, enjoy the video.
In this video, we are going to replace the front ABS harness on this 2002 GMC Sierra, same as most of these vehicles from '99 to '06. These can get broken, you can hit an obstruction, and the harness can get torn or they can just sometimes wear out and break over time. We shall need our 18, 21 and 22 mm sockets with the ratchet. You may need a pipe or breaker bar for some leverage on some of those bolts that are little difficult; Allen wrench and adjustable wrench, large flat plate screwdriver, and a pair of pliers.
Start out by using a 21 mm socket and just loosening the plastic retainers and taking off the hubcap if you have the style wheels. You want to raise and secure the vehicle if you are not working with air tools like I'm, then loosen the lug nuts for the wheels on the ground, then raise it with a jack, support it with a jack stand and remove the lug nuts rest of the way and remove the tire.
Okay we are going to remove the caliper, which is two 18 mm bolts; one there and one up here. I'm going to speed things along here and you can see I'm able to get those bolts with the ratchet on. You might want to use a pipe to give you a little extra leverage. I will show that in the next step, and then I actually go to the air tools to get the bolts off the rest of the way. Then I pick a screwdriver; put it in this hole in the caliper here; prying out the caliper. This forces the piston back while I get the caliper up and off. Then you got to take off this caliper bracket, which involves taking off these two bolts here.
Okay fast forward again. You all notice I have a pipe there, that's for some extra leverage on these bolts. These are 21 mm bolts in size and we will just fast forward through me taking them out. Then you are going to pull your brake rotor right off as well. The brake rotor has threaded holes here. If you couldn't get it off, it doesn't pull off, you want to use an M10 or M12 7 cm long bolt and you put the bolts in there and that forces the rotor off. Here I'm just taking one of my bolts and my caliper bracket and just threading it in on a few turns and then putting my brake caliper back on just kind of threading that bolt in and putting on a few turns. This just puts the caliper on a safe place while I'm working.
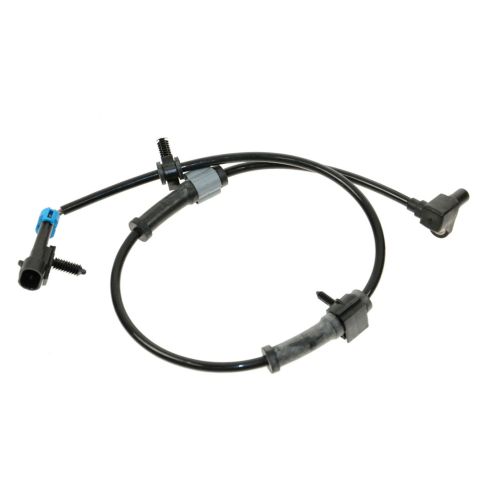
You need to get here; here is your sensor, the end of your sensor right here. Now I'm going to take an Allen wrench, put it in that bolt that's holding the sensor or adjustable wrench. This whole things is leveraged on this power wrench. This is the bolt, pair of pliers where I want the sensor, pull it up and out. Pull the sensor up and out. Pull this off for a second, put your sensor right up through there. Now using one of these pair of pliers and force these clips out. There is one more up here. It comes out and then right here near your shocks. Right up here near your shocks for the connectors, use a screw driver, pry the pin up and out and very carefully cut the bottom side and over here, the bottom side, all right unplug it. I think here is my old sensor. New sensor from 1A Auto you can see has all the same hooks and connectors.
Start up here and push it back in just like before, put this heat shield down around it, pick the shock, wrap the heat shields down, press it down in. Press that in. Here this pin didn't actually come out. That probably needs a little punch. Punch that through. Down in, that goes in there. Put that right through; just make sure you clean the sensor off. Guide that sensor into the hole with my thumb and then down in. Allen wrench and the screw. I'll just speed it up here as we screw in with the Allen wrench and then use the adjustable wrench to tighten it up and continue with the fast motion as we take that bolt that was holding the caliper, put the caliper up, and put the bracket back on, thread the bolts in and then preliminarily tighten them.
Torque these to a 110 foot pounds and put the brake shoes back on here. Now bring that calipers down and start those long bolts in. You want to make sure that those are nice and clean and have some grease on them because the caliper needs to slide back and forth on those bolts. Torque these caliper bolts to 85 food pounds. Fast forward again here as we hoist the tire up on. You want to start all lug nuts by hand first and then I just use the air ratchet or the impact wrench just to tighten up the lug nuts preliminarily. I don't tighten them all the way up until the vehicle is on the ground.
The wheel works to 120 foot pounds. Again we will speed up here and you can see that kind of cross into the opposite lug nuts and then afterwards I actually go around one by one and just make sure they are all torqued. Okay now put the cap back on and then please stay with it for one more very important step. Make sure that whenever you are taking your brake spare parts that before your drive your vehicle, you pump your brakes so much times and then do test it up before road testing it.
We hope this helps you out. Brought to you by www.1AAuto.com, your source for quality replacement parts and the best service on the internet. Please feel free to call us toll free, 888-844-3393; we are the company that serves you on the internet and in person.
Shop Products


How To Replace ABS Sensor and Harness 1992-95 Honda Accord
A damaged ABS sensor can turn on your ABS light or cause system malfunction. Maintain safe operation in your 92-95 Honda Accord with help from this video.
