How to Replace Accelerator Pedal Position Sensor 2007-11 Chevy Silverado 1500
Created on: 2015-09-11
Watch this video, and learn how to replace the throttle pedal and position sensor on your 07-13 Chevy Silverado and similar GM vehicles.
-
step 1 :Disconnecting the Battery
- Disconnect the negative battery cable with a 10mm socket and ratchet
-
step 2 :Removing the Accelerator Pedal
- Disconnect the pedal sensor wiring harness
- Remove the two T30 Torx screws from the accelerator pedal
-
step 3 :Installing the Accelerator Pedal
- Insert the accelerator pedal into place
- Tighten the two T30 Torx screws to the accelerator pedal
- Connect the pedal sensor wiring harness
Tools needed
-
10mm Socket
Ratchet
Brought to you by 1AAuto.com, your source for quality replacement parts and the best service on the Internet.
Hi, I'm Mike from 1A Auto. I hope this how-to video helps you out, and next time you need parts for your vehicle, think of 1AAuto.com. Thanks.
In this video, we're going to show you how to replace the accelerator pedal and the pedal also has a position sensor in it. This is a 2011 Chevy Silverado. This is the same for many GM trucks and SUVs of this time period, basically 2007 to 2013.
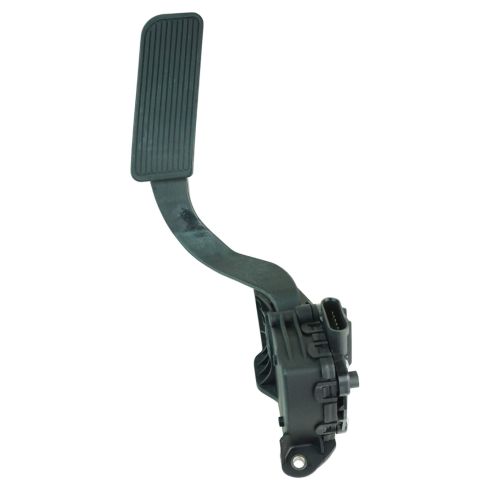
For a pedal that's going bad, you can have hesitation in your vehicle where it's not quite getting full power and things like that. Even if a sensor really goes bad, then all your traction control and service ABS and all that stuff, all your lights will start flashing. You'll need a new accelerator pedal and sensor from 1AAuto.com, a 10 millimeter socket, T30 Torx driver or socket, and a ratchet and extension.
To start off, your battery is located on the passenger side, rear of the truck. You want to disconnect the negative battery cable, loosen up that 10 millimeter nut, and pull that cable up and off and set it off to the side where it won't contact the battery post.
Most of you should know where the accelerator pedal is. It's held in by two T30 Torx screws, one there and then there is one basically opposite of it on top as well. Disconnect the lead by pulling out on the grey clip. Just work your fingernail under there and pull it back, then press the clip on the side. There's a tab on the side, press it in and pull the connector off. Then using a T30 Torx bit, I'm using a socket and ratchet, you could also use just a T30 Torx driver, remove the two bolts that hold these simply in place.
The new assembly from 1A Auto is going to be just like the old assembly. There are two tabs in the back that line up into holes in the mounting surface. Make sure those are lined up. Hold them in place. I found it easy just to start the top one first, get in a few turns, and then the lower one I kind of loaded to my Torx bit, inserted it into place, and started it. Tighten those up. You want to tighten them nice and firm; don't over-tighten them you don't want to strip the plastic out. Re-connect your negative battery cable by just reaching in there. Put it back on the post, push it down firmly, and then re-tighten that 10 millimeter nut.
Thanks for tuning in. We hope this video helped you out. Next time you need parts for your car, please visit 1AAuto.com. Also check out our other helpful how-to and diagnosis videos.
Shop Products

How to Replace Accelerator Pedal Position Sensor 2000-2006 Chevrolet Tahoe
This video shows you how to install an accelerator pedal & position sensor on your 2000-2006 Chevrolet Tahoe.
