How To Replace Air Shock 2007-14 Cadillac Escalade
Created on: 2020-06-01
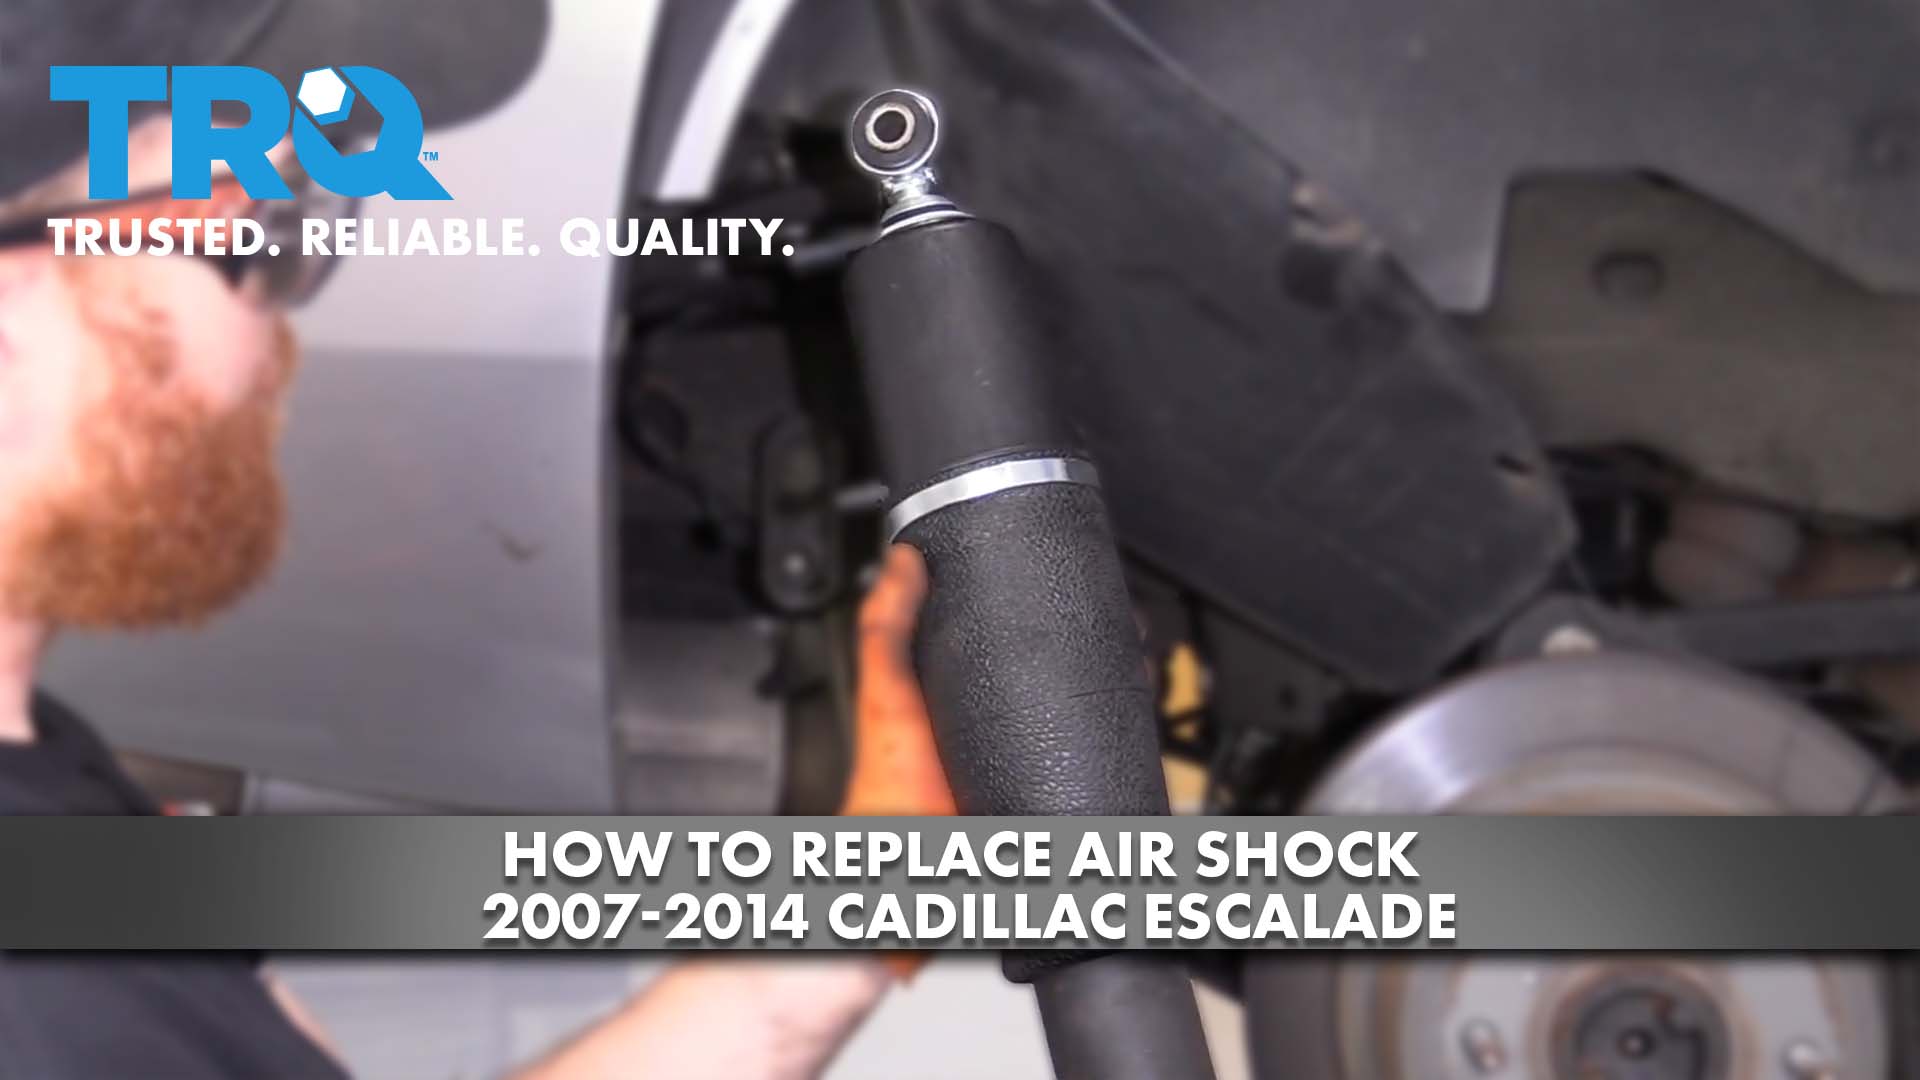
This video shows you how to install a new air shock absorber on your 2007-14 Cadillac Escalade.
Tools needed
-
Torque Wrench
Socket Extensions
Pry Bar
Jack Stands
Trim Tool Set
21mm Socket
21mm wrench
Socket Driver
Wheel Chocks
7mm Socket
Ratchet
Floor Jack
22mm Socket
All right. So, one of the first things you're going to want to do is raise and support the vehicle, so that the rear suspension is hanging. Once you've done that, you're going to carefully remove your center cover, and then behind that, you're going to remove your 22-millimeter lug nuts. Remove your wheel. The next thing we're going to do is remove some of the mounting area, right along here, so that we can move this away. You're going to use a 7-millimeter on the bolts, and then of course, just draw away the push clips.
There we are. I'm just going to move this, so we have a clear view of what's going on behind there. Now, with this pulled out of the way, we have a clear view of our connection points. You have your electrical connection and your air connection. Remove the pair. Nice small pocket screwdriver. You can come in here, and you can draw out the locking clip, and then take this right off of here. Take a peek. Set it aside. With this one right here there's a little tab up along the top. You can just usually grab onto that, and then draw the electrical aside. Take a peek. Make sure you don't see any funny colors.
The next thing we're going to do is just put light pressure on the rear differential to take pressure off of the rear shock. That should be good. Now, if you were to look at the shock, you're going to see the upper mounting nut with the bolt that comes through from the inside. All right, it's going to come in this direction. From the backside, we're going to use a 21-millimeter socket deep with a ratchet, and it's just going to be able to hold this. And then we'll take off the 21-millimeter nut. We'll leave this bolt in here for now, and we'll move along to the bottom. Now, I'm going to use a 21-millimeter to hold the nut right here, and we're going to loosen up this side. If the bolts don't want to come out, you can either raise or lower the pumpkin until it's nice and free. There we are. There we are. There it is, friends.
Now, it's going to be time to install our new shock. Take one of your bolts for the top. Come in just like this. Line it up, and then we'll come from the inside and then through. Hardest part is just getting it lined up. Once you do, it should be fairly easy. Push it right on through. We're not going to tighten that up yet because next we're going to set in the bottom.
So, now if you were to look, you're going to see that your shock sits much lower than the area on the differential, so you're just going to lower it down a little bit until it gets close. That looks pretty good. Bolt from the inside to the outside. Go ahead and start on that nut. Perfect. Let's get the top nut up on here. Make sure we have this in the forward motion, so it's going to hold it on for us. Let's go ahead and bottom that out. That's good. Now, we'll torque it to manufacturer's specifications. Let's torque this to 85 foot-pounds. [inaudible 00:04:32] down on that ratchet. Torqued. Do the same to the lower. Torqued. Now, if you got a little dielectric grease, I would just go right along this wired area right here. It's going to help keep moisture out of there. And then at the same time, I would go along this area right there. But be careful not to get anything inside of the hole. Let's connect in that electrical. Make sure it clicks in. Give it a nice little tug. Make sure it doesn't slide off. Take this one and give it a little wiggle. Slide it straight on. There we are. Now, we'll make sure we put in our locking clip. Give it a nice tug. Make sure it does not come off.
All right, so now it's time to re-secure this right here. We know we had a push clip there. Let's go ahead and put that back in. Another push clip down along the bottom right there, and now we'll finish it off with the bolts, one, two, and three. Now, it's going to be time to get the wheel back up on here. Go ahead and start on a couple of those lug nuts. Now, we'll bottom them out, and we'll torque them to manufacturer's specifications. Now, it's going to be time to torque the wheels. We're going to torque these to 140-foot pounds in a crisscross pattern.
Torqued. Now, it's going to be time to install our center covers. If you were to pay attention to the back, you're going to see something that looks a lot like a valve stem. Line it up with the valve stem on your wheel, and then give it a light bonk. Clean up your wheel. Take it for a road test.
Shop Products


Chevrolet GMC Cadillac Front & Rear 5 Piece Suspension Kit TRQ PSA52596
Part Details:
- 5 Piece
- (2) Rear Passive Air Shocks
- (1) Air Ride Suspension Compressor
- (2) Front Magnetic Ride Control Shock & Spring Assemblies

How to Replace Rear Shock 2000-13 GMC Yukon
Watch this video to learn how to install new rear shock absorbers on your 2000-06 GMC Yukon.
