
How to Replace Alternator 1991-98 Jeep Cherokee
Created on: 2016-12-01
Learn how to replace the alternator on your 91-98 Jeep Cherokee with detailed step-by-step instructions in this 1A video!
-
step 1 :Disconnecting the Battery
- Loosen the 13mm nut on the negative side
- Remove the negative terminal
- Repeat the process for the positive side
-
step 2 :Removing the Serpentine Belt
- Familiarize yourself with the route of the serpentine belt
- If there is no belt diagram, draw your own
- Loosen the 15mm bolt on the tensioner pulley
- Loosen the tensioner with a 15mm socket and ratchet
- Slide the belt off the water pump pulley
- Pull the serpentine belt off and out
-
step 3 :Removing the Alternator
- Remove the top 15mm bolt from the alternator
- Raise and support the vehicle
- Remove the 10mm nut from the power wire to the alternator
- Remove the power wire from the stud of the alternator
- Remove the two 10mm nuts at the bottom of the alternator
- Remove the two 7mm nuts from the voltage regulator
- Remove the voltage regulator
- Remove the 15mm bolt from the bottom of the alternator
- Remove the four 15mm bolts from the alternator
-
step 4 :Removing the Battery
- Remove the 13mm nuts from the hold down
- Remove the hold down
- Remove the battery from the vehicle
- Remove the three 15mm nuts at the bottom of the battery tray
- Lift the battery tray
- Disconnect the sensor on the bottom of the battery tray
- Remove the alternator
-
step 5 :Installing the Alternator
- Insert the alternator into place
- Tighten the four 15mm bolts to the alternator bracket
- Tighten the top 15mm nut to the alternator
- Reinstall the voltage regulator
- Tighten the two 7mm nuts to the regulator with a 10mm socket and ratchet
- Reinstall the power cable
- Tighten the 10mm nut into place
-
step 6 :Installing the Battery
- Connect the sensor to the battery tray
- Insert the battery tray into place
- Tighten the three 15mm nuts to the bottom of the battery tray
- Insert the battery into the vehicle
- Tighten the 13mm nut to the hold down
-
step 7 :Installing the Serpentine Belt
- Thread the belt around the crank shaft pulley
- Feed the right side of the belt over the fan pulley
- Feed it over the alternator
- Feed it over the A/C compressor
- Feed it under the water pump pulley
- Feed it over the power steering pump pulley
- Feed it over the belt tensioner
- Loosen the tensioner more if necessary to install the new belt
- Check that the belt is routed correctly
- Tighten the tensioner with a 15mm socket and ratche
- Tighten the 15mm bolt on the tensioner pulley
-
step 8 :Reconnecting the Battery
- Connect the negative terminal and its 13mm nut
- Connect the positive terminal and its 13mm nut
Tools needed
-
13mm Socket
15mm Wrench
Socket Extensions
Flat Blade Screwdriver
15mm Socket
Rust Penetrant
7mm Wrench
Jack Stands
7mm Socket
10mm Socket
Ratchet
Floor Jack
Hi, I'm Mike from 1AAuto. We've been selling auto parts for over 30 years! We're dedicated to delivering quality auto parts, expert customer service, and fast and free shipping, all backed by our 100% satisfaction guarantee. So visit us at 1AAuto.com, your trusted source for quality auto parts.
In this video, we're going to be working with our 1996 Jeep Cherokee. We're going to show you how to remove and replace the alternator on a six cylinder or 4.0-liter engine. This is going to be similar to a lot of the 4.0-liter Jeeps, some available in Wranglers, Grand Cherokees, and other vehicles. It'll be pretty much the same process.
If you like this video, please click subscribe. We have a ton more information on this truck as well as many other makes and models. If you need this part for your vehicle, you can follow the link down in the description over to 1AAuto.com.
Here are the items you'll need for this repair: 7mm-15mm sockets, ratchet, socket extension, 7mm to 15mm wrenches, rust penetrant, jack, jack stands
Before working on the alternator, we'll disconnect the battery, starting with the negative side and then the positive. All we need is a 13 millimeter wrench. Loosen up the clamp and work it off of the battery post. Make sure you set it somewhere where it's not going to move and land back on the battery. This truck shouldn't be double knotted but somebody had a power accessory on here before, so we'll just loosen up the inner nut if we can. Same thing, we'll set that off to the side to isolate it.
Now, this vehicle is missing the belt path diagram. Normally it would be under the hood or up here on the cowl somewhere, so I'm going to go ahead and draw my own on it. We'll start up top with the AC pulley. The belt then goes down to the bottom, to our alternator. We have our fan pulley right in the middle and to the inside of them. All the way down at the bottom, we have our crank pulley, which we'll make larger than the rest. We then have our water pump pulley, our power steering pump pulley up here at the top right, and down below our power steering pump and close to the water pump, we have our tensioner pulley.
Now, we'll draw the belt, which goes over our A/C, under our alternator, up over the fan pulley here, and down and around the crank pulley. The crank pulley comes up, and goes over the tensioner, under the power steering, around the power steering – I've drawn this a little tight here – under the water pump, and back up over to our A/C pulley. Now, we have a good path of where it goes. We can be confident, removing our belt, that we'll make sure it goes back in the exact same path.
Using a 15-millimeter wrench, we'll loosen the bolt at the center of our tensioner pulley. Do not remove this fully. Just loosen it up enough that when we adjust the tension, the pulley will move freely. It should only take a couple of turns. If your vehicle's been run recently, be careful, because this housing up here is very hot. Using a 15-millimeter socket, ratchet, and extension, we'll loosen this tensioner bolt here until we can remove our belt. You can see as we loosen it, it moves our pulley down, taking pressure off of our serpentine belt. Once the tension's off, it's easiest to remove the belt from a smooth pulley, like our water pump pulley here. We'll slide the belt off of it.
I like to remove it fully just to make sure that it's out of our way when we're working. Remove the top bolt from the alternator with a 15 millimeter socket and ratchet, as well as a wrench on the backside to keep the nut in place. Remove the bolt from the top of the alternator. We're using a lift but this jump can easily be done in the driveway on a jack and jack stands or if your vehicle's nice and high like this one, you may even be able to do it with the weight of the vehicle on the tires. Using a 10 millimeter socket and ratchet, we'll remove the nut for the power wire to the alternator. It's at the top here. Once the nut's off, remove the power wire from the stud of the alternator. Remove the two 10 millimeters at the bottom of the alternator for the voltage regulator. Remove the two seven millimeter nuts at the top of the studs for the voltage regulator. Do that with a seven millimeter socket and ratchet. Then remove the voltage regulator from the back of the alternator. Remove the 15 millimeter bolt at the bottom of the alternator with a socket and ratchet. Remove these four 15 millimeters if you need a little extra room to get the alternator out of the vehicle. Sometimes they will just sneak out of the bracket here but ours is a little stuck so we're going to pull that off to make it easier to remove. Remove the bracket.
Now in models with the mechanical fan, you may have to remove the battery. It's 13 millimeter nuts on the hold downs at the top. Remove the hold down. Remove the battery from the vehicle. Remove the three 15 millimeter nuts at the bottom of the battery tray. Our first nut broke off, so we'll spray the others with some penetrating oil to help free them up. All of our hardware and the battery tray is broken off, so we'll have to find another way to secure it when it goes back in. Hopefully, yours came out normally. We'll remove ours. There's a sensor at the bottom here that we'll have to disconnect to get our battery tray out. Remove the battery tray. Then remove the alternator.
Reinstall your alternator into the bracket. Reinstall the plate that goes in front of the alternator bracket. We'll start the three 15 millimeter nuts on there by hand to keep the bracket lined up. There's also the shortest of the three 15 millimeter bolts that goes in the hold to the side of the bottom alternator hole and the second longest of the three 15 millimeter bolts. We'll go into the bottom hole. Before tightening any of the bolts at the bottom, we'll also have to line up our top bolt, which is the longest of all of them. We'll start that 15 millimeter nut on the back as well. Since everything's lined up, we can go ahead and tighten this bolt up while we're right here with our 15 millimeter socket, ratchet and wrench.
Now, you can tighten up the remaining 15 millimeter hardware. Reinstall the junction block for the voltage regulator. We'll start with the two seven millimeter nuts on the terminals. Tighten them down with a 10 millimeter socket and ratchet. Reinstall the power cable to the alternator onto its stud. Start the 10 millimeter nut. Then tighten it down with your socket and ratchet.
Reinstall the electrical connector at the bottom of the battery tray. Reinstall the battery tray over the studs. Ours broke off while we were removing our alternator, so we're going to have to find another way to attach it, but you should be able to just reinstall the 15 millimeter nuts you removed. Reinstall the battery into the tray. Reinstall the hold down. Once your hold down studs are through, reinstall the two 13 millimeter nuts. Tighten down the two 13 millimeter nuts on your hold down with a socket and ratchet. Be sure to tighten these down only until the battery is snug. If you go too tight, you risk cracking the case on the battery.
Install your belt starting around the crank pulley at the bottom. The right side goes over the fan pulley. The belt goes over the fan pulley, under the alternator, over the A/C compressor, under the water pump pulley, over the power steering pulley, and over the belt tensioner as well. It may be easier to go over the belt tensioner and around the power steering pump before going under the water pump pulley in the same way that we removed it.
With a new belt, you may have to loosen up the tensioner some more. Tighten the tensioner bolt with your 15-millimeter socket, ratchet, and extension. Feel the belt to make sure that it's on there snug, with a little bit of flex. If you have it on there too tight, it'll break, too loose, and it won't turn the pulleys properly. You may have to make an adjustment after you get the vehicle running again. Before running the engine, after you've tightened down the tensioner, make sure you tighten down that center 15-millimeter bolt on the tensioner pulley.
Thanks for watching. Visit us at 1AAuto.com for quality auto parts, fast and free shipping, and the best customer service in the industry.
Shop Products
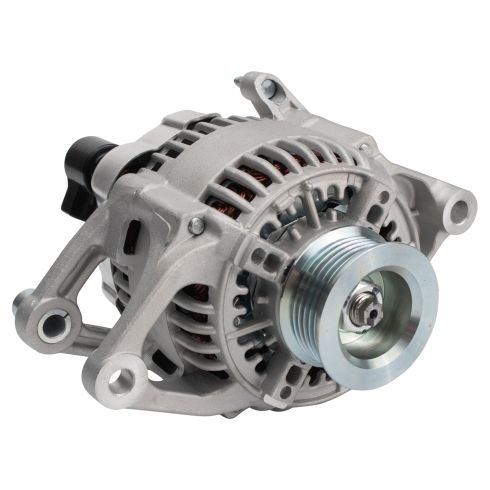
Jeep Dodge Alternator TRQ ALA94409
Part Details:
- Yes
- 12 VDC
- Serpentine
- 90 A
- NIPPONDENSO
- Clockwise (Right)
- No
- 4
- No
- 55 mm
- 45 mm
- Internal
- Yes
- Yes
- 2.17 in
- 1.77 in

How to Replace Alternator 1985-86 Chevy Camaro
Watch this video for detailed instructions on how to replace the alternator on your 85-86 Chevy Camaro.
