
How to Replace Alternator 1994-2001 Toyota Camry
Created on: 2011-01-10
To learn how to replace your 94-01 Toyota Camry's alternator, watch this video.
-
step 1 :Disconnect the battery
- Disconnect the negative battery cable.
-
step 2 :Remove the alternator.
- Loosen up the 14 mm bolt and 13 mm bolt
- This will loosen the belt.
- Disconnect the alternator, removing the rubber gasket out of the way first.
- Remove the bolts the rest of the way.
- Remove the alternator.
-
step 3 :Install the new alternator
- Mount the new alternator and bolt it in.
- Plug in the alternator and put the belt back on.
- Tighten the bolts all the way.
-
step 4 :Reconnect the battery
- Connect the negative battery cable.
Tools needed
-
12mm Socket
13mm Socket
14mm Socket
10mm Wrench
10mm Socket
Ratchet
12mm Wrench
Brought to you by 1AAuto.com, your source for quality replacement parts and the best service on the internet.
Hi, I'm Mike Green. I'm one of the owners of 1AAuto. I want to help you save time and money repairing and maintaining your vehicle. I'm going to use my 20-plus years experience restoring and repairing cars and trucks like this to show you the correct way to install parts from 1AAuto.com. The right parts installed correctly; that's going to save you time and money. Thank you and enjoy the video.
In this video we're going to remove and reinstall an alternator in this '94 Camry, same as any '94 to'96 Camry and actually same as a few different vehicles that have the 3.0-liter VW6 such as Solara and Lexus ES300.
We're going to use the 10-millimeter wrench to disconnect the negative battery cable to loosen up this bolt here. You can also remove this 12-millimeter bolt. First we'll just loosen up this 14-millimeter bolt. Now you want to loosen this 13- millimeter bolt down here. Then as you loosen this 13-millimeter bolt, you'll see my belt start to loosen. Once you have it loosened up, pull the belt off the alternator.
You want to disconnect the leads on the alternator so you pull this rubber boot up and off. Then there's a tab right here that you need to push this way on to unlock it. You push on that tab and pull on the lead. Sorry if I'm in the way here. I wanted to show you that a little better. Here's the tab. Push down with your thumb to unlock it. Push right on the top of the tab right here. Then here's your battery lead, 10-millimeter wrench. Lift that up and off. I just put the nut right back on for safe keeping. Now with the belt out, you want to remove this bolt the rest of the way. Now you can remove this bolt the rest of the way. Now your alternator moves forward and up and out.
Here's our original new alternator from 1AAuto. You see it has the same connections and everything. It's all going to mount in the same. Actually there's nothing wrong with this alternator in this car. I'm just doing the video to show you, so I will reinstall the old one. I just wanted to show you that the new one from 1AAuto, if you need a new alternator, it's got to be the correct one. It's going to bolt in just the same as the original.
To reinstall, put it down in the same way. First we'll put in this bolt. When you put the bolt in here, you want to make sure that this block, the bolt, the tensioning bolt is closer to your alternator. Put the bolt through the block and make sure, like I said, this tension bolt is close to the alternator as opposed to you don't want to put it on you want it positioned you want the block positioned this way. You don't want it positioned this way. You want it positioned that way. Put our bolt in; put your alternator up.
You can kind of see through the slot in the bracket. Then get that bolt in and then you get it hand tight. Okay, put the alternator down. Hold your belt up and on. Now make sure it's on your AC. Make sure it's on your crank pulley. I'm going to speed this up a little bit. Now here I'm just tightening up that tension bolt. You want to have about a- you want to be able to press in the middle of the belt and about a quarter inch of play. That when you know it's tight enough. Now you can tighten up your 13-millimeter bolt here. Now you can tighten up your 14- millimeter bolt here and then lastly plug in your connection. Make sure it clicks. Put that boot back down over. 10 mm nut. Make sure it's nice and firm. It doesn't have to be extremely tight but it has to be good and firm on there. Push your boot back over it and now reconnect your negative battery cable, push it down on, take your 10-millimeter up here.
We hope this helps you out. Brought to you by www.1AAuto.com, your source for quality replacement parts and the best service on the internet. Please feel free to call us toll-free, 888-844-3393. We're the company that's here for you on the internet and in person.
Shop Products
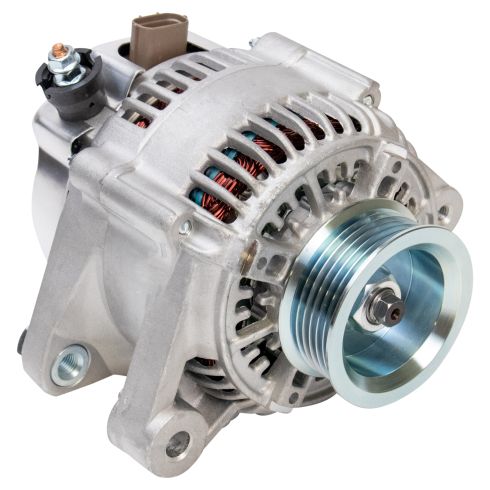
Toyota Lexus Alternator TRQ ALA94423
Part Details:
- Yes
- 12 VDC
- 80 A
- Serpentine
- 6
- 107 mm
- NIPPONDENSO
- 44 mm
- Clockwise (Right)
- No
- No
- Internal
- Yes
- No
- 1.73 in
- 4.21 in

How to Replace Alternator 1985-86 Chevy Camaro
Watch this video for detailed instructions on how to replace the alternator on your 85-86 Chevy Camaro.
