
How To Replace Alternator 1996-99 Chevy Suburban
Created on: 2010-01-26
In this video, 1A Auto shows you how to replace the alternator in a 96-99 Chevy Suburban.
-
step 1 :Disconnect the battery
- Use an 8mm wrench to disconnect the negative battery cable
-
step 2 :Remove the serpentine belt
- Use a 3/8 ratchet handle to release the tension
- Remove the belt
-
step 3 :Remove the alternator
- Disconnect the lead.
- Unclip the AC hose
- Remove the 15mm mounting bolts.
- Pry up the alternator.
- Disconnect the wiring harness.
-
step 4 :Install the new alternator
- Put the alternator in its mounting.
- Connect the wiring harness and snug the alternator into place.
- Bolt the alternator in.
- Clip the AC hose on.
- Bolt the lead back in using two wrenches.
-
step 5 :Put the serpentine belt back on
- Thread the serpentine belt into place and release the tension using a wrench to get it all the way on.
- Reconnect the battery.
Tools needed
-
15mm Wrench
Flat Blade Screwdriver
Rubber Mallet
8mm Wrench
Ratchet
13mm Wrench
This video is brought to you by www.1AAuto.com, your source for quality replacement parts and the best service on the internet.
Hi, I'm Mike from 1A Auto. In this video we're going to show you how to replace an alternator on a Vortech 5700 equipped 1999 Suburban. The Vortech engine was a very popular V8 used by GM from '96 to '01. Here's a list and you can pause it yourself if you want and check it out. This is not all-inclusive. There may be other trucks that do have this engine in it. For this replacement you will need a 3/8 drive ratchet handle, 15 mm wrench, 13 mm wrench, a 5/16 wrench, and a large screwdriver or a small pry bar, and a rubber mallet.
Now the first thing you want to do is find your belt routing diagram shown here. It's usually right near the radiator. This will help you when you want to reroute the belt at the end of This sticker located in the glove box is your RPO code sticker, regular production option. This will tell you how big of an alternator you have in your truck. Most trucks have the K68 code which is 105 amps. If you have a heavy duty alternator, a 140 amp, it's either a K98 or a KG9, but again most trucks have the K68 105 amp alternator.
And with that we can start replacing the alternator. First you want to disconnect your battery with a wrench. Then using your 3/8 ratchet you want to move the serpentine belt pulley, and here you can see where you would insert that ratchet. It has a small square hole, and then you push down which takes the tension off the belt and you slip it off the idler pulley, and now it's clear of your alternator for you. After this you're going to disconnect the rear wire and you're going to put a wrench on, and actually you're going to put another wrench holding the stud so you actually have two wrenches, and you hold one wrench while you loosen the other one because the stud will just spin in the alternator if you don't do it this way. After this there's just a little A/C hose that you pull out of the clip to give yourself some room to move the alternator. Then you remove the two mounting bolts. Here I have them kind of almost removed out. I didn't get a shot of loosening them, but you use a 15 mm wrench and loosen them, and then you use your screwdriver or pry bar and pry up the alternator because they actually use pressure fittings to hold it in place. Once you get the alternator up you expose the other one wire that's in there. You can pull that easily off with your fingers, and then your alternator is out.
And to reinstall, reverse the procedure. Make sure you have that wire out of the way. Put the alternator down in there. Connect your single wire. Then get the alternator into place and take a little bit of force and kind of force it, start it down into the bracket a little bit. See I kind of put my hands around the top of it and shake it down in there, jiggle it a little bit, and then after you get it somewhat in place, use a rubber mallet, and obviously a rubber mallet and not a hammer. You don't want to use metal-to-metal contact on an alternator. Then you just kind of tap the alternator down into place, and then you can get the bolts back in and you might need a little bit of tapping to work them in a little more, and then once the bolts are in place, you tighten them up again with a 15 mm wrench which I don't show here, but trust me. You do want to tighten them up. You don't have to tighten those crazy tight, 45-50 foot pounds.
After that, then you reconnect your rear line, and obviously this is where you must have your battery disconnected because you'll get a lot of sparks here if you don't, and tighten it up. Again, you're going to use two wrenches, one to hold the studs, and then one to tighten up the nut. Put that hose back in, and then you're going to put your belt back in. First check it. We just kind of go along the length. Make sure the outside doesn't have any holes, and then if it's cracked on the rib side that's OK. The ribs cracked are fine, but just make sure the outside is all solid, and you run it the way you're supposed to run it. Get your 3/8 wrench in there, and then push it down into the idler pulley as you're pushing down on the wrench and you got it. Reconnect your battery and you're ready to get back on the road.
This video was brought to you by www.1AAuto.com, your source for quality replacement parts and the best service on the internet. You can call us toll free, 888-844-3393. We are the company on the internet and there in person for you. Thank you very much.
Shop Products
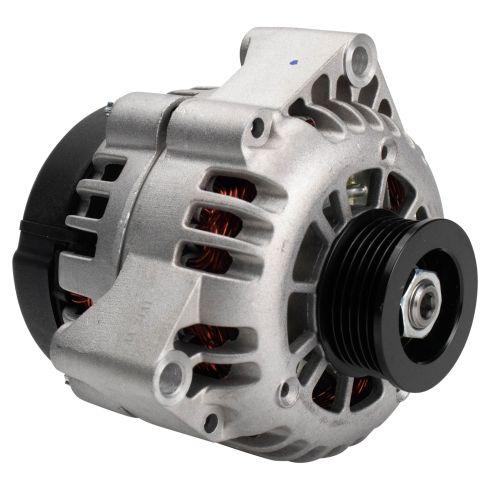
Chevrolet GMC Cadillac Olds Isuzu Alternator TRQ ALA94400
Part Details:
- Yes
- 12 VDC
- Serpentine
- 6
- 105 A
- 51 mm
- Clockwise (Right)
- No
- No
- Internal
- Yes
- No
- DELCO
- 40 mm
- 2.01 in
- 1.57 in

How to Replace Alternator 1998-2003 Ford Escort
Learn how to replace the alternator on your 98-03 Ford Escort with detailed step-by-step instructions in this 1A video!
