
How to Replace Alternator 1996-99 GMC Sierra K1500 5-7L
Created on: 2017-02-24
How to repair, install, fix, change or replace a broken or bad alternator on 96 GMC Sierra
-
step 1 :Disconnecting the Battery
- Disconnect the negative terminal with a 5/16 or 8mm wrench
- Move the terminal to the side
-
step 2 :Removing the Serpentine Belt
- Familiarize yourself with the route of the serpentine belt
- Insert the 3/8 inch drive ratchet into the tensioner
- Turn the tensioner clockwise to loosen the belt
- Pull the belt off the alternator
- Release the tensioner
- Pull the belt off by hand
-
step 3 :Removing the Alternator
- Remove the 10mm bolt at the rear of the alternator
- Remove the two 13mm bolts at the bottom of the alternator
- Wiggle and lift the alternator out of its brackets with a pry bar
- Disconnect the wiring harness from the alternator
- Lift the rubber boot
- Remove the 13mm bolt
- Remove the alternator
-
step 4 :Installing the Alternator
- Lay the alternator first on the pulley side
- Reinstall the power terminal, lock washer, and 13mm nut
- Close the boot over the nut
- Connect the wiring harness
- Press the alternator into place
- Tighten the 13mm bolts to the alternator
- Tighten the 10mm bolt to the alternator
-
step 5 :Installing the Serpentine Belt
- Loop the belt around the crank pulley
- Bring it around the water pump
- Bring it under the power steering pulley
- Bring it around the A/C Pulley
- Bring it around the belt tensioner
- Bring it under the idler pulley
- Pull the tensioner clockwise with the 3/8 inch ratchet
- Pull the belt over the alternator
- Release the tensioner
-
step 6 :Reconnecting the Battery
- Disconnect the negative terminal with a 5/16 or 8mm wrench
- Move the terminal to the side
Tools needed
-
13mm Socket
Socket Extensions
Pry Bar
8mm Wrench
8mm Socket
10mm Wrench
10mm Socket
3/8 Inch Drive Ratchet
13mm Wrench
Hi, I'm Mike from 1AAuto. We've been selling auto parts for over 30 years! We're dedicated to delivering quality auto parts, expert customer service, and fast and free shipping, all backed by our 100% satisfaction guarantee. So visit us at 1AAuto.com, your trusted source for quality auto parts.
In this video, we're going to be working with our 1996 GMC Sierra K1500 5.7-liter V8. We're going to show you how to remove and replace your vehicle's alternator.
If you like this video, please click subscribe. We have a ton more information on this truck as well as many other makes and models. If you need this part for your vehicle, you can follow the link down in the description over to 1aauto.com.
Here are the items you'll need for this repair: 8 to 13mm sockets, ratchet, socket extension, 8 to 13mm wrenches, pry bar
Remove the negative post from your battery using a 5/16 or an 8mm wrench. Remove the terminal and isolate it from the battery.
Be sure your vehicle has a belt path diagram somewhere on the cowl or under the hood before removing the belt. If it's missing or unclear, be sure to draw it somewhere under the hood or take a good picture. Put the 3/8 drive of a ratchet into the square on your serpentine belt tensioner and turn it counterclockwise to release tension. Then simply pull the belt off of any one of the pulleys, slowly release the tension from the tensioner. Remove your ratchet, and take the belt off of the pulleys.
Remove the 10mm bolt on the top of the bracket at the rear of your alternator. I'm using the 10mm wrench. You could use a socket and ratchet and try to sneak around this cooling line here. I don't want to miss breaking that, so I'll just use the smaller tool. Remove the two 13mm bolts at the bottom of the alternator. Carefully wiggle and lift the alternator out of its brackets. You may need to use a small pry bar to help lift it out. Carefully reposition the alternator so you can easily access the wiring on the back. Lift up on the tab for the clip and remove that connector. Lift up on the rubber boot and remove this 13mm bolt with a socket and ratchet. Theirs is actually on a stud that's spinning, so we'll need a 13mm wrench on the bottom side to hold that in place. Once the connections are undone, remove your alternator from the vehicle.
Reinstall the alternator, laying it first on the pulley side. Reinstall the power terminal, the lock washer, and the 13mm nut, which we'll then tighten down with our 13mm socket and ratchet. You don't have to go crazy here. Just get it snug. That lock washer should keep anything from falling off. Throw the boot back on. Reconnect the plug. Lay the alternator back into position. Reinstall the two 13mm bolts at the bottom first. Tighten them down with the 13mm socket and ratchet. Reinstall the 10mm bolt at the back of the alternator. Tighten it back down with the 10-mm wrench.
Hook the serpentine belt around the crank pulley or harmonic balancer from the passenger side. Be sure that it seats fully into the grooves of the pulley and doesn't lay over the edge on either side. Wrap the driver's side of the belt around the water pump, under the power steering pump on the other side, and up and over the AC compressor. I already have the left side wrapped around the tensioner here just because that's where it falls. Then, from over the AC compressor under the idler pulley, reinstall the ratchet into the tensioner. Turn the ratchet counterclockwise to release the tension, and install your belt over the alternator. Take a second just to look around and make sure that your belt is seated and routed properly before releasing the tension and removing your ratchet.
Reconnect your battery, and you're good to go.
Thanks for watching. Visit us at 1AAuto.com for quality auto parts, fast and free shipping, and the best customer service in the industry.
Shop Products
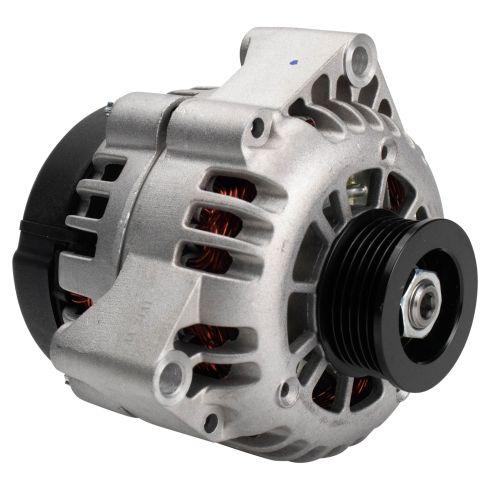
Chevrolet GMC Cadillac Olds Isuzu Alternator TRQ ALA94400
Part Details:
- Yes
- 12 VDC
- Serpentine
- 6
- 105 A
- 51 mm
- Clockwise (Right)
- No
- No
- Internal
- Yes
- No
- DELCO
- 40 mm
- 2.01 in
- 1.57 in

How to Replace Alternator 1994-2005 Ford Explorer 4-0L
Battery ran down? You might need a new alternator! Check out this video to learn how to replace it in your 94-05 Ford Explorer
