
How To Replace Alternator 1997-2003 Ford Expedition
Created on: 2010-07-15
Check out this video to learn how to replace an alternator in a 97-03 Ford Expedition.
-
step 1 :Disconnect the battery
- Use an 8 mm wrench to disconnect the negative battery terminal
-
step 2 :Remove the alternator
- Remove the two 10 mm bolts from the alternator using your socket and ratchet.
- Additionally, unbolt the 10 mm bolt securing the trim cover as well as the fourth 10 mm bolt on the spark plug bracket.
- Remove two more 10 mm bolts on the alternator.
- Remove the 11 mm nut securing the harness.
- Disconnect the harness leads.
- Use a flat blade screwdriver to pry and unclip the harness rather than yanking them out.
- With a 15mm socket and ratchet, unbolt the hose bracket.
- Pry up the alternator and remove.
-
step 3 :Install the new alternator
- Mount the alternator into place, using a rubber mallet if need be.
- Plug back in the wiring harnesses and bolt down the hose bracket.
- Bolt down the 11 mm nut on the harness.
- Use your 10 mm socket and ratchet to bolt in the six 10 mm bolts.
- Replace the serpentine belt using your 1/2 ratchet to relieve the tension from the tensioner pulley.
- Use your serpentine belt diagram to route your serpentine belt correctly.
- Reconnect the battery using your 8 mm wrench to connect the negative battery terminal.
Tools needed
-
15mm Wrench
Flat Blade Screwdriver
1/2 Inch Ratchet
10mm Socket
Ratchet
Needle nose pliers
11mm Socket
Brought to you by 1AAuto.com, your source for quality replacement parts and the best service on the internet.
Hi. I'm Mike Green. I'm one of the owners of 1A Auto. I want to help you save time and money repairing and maintaining your vehicle. I'm going to use my 20 plus years experience restoring and repairing cars and trucks like this to show you the correct way to install parts from 1A Auto.com. The right parts installed correctly. That's going to save you time and money. Thank you and enjoy the video.
In this video we will be replacing an alternator on this 97 Expedition same as a Navigator or 97-02 Expedition plus 97-03 F150 probably the same as the other trucks too. They just probably use larger capacity alternators. Tools you will need are various millimeter sockets and things, screwdriver and pliers and maybe a telescoping magnet if you tend to drop the bolts like I do.
Now with the fan belt out of the way there are two bolts that have to be removed from the alternator. One right there and then one on the opposite side which is a little difficult to film. You also want to remove your trim cover here which is also a 10 mm bolt. Now you are going to want to get down to a 10 mm bolt right down here. This holds this spark plug bracket on here. Then there's another 13 mm one right here. Sorry that was 10 mm. Then the telescoping magnet is always a good tool for retrieving the bolts. There is one more 10 mm bolt here. You can see here that the red cap on the alternator comes off.
Here's a better view. There's an 11 mm nut on the back of the alternator here. Now I'm removing that 11 mm nut. That allows this harness to come off. Now after removing that we still have two harnesses hooked right here and here.
Sometimes manufacturers make things a little more difficult then they need to be. This would be one of those times just to disconnect this connector here. I'm going to put a screwdriver in here, hold it with that hand and then I'm going to try and grab hold of the plastic part of the connector. You don't want to grab a hold of the wire and try and pull it. Let's see if I can't get this thing to come off and there it comes. Then this other larger connector here; what I'm going to do is work my screwdriver in from the back side. It's probably really hard to see. I apologize, but I'm doing the best. Using the screwdriver from the back side, pry the clip away and now the harness is free.
Now you are going to want to remove this hose bracket here. It's a 15 mm. You want at least to loosen it up enough so that you can flip it down all the way here. Then you can reach in and free your alternator, but be careful of the throttle bracket.
This is our old alternator. This is our new alternator from 1AAuto. You can see it's all the same. It's going to bolt in exactly the same. Here are the connections, same, same, same all the same. I did take the posts off the back of this so you can disconnect it differently. It's the same thing it just has this extra post on it. This alternator is working fine still so we are going to reinstall that back into the vehicle.
Lower our alternator back down and in. Bring our harnesses up. Reconnect them. Pull this up and reconnect this onto the back. Here when you're tightening this up on the back of the alternator, tighten it up some, move the connection around. It does go into a slot so just move it back and forth and make sure that it's in there correctly. That's in there tight. Put your cap on the back of it. Put it back into place. Work this bolt in first. Careful on the alternator. Now do the other bolt on this side. Get in the place too. Feed it in there. I've got two mounting bolts in seated. Tighten them up by hand now. If you pull them tight. Torque spec is probably about 35 foot pounds so it's getting nice and tight with this small handled wrench. There's one on this side. Now I will put the three bolts back into this bracket and I'll tighten up this hose bracket. So we are just going to fast forward during this. This is a 15 mm nut holding that hose bracket on and then the three 10 mm bolts that hold that spark plug bracket. Then briefly you will see me put the trim cover back on the top of the engine. Here we go. There's the trim cover. We're going to fast forward also through putting the serpentine belt back on. If you do need to see this in regular time just check out our other videos. We do have a video for just the serpentine belt on the Expedition, F150 and Navigator. Then once the belt is back on then you will see me reconnect the battery, connect the battery, start your truck up and make sure that your belt isn't making any noise, that it's routed correctly and make sure also your battery light goes out and your volt gauge is up around 13 volts. Then you should be all set.
We hope this helps you out. It was brought to you by www.1AAuto.com your source for quality replacement parts and the best service on the internet. Please feel free to call us toll free 888-844-3393. We are the company with you on the internet and in person.
Shop Products
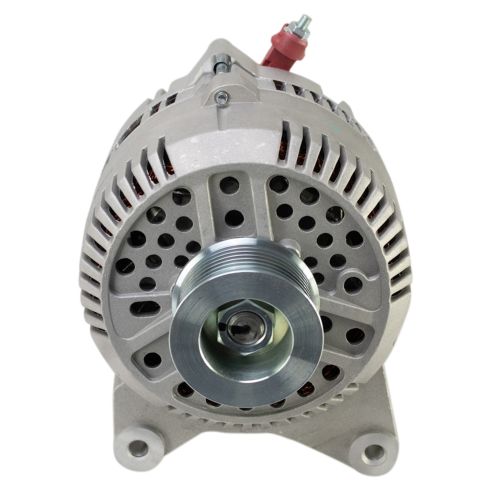
Ford Lincoln Alternator TRQ ALA94402
Part Details:
- Yes
- 8
- 12 VDC
- 130 A
- Serpentine
- FORD
- Clockwise (Right)
- No
- No
- Internal
- Yes
- No
- 26 mm
- 39 mm
- 1.02 in
- 1.54 in

How To Replace Alternator 2004-07 Jeep Liberty
Watch now and learn how to replace the alternator on your 04-07 Jeep Liberty.
