
How to Replace Auxiliary To Radiator Upper Transmission Cooler Line 2000-06 GMC Yukon
Created on: 2020-05-01
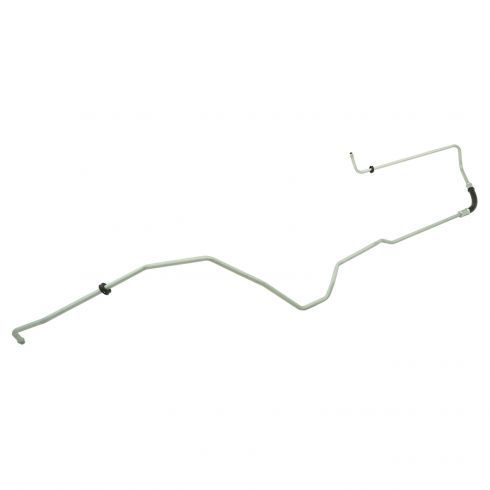
Watch this video to learn how to install a new transmission cooler line on your 2000-06 GMC Yukon.
Tools needed
-
Gloves
Flat Blade Screwdriver
15mm Socket
Phillips Head Screwdriver
10mm Socket
Trim Tool Set
Safety Glasses
Pick
All right. Let's remove this panel. I'm gonna use a trim tool to take these clips out. Okay. Take this panel off. Take this bolt out. Use a 10-millimeter socket. And there's four of these twist retainers, just take a Phillips head screwdriver and just twist it about a quarter of a turn. And there's another one down here, underneath, and two over here as well. And just grab the trim over on the side. You're just gonna pull it forward, just like that. It's clipped in right there on the sides. Do the same for the other side. And this slides right off. All right. We need to disconnect these cooler lines from the cooler. Now, these are pretty rusted, but just take a straight blade screwdriver and try to get this cover off. Just be careful. Pry this down. And there's a clip in here, you can use a pick. It's clipped in right here. I'm trying to get underneath the pick, underneath the clip.
Now, normally you wanna save this and reuse it, but in our case, we're gonna replace the cooler. So, it doesn't matter. Take that clip off and then just take the line. We're gonna line back and forth. This one is pretty rusty and you're gonna pull it straight down. And then you'll do the same with the other side. Now, if your lines are this bad, you're gonna need to replace the lines as well. We're just gonna have to cut these. So, if your cooler fittings were this bad, when you're doing the lines you're gonna need to replace the cooler as well. You're not gonna be able to break those free. We need to take this panel off. I'm gonna use a trim tool. Just get underneath these push pins. And you can just pull it back a little bit if you want or you can take the whole panel off. Just get under that wire clip, take that off and this push pin. Oops. Then just slide this out of the way. Just pull it aside and pull these lines out of this retainer right here. Just like that. And that can stay right there. Loosen up this worm clamp right here and just use a straight blade screwdriver. And you can do the same on this one.
If you have a cover right here, just pull that cover off. There's an 8-millimeter screw that goes in there and there's another clip right here. Just slide this clip off and grab the snorkel, pull it back, and just slide it out. And disconnect this electrical connector. And then just grab the air box and pull up and slide it out. I'm gonna take this little cover off. Just use a screwdriver. Slide that off. And you can use a pick. They do make a special tool to remove this if you have one, but you can just use a pick. Just try not to stretch this clip too much. And slide that clip out. Then we can grab the line and just slide it out. I'm gonna take this panel off. Use a 15-millimeter socket to take these bolts out. There's four bolts. Slide that down. I'm gonna take this hose and just slide it back a little bit. Twist it down. Oops. There's some fluid coming out. And just like that. All right. Take the new line. Pretty much run it the way you pulled it out. Run it this way and twist it up. And if you have to bend the hose a little bit, that's okay. You just don't wanna put any kinks in the hose. And this cover bolts in. And tighten these bolts down. Put this clip on here, and then take the line, lock it in place, and put this cover over. It's just gonna hold the retainer in there.
Now, I'll take this little cover off here, if you have one of those, and slide this in place, and lock it in. Make sure it locks in all the way, if you had to re-install that retainer there, and then put the cover on. This is gonna go into this bracket right here. Push it in. Now, I'll take this cover. Re-install this, if you took it out completely. Slide this in position and push the push pins back in position. Make sure that stays out. Okay. Looks good. Push this wire tie down in, and put the air box back, slide it in position. That part over here is gonna slide and then once it slides in, you can get the other retainers lined up. And when the back part is slid in and the front retainers are lined up, push down. That's good. Plug the mass airflow sensor back in, lock it in place. Take the intake snorkel and then line this up. Put it over the throttle body and make sure this is on over here, and tighten this down. And same with this one, and put this bracket right through. And if you have a cover over there, put the cover back on.
All right. Take the grille and then line it up. Get this lined up on the side and just twist these. There's four of them. And take this bolt, get that started, and then tighten it down. And put this cover back on and take all the push pins. Put all the push pins back in. After you're done, you're gonna wanna check the transmission fluid level. Start the vehicle, let it run, pull this dipstick out, wipe it off. And there's two areas right here. This is the hash marks where the fluid level should be when it's hot. And when it's cold, it should be down here. You can top off the fluid with the appropriate fluid. Get that information from your owner's manual and adjust accordingly.
Shop Products

How To Replace Inlet Lower Transmission Line 1994-2004 Chevy S-10
This video shows you how to install new lines from TRQ that are made to fit the specifications of your 1994-2004 Chevy S-10.
