
How to Replace Axle Shaft 2001-05 Honda Civic
Created on: 2016-04-21
Watch this video to learn how to replace the CV axle on your 01-05 Honda Civic. 1A Auto will show you how step by step!
-
We recommend an alignment after completing this repair
step 1 :Removing the Wheel
- Loosen the 19mm lug nuts with the vehicle on the ground
- Raise the vehicle with a floor jack
- Secure the vehicle on jack stands
- Remove the lug nuts
- Pull off the wheel
-
step 2 :Removing the Hub Nut
- Remove the center cap from the wheel
- Slide the wheel into place
- Lower the vehicle to the ground
- Have an assistant hold the brakes
- Remove the 32mm nut with a large breaker bar
- Secure the vehicle on jack stands
- Pull off the wheel
- Check to make sure the axle is free from the hub
-
step 3 :Removing the Caliper
- Remove the 12mm bolt from the brake hose
- Remove the 10mm bolt from the sensor wire
- Remove the 12mm bolts from the brake caliper
- Pry the brake pads into the caliper with a flat blade screwdriver to push in the pistons
- Pull the caliper aside
- Secure the caliper up in place with wire ties
-
step 4 :Removing the Axle
- Remove the 21mm pinch nuts and 19mm bolts
- Pull the wheel knuckle out
- Pry the axle out with a pry bar
- Place a drain pan beneath the transmission
- Pry the axle out of the transmission with a pry bar
-
step 5 :Installing the Axle
- Insert the axle into the transmission
- Remove the new 32mm nut from the axle splines
- Insert the axle into the wheel knuckle
- Insert the 21mm pinch nuts and 19mm bolts into place
- Hand tighten the 32mm hub nut
-
step 6 :Reinstalling the Caliper
- Place grease on your brake pads
- Lower the caliper into place
- Thread 12mm bolts by hand
- Tighten bolts to 34 Newton Meters or 25 foot-pounds
- Tighten the 10mm bolt to the sensor wire
- Tighten the 12mm bolt to the brake hose
-
After tightening, you might have to take the wheel off and dent the hub nut
step 7 :Reattaching the Wheel
- Slide the wheel into place
- Start the lug nuts by hand
- Tighten the 19mm lug nuts preliminarily
- Lower the vehicle to the ground
- Tighten the lug nuts to 80 foot-pounds in a crossing or star pattern
- Tighten the hub nut to 134 foot-pounds or 181 Newton Meters
- Replace the center cap
Tools needed
-
Socket Extensions
Torque Wrench
Hammer
Rust Penetrant
Jack Stands
19mm Wrench
19mm Socket
21mm Socket
21mm wrench
32mm Socket
Wire Ties
10mm Socket
Drain Pan
Ratchet
Floor Jack
Assistant
Needle nose pliers
1/2 Inch Breaker Bar
Brought to you by 1AAuto.com, your source for quality replacement parts and the best service on the Internet.
Hi, I'm Mike from 1A Auto. I hope this how-to video helps you out, and next time you need parts for your vehicle, think of 1AAuto.com. Thanks!
In this video, we're going to show you a front axle replacement. This is a 2003 Honda Civic, same for a 2001 to 2005 Civic. We show you on the driver's side, passenger side is the same procedure. Items you'll need include a new axle from 1AAuto.com, 10mm to 21mm sockets with wrenches, ratchets, extensions. You also need a 32mm socket, and we highly recommend having air tools, breaker bar/tire iron, torque wrench, small hammer, needle-nose pliers, penetrating oil, jack and jack stands, pry bar and a drain pan. It's probably a good idea to have a front end alignment done after this repair as well.
We'll remove the front wheel, held on by four 19mm lug nuts. If you have a different style hub cap, you'll need to remove that, but just use a breaker bar or your tire iron and loosen the lug nuts while the tire is on the ground. Now raise and support the vehicle. Now remove the lug nuts the rest of the way, and the wheel and tire.
For this 32mm nut on the end of your axle, there's two options. You can take your wheel off, take your center cap out of the wheel, put the wheel back on, put the vehicle on the ground, have somebody hold the brakes, and use a large breaker bar and try and remove it. We highly recommend having an impact wrench for this because this can be difficult to get off. Then, with the nut off, just want to make sure your axle is free from the hub, which it is.
You want to remove this 12mm bolt and this 10mm bolt. They hold the brake hose and the sensor wire. Remove the two 12mm bolts that hold the brake caliper in place, here and here. If necessary, use a flat blade screwdriver or pry bar, pry out on the caliper a little bit to loosen it up, and then you can take the caliper off. Take the bungee cord and just secure your caliper back here so that you don't stress the brake hose. Now, we're going to remove the pinch bolts, 21mm nuts and 19mm bolts, 21mm socket and a breaker bar. Get the nuts started and once the bolts start moving, then hold them and take them off. Helps if you turn your wheel to the outside. Remove your bolts that hold the strut and carefully let this down.
Push your axle through. Have a pry bar or a big screw driver handy just to help you get it out. Hold the axle out from there. Good idea to have a drain pan underneath where the axle goes into the transmission, then take a good sized pry bar, get it between the axle and transmission, and pry out. Now you can bring your axle right out.
Here's the old part from the vehicle and the new part from 1A Auto. Visually, there's some slight differences, but it's going to go in and install just like the original and fix up your problem.
Take the new axle and feed it into place, put it into place, and then you kind of have to just push it in. Take the nut off, we do keep it on there just to protect the threads on the axle while we're installing it. Then put the axle in place, bring this up, and you may have to just kind of spin the axle a little bit, get the axle in place, put the knuckle up into, a lot of times it's easier to start the bottom strut bolt first and then you can push in to get the top one in place. Put the axle nut in place, and we'll tighten it up when the vehicle's on the ground.
Reinstall the caliper. Remove your bungee or whatever you might have holding it. Make sure you have some grease on your pads to prevent squeaking. You have to push your slides in a little bit to get it to go on. Tighten these to 25 foot-pounds.
Reinstall these brackets. 10mm bolt holds the sensor wire and the 12mm bolt holds the brake hose. Put them in and tighten them up. If you've got any grease or anything on your rotors, make sure you wheel back in place.
Start your lug nuts, and we'll tighten them preliminarily, and then torque them when the vehicle's back down on the ground. We'll torque our lug nuts to 80 foot-pounds first. Tighten and then torque the center nut to 134 foot-pounds or 180 newton meters. With these wheels, you may find to get the best angle to dent that hub nut, you may have to take the wheel back off, use a punch or a big screwdriver and dent the nut down and replace your cap.
Thanks for tuning in. We hope this video helped you out. Next time you need parts for your car, please visit 1AAuto.com. Also check out our other helpful how-to and diagnosis videos.
Shop Products


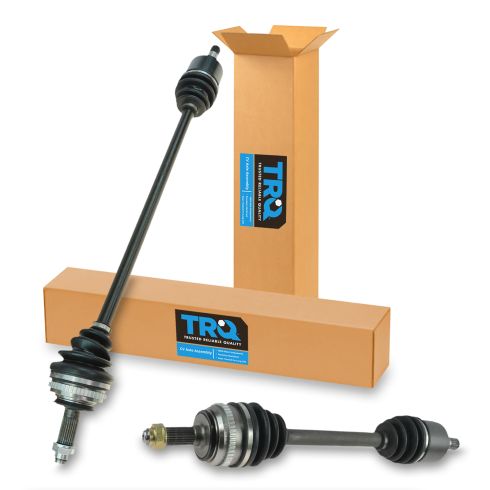
2001-05 Honda Civic Automatic Transmission Front Driver & Passenger Side 2 Piece CV Axle Assembly Set TRQ CSA82481
Part Details:
- 2 Piece
- (1) Front Driver Side CV Axle Assembly
- (1) Front Passenger Side CV Axle Assembly

How to Replace Front Driver Side CV Axle 2011-15 Chevy Cruze
This video shows you how to install a driver side CV axle on your 2011-15 Chevy Cruze.
