How to Replace Battery 2003-09 Mazda 3
Created on: 2018-09-26
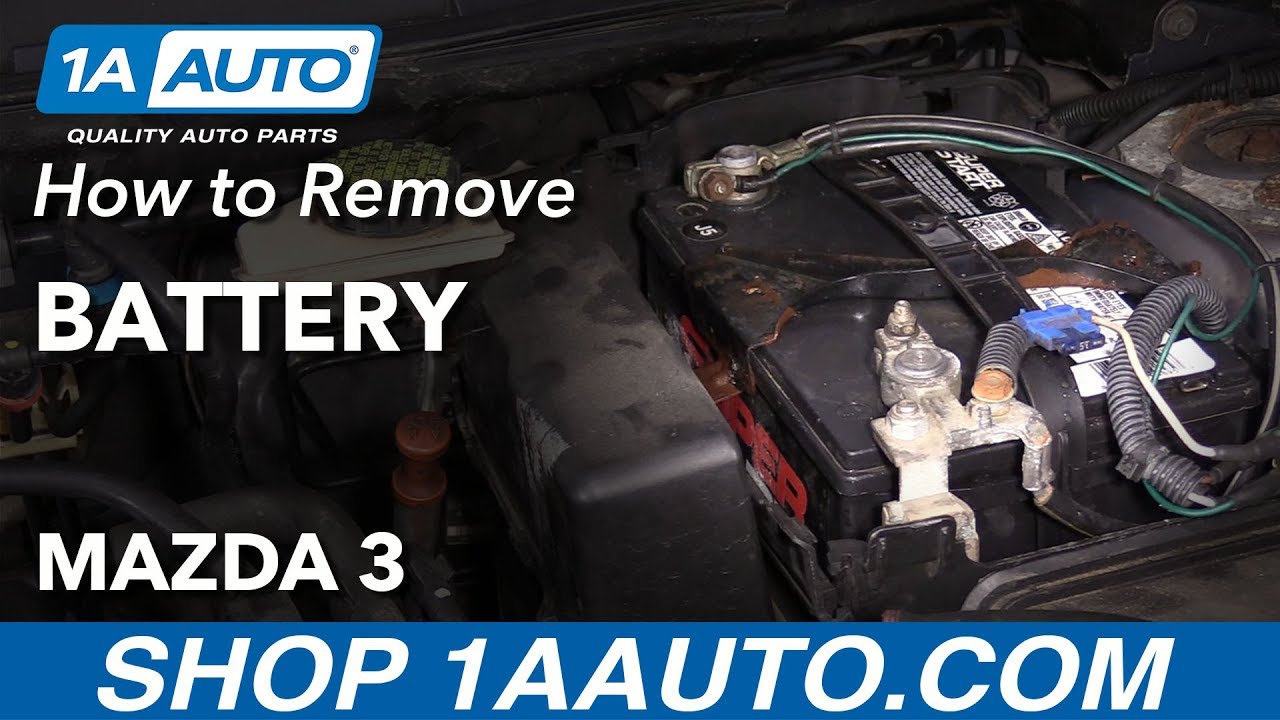
How to replace the battery on 07 Mazda 3.
-
step 1 :Removing the Battery
- Lift the battery cover off
- Remove the 10mm battery mounting bolts
- Remove the battery mount
- Disconnect the negative battery cable with a 10mm socket and ratchet
- Disconnect the positive battery cable with a 10mm socket and ratchet
- Lift the battery up and out
-
step 2 :Reattaching the Battery
- If reinstalling the old battery, clean the terminals with a wire brush and soak the terminals with battery terminal cleaner, and clean the terminals off with water
- Clean the positive and negative terminals with a wire brush
- Put the battery into place
- Put the battery mount in place
- Tighten the 10mm battery mounting bolts
- Reconnect the positive battery cable with a 10mm socket and ratchet
- Reconnect the negative battery cable with a 10mm socket and ratchet
- Place the battery cover on
Tools needed
-
Socket Extensions
Terminal Cleaner
10mm Socket
Ratchet
Wire Brush
Hi, I’m Mike from 1A Auto. We’ve been selling auto parts for over 30 years!
Hi, everyone. Sue from 1A Auto. Today, we're working on our '07 Mazda 3 with a 2.0 liter in it. We're going to be showing you how to remove the battery, clean the terminals, clean the battery, and reinstall. If you need any parts for your car, come on over to 1aauto.com.
Hood release is located right here. Safety latch is right above the Mazda symbol, right in the center. Just turn it over to the right. Then you have the hood prop rod. You put it in where the arrow goes. It says rod. Right in there. Lock it in.
To change the battery, or to remove the battery, we need to remove the battery cover, which clearly states it's the battery underneath the positive and the negative with the symbol. We're going to pull on some of these tabs here. Lift it up. There's our battery.
When you have battery hold-down bolts that look like this, it's best to let those soak for a little bit with some penetrating spray. We don't want to break the hold down studs. This is a 10mm socket. I've sprayed it and let it soak for a little bit. I'm going to back this bolt right out. Take the nut off. Before I take it all the way off, let's see if this side will break free. Now we have the hold-down ready to come out.
On this particular model, someone put it under the handle, which is fine. The slight corrosion needs to get cleaned up. What we do is, we would put baking soda on it, and soak it down with water. Let the baking soda eat away at the corrosion, and it will be ready to put back in.
Negative side is over here, on the right side of this battery, closest to the cowl. This battery has aftermarket accessories to it, so they had bolted down the wire on the negative ground. This is 11mm. Your car probably will not have this. It's not a factory set up. Once I take this off, you'll see the factory bolts. That's the factory terminal ends. That is a 10mm.
Always disconnect the negative first, then the positive. Loosen that up. Just take it right off. Then we're going to disconnect the positive. This is a 10mm bolt here. No need to take that all the way out. We just want to loosen the wedge part of it. Pull it off. Then try to tuck everything up and out of the way here. Now it's clear to take the battery out.
So I'm going to clean the battery terminal ends. I have here a battery terminal cleaner brush. This is for top posts. That's for the post part, and that's for the terminal end. I'm just going to take the wire brush and put it on there, and spin it. Lift it off. Do the positive side. Now, I'm going to take a cleaner that you can buy at any apart store, and it's battery terminal cleaner. I'm going to spray it on there. It's going to foam up.
I'm going to let that really spray around. Let it sit there and do it's scrubbing. Then we'll pour some water over it, and rinse it off into the tray. Now I've let that soak. I'm going to just wash it off with some water. I did my hold-down also. That's nice and clean.
Now, I'm going to clean the terminal ends on the cables, and we'll get ready to install that. Here we have the positive terminal. I'm just going to put the battery terminal brush in there, and spin it around. That's good and clean. I'll do the same to the negative side. Get these out of the way. Wipe the battery down and we reinstall it.
Okay, it's down there nice and tight. I'm going to put the positive terminal on. Tighten that down. Make sure you put it all the way down. Some people put terminal ends on like that. That's a no. That's even a no. You want it all the way down. Part of the terminal up over the top. Once again, terminal ends are made out of a soft metal. So, if you really yank on that, you're going to snap the ears off.
Right now it's tight. Terminal end is not moving. I'm just going to turn it an eighth of a turn. That's nice and snug. Before I put the negative on, I'm going to put the battery holder back through. Put those tow bolts on. Two nuts, sorry. I just did that because, just in case, while I slid it through, I didn't want metal hitting anything and having completed circuit, by having the negative connected 10mm socket.
Now I'm ready to install my negative terminal end in the accessory wire that they have. Once again, you don't want to over tighten it. That's nice. Put the accessory wire on that they have sometimes in the car. I guess that your factory battery will not have these accessory wires snug that down. Replace my cover. This has two plastic ears that go on to those guides back there. The cover will snap down.
Thanks for watching. Visit us at 1AAuto.com for quality auto parts, fast and free shipping, and the best customer service in the industry.

What is an ECU Car SUV and Truck Computer Acronyms Explained
This video explains some of the common acronyms of a vehicle's computer system
