How to Replace Blower Motor 1992-96 GMC Sierra K1500
Created on: 2017-02-27
If the blower motor is loud or broken, find out how to replace it yourself by following our expert's instructions
-
step 1 :Removing the Glove Box
- Open the glove box
- Remove any items inside the glove box
- Press the back corner of the box together from the side
- Lay the box down
- Pop the box out of its hinges
-
step 2 :Removing the Blower Motor
- Pop the purple connecter out toward you
- Press the tab on the black connector and release it
- Lift up the top and bottom flap from the blower motor cover
- Pull the cover off
- Remove the 7mm bolts around the blower motor, including the groun tab
- Pop the hose off of the HVAC box
- Remove the blower motor
-
step 3 :Preparing the Blower Motor
- Tap out the fan from the motor with a hammer
- Slide the plastic off by hand
- Remove the cooling tube
- Line up the splines and press the fan into place on the new motor
- Connect the hose to the blower motor
-
step 4 :Installing the Blower Motor
- Install the blower motor and fan assembly into the heater box
- Reinstall the cooling hose
- Reinstall the 7mm screws, including the one with the ground, which should stick out at the 3:00 position
- Slide the blower motor cover into place
- Connect the two connectors
-
step 5 :Installing the Glove Box
- Hook the bottom hinges into place
- Click the tabs into place
- Close the glove box
Tools needed
-
Hammer
Socket Extensions
7mm Socket
Ratchet
Hi, I'm Mike from 1AAuto. We've been selling auto parts for over 30 years! We're dedicated to delivering quality auto parts, expert customer service, and fast and free shipping, all backed by our 100% satisfaction guarantee. So visit us at 1AAuto.com, your trusted source for quality auto parts.
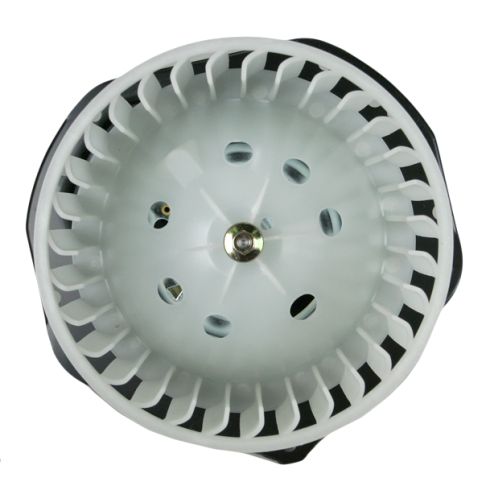
In this video, we're going to be working with our 1996 GMC Sierra K1500. We're going to show you how to remove and replace your vehicle's blower motor. Some of these are available as just the motor without the fan cage on it. We're going to show you how to swap the part over as well.
If you like this video, please click subscribe. We have a ton more information on this truck, as well as many other makes and models. If you need this part for your vehicle, you can follow the link down in the description over to 1AAuto.com.
Here are the items you'll need for this repair: 7mm socket, ratchet, socket extension, hammer
Open your glove box. Be sure that anything that's going to fall out or roll around on the floor has been removed. Press the back corners of the glove box together until they slide out. Lay the glove box down and pop it out of the hinges.
The blower motor cover is located here. You have two electrical connectors. The purple on at the bottom left, you can simply pop out toward you. The black connector at the top right has a little tab here where my thumb is, that you'll push down and release as well. Lift up the flap on the top side of the blower motor, pop out the one on the bottom as well. Bend the cover and sneak it out from behind the dash.
Using a seven millimeter socket and ratchet, as well as whatever extensions are necessary, remove the seven 7 millimeter bolts from the perimeter of the blower motor. Be sure to take that little ground tab with the last bolt. Pop that hose off of the H-Vac box, and remove your blower motor from the vehicle.
Now, our new blower motor does not come with the plastic fan cage like this one has here. If that's the case with yours, removing it is fairly simple. You just have to be careful. You don't really need a hammer as big as the one we have here. The only reason I'm using this is because of the depth of the head, so I can get in there and actually hit that center without the handle hitting the plastic and potentially break it. I'm just going to hold the fan firmly in one hand. Give that a couple of taps. Then, you can either try to slide it off by hand at this point - just a little bit of working it back and forth. With just a little bit of effort, that will come off.
If your blower motor had this cooling tube on it, just pop that out real quick. We'll need that on our new part as well. While our old motor may not be aesthetically pleasing, it's still in mechanically fine shape and works properly. We're just going to reassemble it the same way you would with a new part.
All we need to do is line up those splines on the fan and then you should just be able to work it back down. Don't push it down too far, make sure that it still spins freely. If your vehicle had the cooling hose, simply work that back into the opening on the back side of the motor. Spin it around the right way. You're ready to reinstall.
Reinstall your blower motor and fan assembly into the heater box. There's some little alignment pins on there you can set it on. Reinstall your cooling hose, then reinstall all of your seven millimeter screws. Remember that the topmost one has that grounding tab that we need to reinstall. Make sure that the tab sticks out from the volt at the 3:00 position. Once that's in, you can reinstall the remaining six 7 millimeter screws. Slide the blower motor cover back into place. Make sure you lock it back onto its tabs. Black connector goes on the top right, where the ground is. Purple connector goes onto the terminal at the bottom left. That comes from the blower motor.
Hook the bottom hinges of your glove box back into place. Push the tabs in and close your glove box.
Thanks for watching. Visit us at 1AAuto.com for quality auto parts, fast and free shipping, and the best customer service in the industry.


How to Replace Blower Motor 2011-17 Toyota Camry
How to repair, install, fix, change or replace a bad or broken blower motor on 11, 12, 13, 14, 15, 16, 17 Toyota Camry
