
How to Replace Blower Motor 1992-99 Buick LeSabre
Created on: 2013-07-01
This video will show how to access, remove, and install a new blower motor, including how to prepare a new one from 1aauto.com
-
step 1 :Removing the Blower Motor
- Remove two 13mm nuts from the blower motor bracket
- Pull out the bracket
- Disconnect the blower motor wiring harness
- Remove the lower four 7mm bolts from the blower motor
- Remove the final 7mm bolt from the blower motor
- Pull out the blower motor
-
step 2 :Preparing the New Blower Motor
- Remove the cushion from the old blower motor
- Slide the cushion on to the new blower motor
- Lock the cushion into the mounting holes
-
step 3 :Installing the New Blower Motor
- Push the new blower motor into place
- Remove the drain elbow from the old blower motor
- Install the drain elbow onto the new blower motor
- Put on the blower motor cover
- Position the drain elbow and wiring harness
- Insert the five 7mm bolts into the blower motor
- Point the drain hose down
- Connect the blower motor wiring harness
- Put the bracket into place
- Fasten the two 13mm nuts onto to the bracket
- Tighten the 13mm nuts to between 20 - 25 foot-pounds of torque
Tools needed
-
13mm Socket
7mm Socket
Ratchet
Swivel
on the Internet.
Hi, I'm Don from 1A Auto. I hope this how-to video helps you out, and next time you need parts for your vehicle, think of 1AAuto.com. Thanks.
In this video we're going to show you how to replace the blower motor in this 1997 Buick LeSabre. This motor fits LeSabres from '93 to '99. It also fits a whole bunch of other GM cars, the Olds 98, Pontiac Bonneville, and Cadillac DeVille. As long as it's a front drive car the procedure should be basically the same. The only tools you're going to need are a 7mm socket and ratchet, as well as a 13mm socket and ratchet.
We're going to remove two 13mm nuts that hold this bracket into place right in there on the back side: here and here. I'm using a flexible head 3/8 inch ratchet with a 13mm on it. I'm going to fast forward it. The nice thing about these two nuts is we found that once you got them loose they just came right off by hand and then you can move the bracket out of the way. You pull the bracket up and out of the way and you're going to want to locate the one, two, three, four, five screws that hold the blower fan in and those are 7 mm. Locate your tab, lift up on it, and then pull out. We're going to fast forward as we just remove those five screws. We suggest removing the four on the bottom first and then save one of the top ones for last.
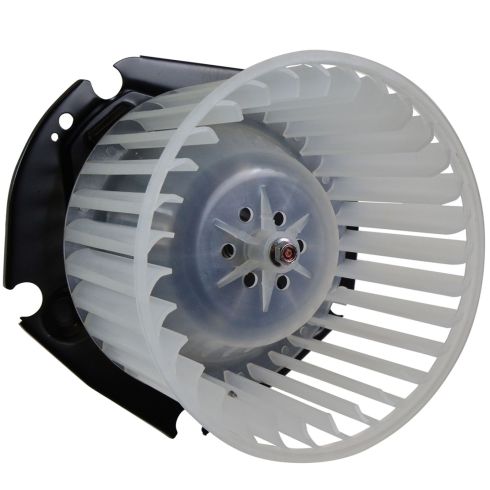
Here's the old part and the new part from 1A Auto, exactly the same. We're going to need to swap over this cushion from the old one to the new one. Okay, carefully pull the cushion out of each hole, slide it down off the old blower motor, put it onto the new blower motor, and then make sure that you have it in the right position and lock it back into the mounting holes in the new blower motor.
Swap over your elbow for the drain, put your cap back on. Remember the correct position for it is that the elbow for the drain is pointing right out to the left toward the passenger side and the connection is also pointing toward the passenger side, but mostly down right into probably about the seven o'clock position as you're looking at it. Once you have it in there and all set then just start your bolts in and tighten them up. Make sure that the drain hose is pointed down so if any water gets into this housing it'll drain right out and then plug your harness back in. Then go back in with the bracket and the two 13mm nuts. We'll just speed up from here. Get the bracket into place, start the nuts on by hand, you can pretty much tighten them up finger tight and then it takes just a few turns to tighten them up with the wrench. They need to be snug, 20 to 25 foot pounds.
We hope this video helps you out. Brought to you by www.1AAuto.com, your source for quality replacement parts and the best service on the Internet. Please feel free to call us toll-free, 888-844-3393. We're the company that's here for you on the Internet and in person.
Shop Products

How to Replace Blower Motor 1997-2005 Chevy Venture
Check out this video on how to repair, install, fix, change or replace a broken, weak, noisy or screeching heater and air conditioning fan blower motor
