How to Replace Blower Motor 1994-2002 Dodge Ram 1500
Created on: 2019-10-27
Check out this video to learn how to replace the blower motor on your 94-02 Dodge Ram 1500. 1A Auto shows you how to DIY so you can save money!
-
step 1 :Removing the Blower Motor
- Remove the blower motor electrical connector from the retaining hook
- Disconnect the electrical connector
- Remove the three 8 mm mounting bolts
- Remove the blower motor
-
step 2 :Installing the Blower Motor
- Transfer the air tube elbow to the new blower motor
- Install the blower motor into position
- Install the three 8 mm mounting bolts
- Connect the electrical connector and secure it on the retaining hook
- Connect the air tube elbow
Tools needed
-
Socket Extensions
8mm Socket
Ratchet
Pocket Screwdriver
Hey friends, it's Len here at 1A Auto. Today we're gonna be working on our 1996 Dodge Ram 1500 and we're gonna replace the blower motor. If you need this or any other part, check us out, 1aauto.com. Thanks.
Okay, so when you're underneath the dash here, you got your glove box. It doesn't do anything if you get the glove box out of the way because you still have the rest of the dash on the way. So you just need to move this wire that runs along the metal here so you can see. You're gonna come over here to where the blower motor is. There's a little tab. You just kind of pull this and that's gonna give you plenty of slack with your wires that go to your blower motor.
Take a pocket screwdriver. It doesn't have to be anything special. This one's bent, but it can be a straight one and all you're really going to do. Once I grab it again, you're gonna push this wire straight up because there's a connector. Let's see if I can move that. There's a connector where the wires go into and that just slides into the box under here. So you lift that straight up, push it out to where it's situated into. I'm gonna get these wires back down. Those out of the way.
Then there's a slot in the box where it meets so you can bring this right down and out. Here we are. So you've got your little lock tab here. Stick your pocket screwdriver in there or you can even probably grab it just by your finger. Separate the two. There you are. Always check your electrical connector. Make sure that there's no greens, blues, reds. Well, anything really aside from metal color. That looks really good.
Next, you've got three 8-millimeter bolts. You've got one here, one there, and then one located on the backside there. You can use a ratchet or an electric if you've got anything like that, but it's an 8-millimeter. I'll see if I can get out the two that I can get with this and then I'll have to use the ratchet for the other. There's one, nothing too special. It's just got the little clipy do on there. There's number two.
All right. Now I'm gonna grab a ratchet for the knee extension and I'm gonna try to get that other one out. So I just started one of these other bolts in a little bit just to hold the blower motor up for me. Let's see if I can get this back on here.
There it is, awesome. Get this last one. Here we go. Start bringing this down and here my friends is our blower motor.
Here we are, friends. A quick product comparison for you. Right here we have our blower motor out of our 1996 Dodge Ram 1500 and over here we have our brand new quality 1A Auto part. As you can tell both these parts are the same. You've got the same three mounting holes, which is very important. You need to be able to mount this into your vehicle. You got the same connector here, also very important, obviously need it to be connected.
It comes with a brand new cage on it, which is great. A lot of times when you buy blower motors you have to take the cage off of the original one and then mount it onto your new one. Sometimes they break. Our Quality 1A auto part comes with a brand new one right on there for you. No work involved. So as you can tell, this is a quality part I can't wait to install into the vehicle, so if you need this or any other part, check us out, 1aauto.com. Thanks.
All right, so we're just gonna get this back on here. Just got a little like a little rubber e-ring thing there. Stick it on there, give a little push, twist it around. It's pretty decent. It doesn't need to make a really good seal. It's gonna seal on there pretty well once it's in the vehicle. We got our tools ready. Here we go back under the dash. Just gonna get the blower motor cage up inside the box here, bring the blower motor up so it lines up with all the holes for mounting. There it is. Awesome. Get a couple of these screws started.
Awesome. Okay, so now that we know that we have it started in, let's go ahead with our electrical connector here. I'm just gonna grab where the tab is, line it up with the tab on the electrical harness for the vehicle, slide right in, give it a nice little tug. Make sure it doesn't come back apart. Now we're gonna put this back in under here, right where we got it from.
Up there, bring it over the hole, my pocket screwdriver. Give that tug, slid right into its spot right there. Perfect. I'm gonna put this back up so it's not hanging down. We've got our wiring here. We need to make sure that we have that held on by this little clipy do here. Just put this one over here and that around. That's gonna hold it up beautifully.
All right. Now that we know that all of that's set up, we can go ahead with our 8-millimeter and tighten this right up. It's important to remember that you're gonna be screwing into plastic so there's not gonna be very much force involved. Once it feels like it bottoms out, that's pretty much gonna be the end of it. You can go just a teeny bit more, but that's it. Last thing you want to do is strip out the box. Could be a fairly expensive fix or of course there are other ways of fixing it that might be considered more of a temporary fix but we don't need to specify those because we're just gonna do it the right way. Just make it so a bottoms out right about there. I'm just going to give it a teeny bit more and that's it.
I'm gonna go ahead and do the same to the other two. All right, that's pretty much bottomed out. Let's give it a teeny bit more. That's it for that one. Now we've just got our little rubber hose here. You just need to make sure it's still in the blower motor, which this is and then press it up into the box which is right under there. You can tell where it needs to go just because it's got this plastic area right here. It goes in between there and then straight up and it's gonna line right up with the hole right there. You can see it there. Put this back inside the blower motor. Of course, I pulled it out now. There we go. Get that on there. Awesome. We get our wiring all bundled up. It looks great. See if I can get this one. It's doubtable. Not bad. Awesome. Let's test it out. So we've got the key in the on position. We're gonna take our blower motor control. Oh yeah.
Perfect. Can't ask for any better than that.
Thanks for watching. Visit 1aauto.com, your place for DIY auto repairs, for great parts, great service, and more content.
Shop Products

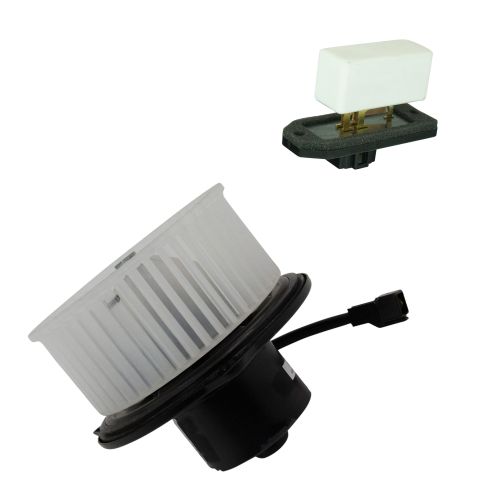
Jeep Dodge HVAC Blower Motor Kit TRQ HMA80229
Part Details:
- Highest Quality Materials
- (1) Heater Blower Motor
- (1) Heater Blower Motor Resistor
- Quality Tested - built to a strict level of product standards.

How to Replace Heater Blower Motor 2006-11 Honda Civic
If the blower motor is loud or broken, learn how to replace it yourself with this how-to video
