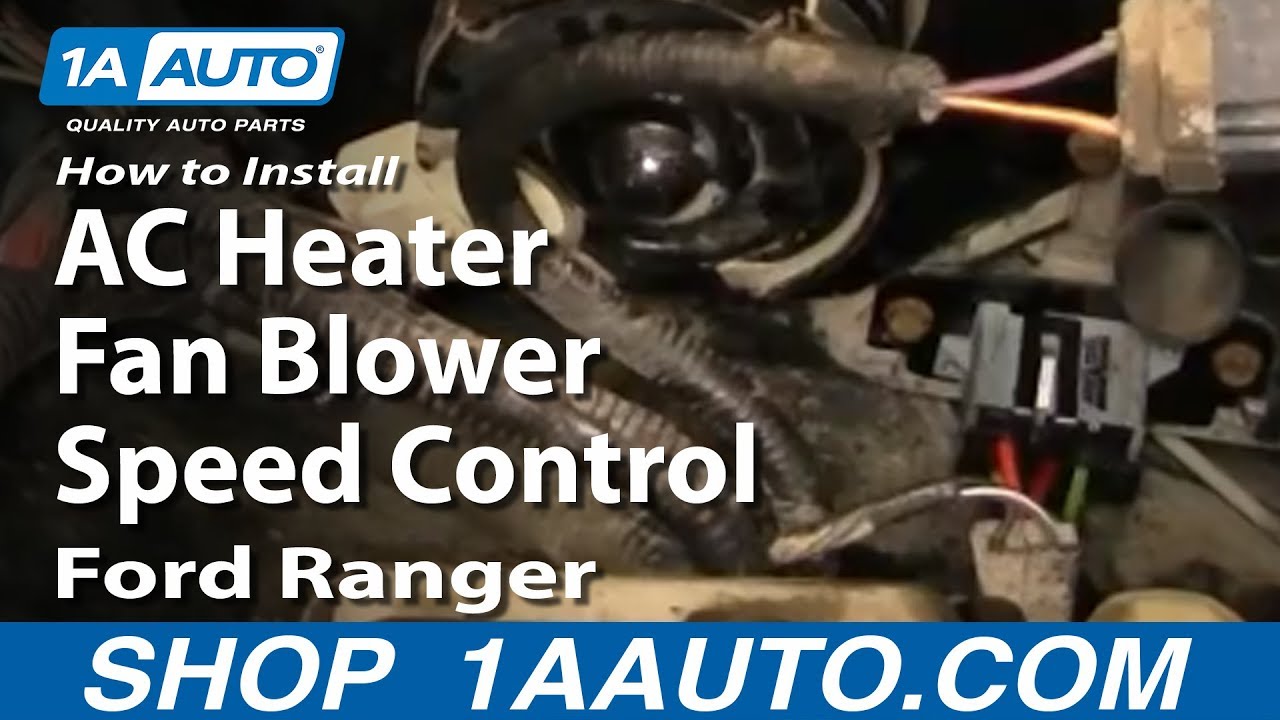
How to Replace Blower Motor Resistor 1995-2011 Ford Ranger
Created on: 2011-10-17
If the blower motor resistor needs to be replaced, watch this video to learn how to easily do it yourself!
-
step 1 :Testing the Blower Motor Resistor
- Turn the ignition on
- Test the fan in all its positions
- The fan speed should change with each turn of the knob
- Turn the ignition off
-
step 2 :Removing the Radiator Bottle
- Apply penetrating oil to the two 11mm nuts in the radiator bottle
- Remove the two 11mm nuts from the radiator bottle
- Remove the two 10mm nuts from the radiator bottle
- Pull the radiator bottle aside
-
step 3 :Removing the Blower Motor Resistor
- Disconnect the fan motor wiring harness
- Pull the vent tube collar off of the fan motor
- Pull the vent tube off of the fan motor
- Carefully remove the two 8mm bolts from the blower motor resistor, being sure not to drop them
- Pull out the blower motor resistor
- Disconnect the resistor wiring harness
- If the harness does not disconnect, break up the resistor housing with pliers and a screwdriver
-
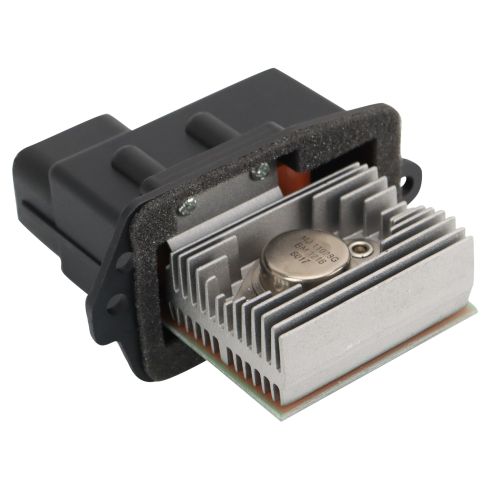
step 4 :Installing the New Blower Motor Resistor
- Apply penetrating oil to the blower motor resistor wiring harness
- Connect the new blower motor resistor to its wiring harness
- Put the new blower motor resistor into place
- Insert the two 8mm bolts into the resistor
- Stretch the vent tube collar around the fan motor
- Push the vent tube onto the fan
- Reconnect the fan motor wiring harness
-
step 5 :Testing the Blower Motor Resistor
- Turn the ignition on
- Test the fan in all its positions
- The fan speed should change with each turn of the knob
- Turn the ignition off
-
step 6 :Reinstalling the Radiator Bottle
- Put the radiator bottle into place
- Insert the two 10mm bolts into the radiator bottle
- Fasten the two 11mm nuts onto the radiator bottle
Tools needed
-
Socket Extensions
8mm Socket
10mm Socket
Slip-Joint Pliers
Ratchet
Needle nose pliers
11mm Socket
Brought to you by 1AAuto.com, your source for quality replacement parts and the best service on the Internet.
Hi, I'm Mike Green. I'm one of the owners of 1A Auto. I want to help you save time and money repairing or maintaining your vehicle. I'm going to use my 20-plus years experience restoring and repairing cars and trucks like this to show you the correct way to install parts from 1AAuto.com. The right parts installed correctly: that's going to save you time and money. Thank you and enjoy the video.
In this video, we replace the blower motor resistor. The symptoms of one of these going bad is that your fan will work at certain speeds but not at others and it's a pretty easy replacement. The tools you'll need are 8,10, and 11mm sockets with ratchets and extensions. That's all you should need after that the resistor should unplug and you should be able to replace it but as you'll see on our vehicle and probably on a lot of vehicles, they corrode and we ended up using a flat blade screwdriver and pliers to basically ruin the old resistor and break it apart to get it unplugged.
Inside the truck, turn the key on. Now, turn the ventilation on and if you listen really carefully you can hear the fan going. You can hear it go faster. Now, when I go from two to three, you can hear that it doesn't really do anything. When I go to four, obviously, it really winds up. There's nothing from two to three. Actually the first time I got in this, when I turned it on there was actually no fan, one, two and three and then four it started working and the other speeds started working so that was an indicator that my blower resistor was starting to go bad.
First, we're going to unbolt our radiator and washer fluid jar and just move it forward to give ourselves a little extra room back here and it's four bolts: one there, one there, another one on the side and then another one down there. Use a little penetrating oil, coat those two nuts down low/ Those are 11mm and I'm going to speed it up here as we remove those two and then the bolts that are up on the fender, the ones up higher, are 10mm and we'll remove those as well. We're just going to pull this up and push it forward some.
With that bottle out of the way, our resistor is this part right down here. What we're going to want to do is just to give ourselves a little room is we'll disconnect our fan connection here and then you'll see this little rubber, almost a rubber band, take that off, which allows you to pull this tube out and off and then just gives you a more clear shot. You can see there's one screw right there, 8mm, and there's another one on the other side, 8mm. Use an 8mm socket with a ratchet and extension. This far one's the most difficult and I'm sure I'm blocking your view but just get your wrench down there on it. I'm just going to speed up as I go to remove those two 8mm bolts and one tip is to remove them most of the way with a wrench as they start getting easy reach down in there with your fingers and take them out the rest of the way so you don't drop them. Once you get them a certain way out, you can reach in with your fingers, you want to avoid dropping them. Then pull the resistor straight out. Now, obviously, you have to disconnect the resistor from the harness and on this vehicle and probably on most vehicles, they corrode very badly and it makes it very difficult to get the resistor apart. I'm actually just showing you the end here, what you can see is the resistor, it's already broken into a few pieces. You can just see I'm prying it off. I used needle nose pliers and other pliers and basically just broke all the plastic around the resistor. Now you don't want to break the plastic that's part of the wiring harness of the car, you just want to break the plastic around the resistor and then get a screwdriver in there and pry the connection out. You can see here I bring in an even bigger screwdriver, it's just really difficult to get that apart and then I end up really breaking the resistor up and then grabbing some pliers to get the rest of it out. Now with the resistor out, I still have a little piece of the plastic housing that it's plugged into that I broke away and then it's just a matter of actually pulling that off with my hands. Now here just use some more penetrant, spray right into the terminal. It just cleans things out.
The new part from 1A Auto goes right in, plugs in. You can see that's how it should come apart. It goes right down. As you're putting it down and in, you will notice the resistor is shaped a certain way and there are little rectangles on the housing and so the resistor only goes in one way. You get it in and get one of the bolts started. I'll fast forward here as I'm starting those bolts and use my 8mm socket with my ratchet and extension to tighten them up. You want to be careful, don't tighten them up too much you don't want to strip the plastic housing. If you do that then the bolts won't hold the resistor in there very well. When you tighten them up just get them to a firm point where you can start feeling them give some resistance and then that's enough. Push the vent tube into the motor, on there and reconnect our fan motor.
Turn the key on, turn the system on. Test: one, two, three, four. Looks good. Again, we'll go into light speed here as we put the radiator and windshield washer bottle back in. Again, the two bolts that go into the fender are 10mm, the two nuts that are down lower are 11mms. Tighten those up. Again, don't over-tighten them, nice and firm and you should be good.
We hope this video helps you out. Brought to you by www.1AAuto.com, your source for quality replacement parts and the best service on the Internet. Please feel free to call us toll-free, 888-844-3393. We're the company that's here for you on the Internet and in person.
Shop Products


How to Replace Blower Motor Resistor 2008-12 Jeep Liberty
The heat and air condition fan is controlled by a separate module, called the blower motor resistor. The nature of this component’s job causes it to heat up frequently, which can lead to failure. If your vents will only blow one speed, this is likely the cause. TRQ has a new resistor module made specifically for your vehicle. How to install it yourself in your 2008-12 Jeep Liberty.
