How to Replace Blower Motor Resistor 1995-99 GMC Sierra K1500
Created on: 2017-02-27
How to repair, install, fix, change or replace a bad or broken blower motor resistor on 95, 96, 97, 98, 99 GMC Sierra K1500
-
step 1 :Removing the Glove Box
- Open the glove box
- Remove any items inside the glove box
- Press the back corner of the box together from the side
- Lay the box down
- Pop the box out of its hinges
-
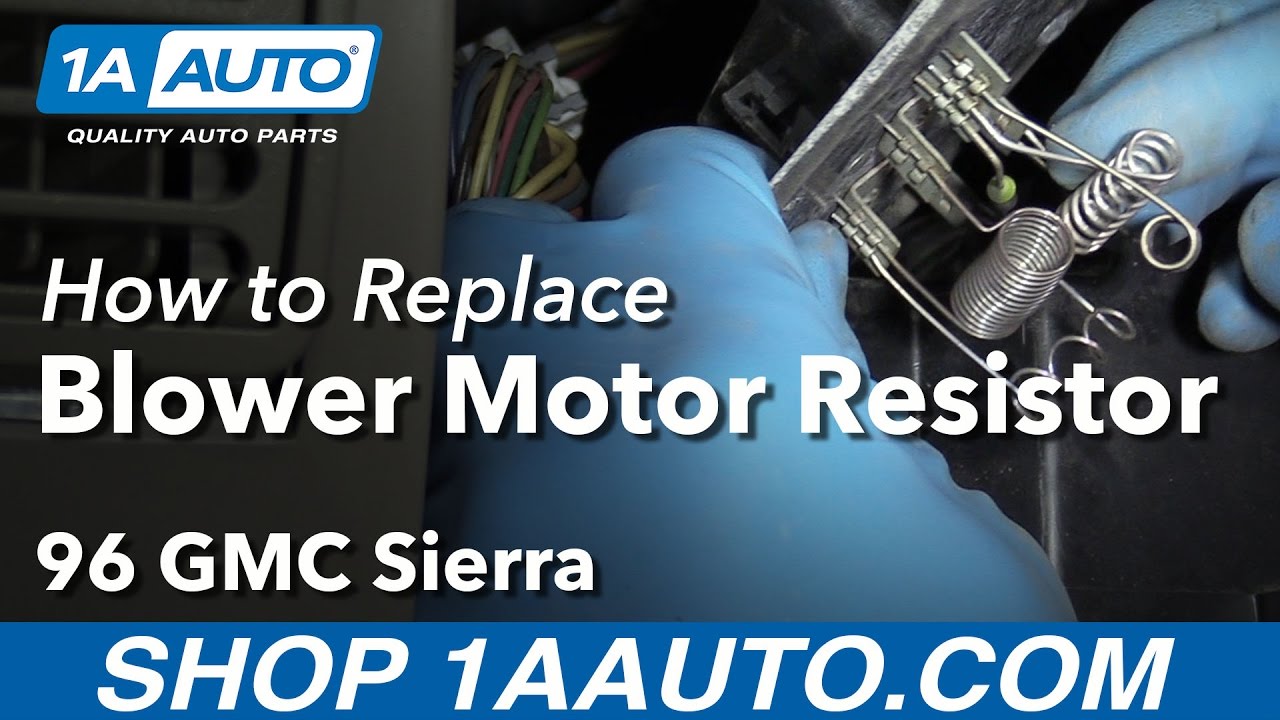
step 2 :Removing the Blower Motor Resistor
- Remove the two 7mm screws from the blower motor relay bracket
- Pinch the clips on the bottom of the bracket connected to the harness
- Pull the connector out of the bracket
- Disconnect the connector from the blower motor relay
- Pry out on the tab and push the resistor up to disconnect the connector
- Remove the two 7mm screws from the resistor
- Remove the resistor
-
step 3 :Installing the Blower Motor Resistor
- Install the blower motor resistor into place, with the safety lock facing the passenger side
- Tighten the two 7mm screws
- Connect the harness to the resistor
- Connect the relay harness
- Press the relay into place
- Tighten 7mm screws to the bracket
- Press in the harnesses to the bracket
-
step 4 :Installing the Glove Box
- Hook the bottom hinges into place
- Click the tabs into place
- Close the glove box
Tools needed
-
Socket Extensions
7mm Socket
Ratchet
Needle nose pliers
Hi, I'm Mike from 1AAuto. We've been selling auto parts for over 30 years! We're dedicated to delivering quality auto parts, expert customer service, and fast and free shipping, all backed by our 100% satisfaction guarantee. So visit us at 1AAuto.com, your trusted source for quality auto parts.
In this video we're going to be working with our 1996 GMC Sierra K1500. We're going to show you how to remove and replace your vehicle's blower motor resistor.
If you like this video, please click subscribe. We have a ton more information on this truck, as well as many other makes and models. If you ever need parts for your car, you can follow the link down in the description over to 1AAuto.com.
Here are the items you'll need for this repair: 7mm socket, ratchet, socket extension, needle nose pliers
Open your glove box, be sure that anything that's going to fall out or roll around on the floor has been removed. Press the back corners of the glove box together until they slide out. Lay the glove box down and pop it out of the hinges.
Remove the two 7 millimeter screws on the blower motor relay bracket. We'll do this using the 7-millimeter socket and ratchet. You'll need a pair of needle nose pliers to pinch these clips on the bottom of the bracket securing the electrical connectors. Pinch those together to compress them, and then push up. It may take a little bit of wiggling. Once you've got them compressed, you should just be able to slide them right up through the opening and grab it. There's one on each connector, they're exactly the same. Now there's a little connector on the back of the relay here, you'll need to push down and you should just be able to pull the whole relay and bracket forward to remove it. Just make sure it's disengaged before you pull too hard. We'll remove that bracket. Slide these harnesses out of the way.
Then take a screwdriver, pry out on the tab for the blower motor resistor. Push up at the same time. Push that connector and the harness out of the way as well. Then there are two 7-millimeter screws on the top there, one on each side of the connector at the three and nine o'clock positions. Reach in there with our 7 millimeter socket and ratchet, and remove those. Once the screws are out, lift up and remove the blower motor resistor from the heater box.
Be careful not to damage anything if you're reinstalling it. Carefully install your new blower motor resistor into the vehicle, be careful not to bend any of these springs and let them touch, otherwise the fan speeds aren't going to work the way you want. Remember that the safety lock side of the connector is going to face to the passenger side of the vehicle. Be sure that none of the wire harnesses or connectors are stuck underneath, and set your blower motor resistor back into the box so you can start your two 7-millimeter screws. Tighten down the two screws with your 7-millimeter socket and ratchet, and remember these are only going into plastic, so we just need to get them snug.
Reconnect the electrical connector for your blower motor resistor. Reconnect the relay, and slide the bracket back into place so you can reinstall and tighten your two 7-millimeter screws with your 7-millimeter socket and ratchet. Slide your connectors back over toward the bracket. White one goes closer to the relay, black one goes to the left of that.
Hook the bottom hinges of your glove box back into place, push the tabs in to close your glove box.
Thanks for watching. Visit us at 1AAuto.com for quality auto parts, fast and free shipping, and the best customer service in the industry.
Shop Products


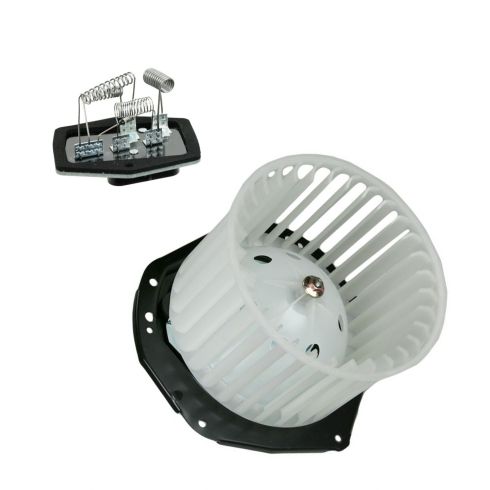
1995-96 Chevrolet GMC HVAC Blower Motor Kit DIY Solutions HVA03423
Part Details:
- Highest Quality Materials
- (1) Heater Blower Motor
- (1) Heater Blower Motor Resistor
- Quality Tested - built to a strict level of product standards.

How to Replace Blower Motor Resistor 1999-2007 Ford F250 Super Duty Truck
Watch this video to learn how to replace the blower motor resistor in a 99-07 Ford F250 Super Duty truck.
