How to Replace Blower Motor Resistor 2005-16 Toyota RAV4
Created on: 2019-09-17
Watch this video to learn how to replace the blower motor resistor on your 05-16 Toyota RAV4. 1A Auto shows you how to DIY it and save money!
-
step 1 :Removing the Blower Motor Resistor
- Remove the under dash panel
- Disconnect the blower motor resistor electrical connector
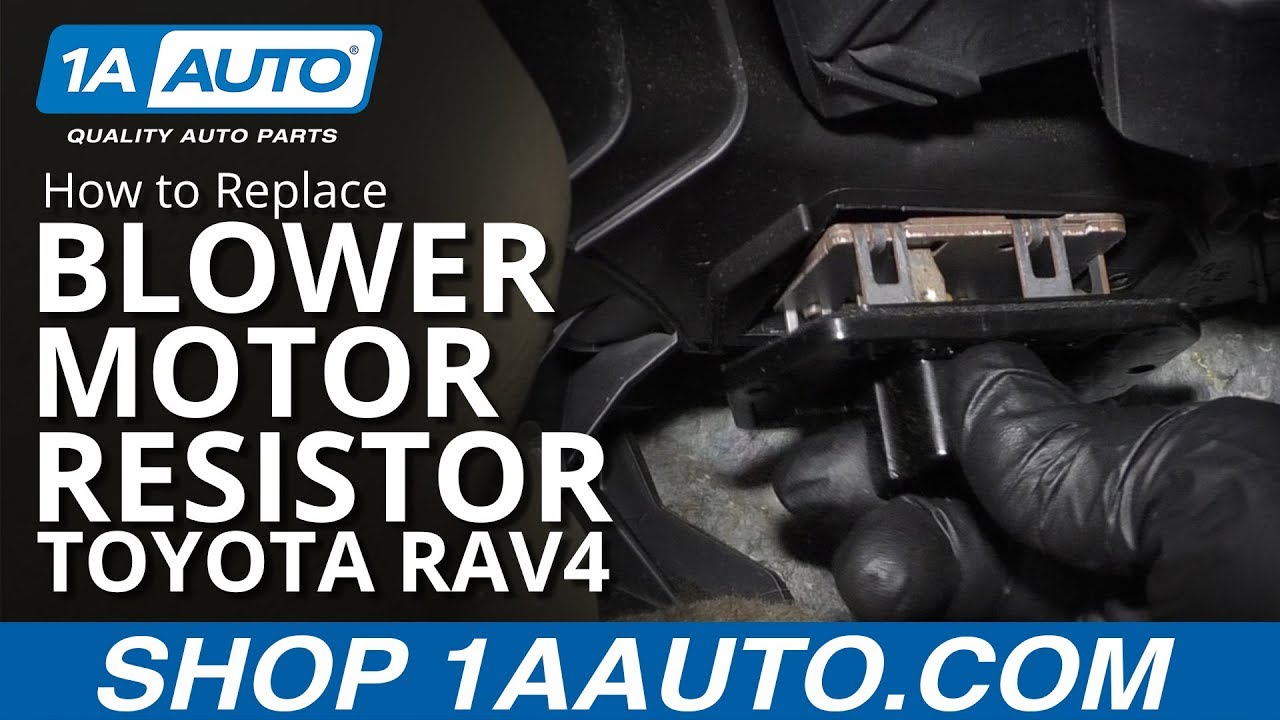
- Remove the two Phillips screws
- Remove the blower motor resistor
-
step 2 :Installing the Blower Motor Resistor
- Install the blower motor resistor
- Install the two Phillips screws
- Connect the electrical connector
- Install the under dash panel
Tools needed
-
Flat Blade Screwdriver
Phillips Head Screwdriver
What's up, guys? I'm Andy from 1A Auto. In this video, I'm going to show you how to replace the blower motor resistor on this 2010 Toyota RAV4. If you need parts for your vehicle, click the link in the description and head over to 1aauto.com.
I want to remove this panel right here. This is underneath the passenger side. Just use a straight blade screwdriver or you could try to push down on these tabs, those lock tabs. It's just easier to use a screwdriver, and just like that, and then it slides out. There's a little pin right there.
I'm going to disconnect the resistor connector right here. Just push this little tab right there and pull the connector down. Now I'm going to take these two screws out right here. I'm going to use a Phillips head screwdriver. These are holding the resistor to the air box. And down and out, and then there is one right here. Get that one out, grab the resistor, and slide it up.
So this blower motor, it's different which way you install this. There's more of a triangle side on this side, and then this side is a little bit different angle on that side. So the triangle side goes towards the middle, like an arrow, just like that. Take the screw, get the screws started, and we'll get the other screws started. I'm taking the Phillips head screwdriver, and we'll tighten the screws up, just going back, and then same with this side.
Snug that up. Take the connector, plug the resistor back in. Reinstall this lower cover, just slide this pin through that hole right there and line these two retainers through the slots, lock it in place.
Thanks for watching. Visit 1aauto.com for quality auto parts shipped to your door, the place for DIY auto repair. And if you enjoyed this video, please click the subscribe button.

Top 5 Problems Ford E-250 Van 4th Generation 1992 - Present
This video discusses the top problems with the 4th generation Ford E series van, model years 1992 to present.
