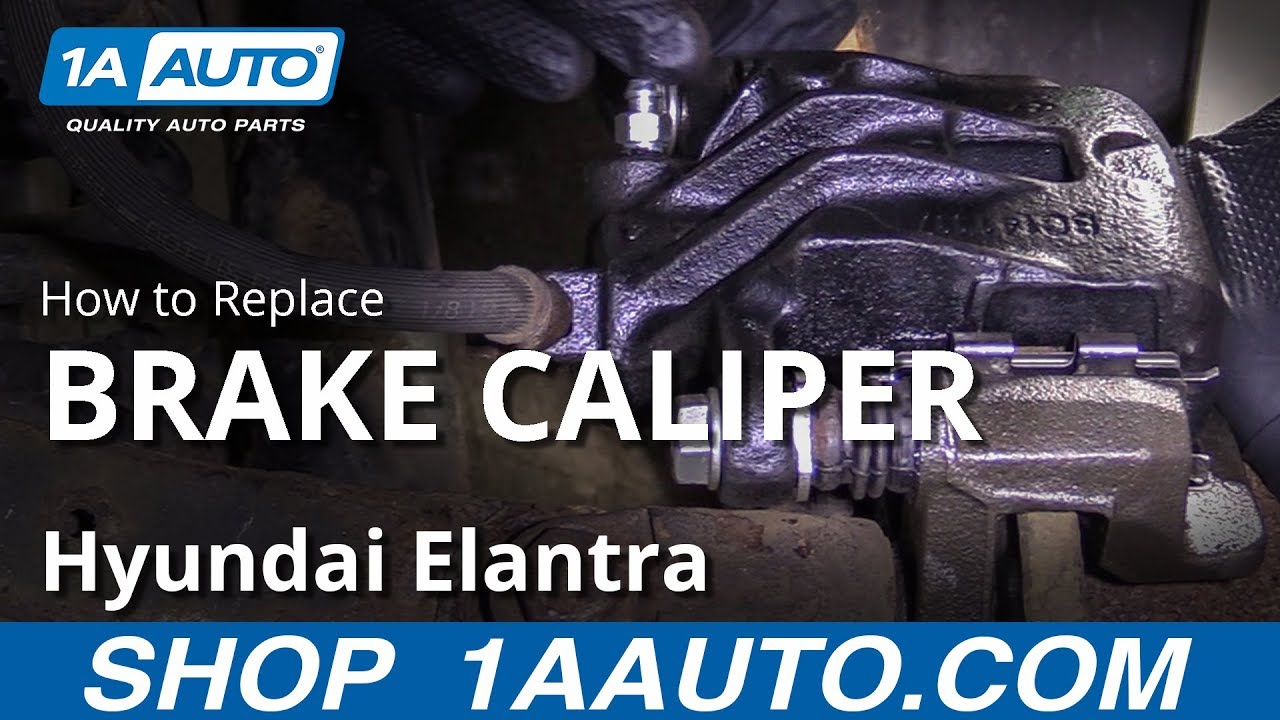
How to Replace Brake Caliper 2007-10 Hyundai Elantra
Created on: 2019-06-24
Check out this 1A Auto video with step by step instructions to learn how to replace the brake calipers on your 07-10 Hyundai Elantra!
-
step 1 :Removing the Wheel
- Raise the vehicle with minimal weight on the tire
- Loosen the five 21 mm lug nuts
- Raise and support the vehicle
- Remove the five lug nuts
- Remove the hubcap
- Remove the wheel
-
step 2 :Removing the Brake Caliper
- Loosen and then tighten the 12 mm brake line banjo bolt so that it is easier to remove later
- Remove the two 14 mm brake caliper slider bolts
- Remove the brake caliper, prying it off if necessary
- Set the caliper aside or hang it so there is no tension on the brake hose
- Remove the 17 mm bolt and 17 mm nut securing the control arm to the knuckle
- Move the control arm aside to give access to the second caliper bracket bolt
- Remove the two 14 mm caliper bracket bolts
- Remove the caliper bracket
- Crimp the brake hose with hose pinch off pliers
- Remove the 12 mm banjo bolt to disconnect the brake hose from the caliper
- Check the brake hose fitting to make sure the copper gaskets are not stuck to it, and remove the gaskets if necessary
- Remove the brake pads from the caliper bracket, hammering them out from the back side if necessary
- Clean the brake pad ears if you are reusing them
-
step 3 :Prepping the new Brake Caliper
- Remove the caliper slider bolts to separate the caliper from the caliper bracket
- Remove the two caliper sliders and apply brake grease
- Reinstall the caliper sliders
- Apply brake grease to the notches where the brake tins will sit
- Install the brake tins into each notch of the caliper bracket
- Apply brake grease to the ears and piston of the brake caliper
- Install the brake pads into the caliper bracket
-
step 4 :Installing the Brake Caliper
- Install the caliper bracket onto the knuckle
- Secure the caliper bracket with the two 14 mm caliper bracket bolts
- Torque the two caliper bracket bolts to 43 ft-lb
- Install the brake caliper onto the caliper bracket
- Secure the caliper with the two 14 mm brake caliper slider bolts
- Torque the caliper slider bolts to 23 ft-lb
- Place one copper gasket onto the banjo bolt
- Insert the banjo bolt through the brake hose fitting
- Place the other copper gasket onto the banjo bolt
- Install the banjo bolt into the caliper
- Tighten the 12 mm banjo bolt until it bottoms out and then an extra 1/8 - 1/4 turn
- Replace the control arm and secure it with the 17 mm bolt and 17 mm nut
- Open the brake caliper bleeder screw to allow fluid to gravity bleed, then close the bleeder screw
- Pump the brake pedal 3-5 times to build pressure in the system
- Open the bleeder screw again until fluid flows in a solid stream, then close the bleeder.
- It is recommended to perform a full bleed after completing the installation.
-
step 5 :Installing the Wheel
- Slide the wheel onto the wheel studs
- Replace the hubcap
- Replace and tighten the 21 mm lug nuts by hand
- Lower the vehicle with minimal weight on the wheel
- Torque the lug nuts to 80 ft-lb in a star pattern
- Lower the vehicle completely
Tools needed
-
21mm Socket
12mm Socket
Hose Pinch-Off Pliers
Socket Extensions
14mm Socket
17mm Wrench
Pry Bar
17mm Socket
Brake Grease
Ratchet
Hey, friends. It's Len here at 1A Auto. Today I'm working on a 2007 Hyundai Elantra. I'm going to show you how to do rear calipers. It's going to be a very easy job. I want to be the guy that shows you how to do. If you need this part or any other part, you can always check us out at 1AAuto.com. Thanks.
Now it's time to loosen these up, okay? 21-millimeter. We've got our long ratchet here. I've got the majority of the weight of the vehicle off the ground. It's just barely touching, so I can remove the lug nuts or at least break them free without spinning the wheel. Okay. I'm just going to give it a quick crank. I'm not going to loosen it up all the way. Last lug nut, I'm holding the wheel. Take off our hub cap. Now we're going to carefully take the wheel down and lower it to the ground, and we'll put it safely out of the way.
One of the first things I want to do when I'm going to replace this caliper is I'm going to break this banjo bolt free. I'm just going to break it free. Then I'm going to go ahead and snug it back up, not too tight, but enough so it's not leaking. I'm using a 12-millimeter. Here we are. Fluid is starting to come out. I know it's good to go.
Next, what I like to do is I'm going to take off this bolt right here and this bolt right here. I'm going to use a 14-millimeter. Some people will tell you that you don't necessarily have to take off the caliper from the bracket, if you're just going to replacing it anyway, but I'm going to show you why I'm doing this on this particular vehicle. I'm going to break this free. These are both the same, not that it matters. We're replacing them anyway. See if we can get this off. Use something like this, small pry bar. I'll try to wedge it in here somewhere. Try to get this caliper off. There we are. If we weren't replacing the caliper, even though we are, I would always look along here. This is the piston. This is the piston boot. We want to see if there's fluid coming out of there. Okay. We're replacing this, so it doesn't really matter. If you weren't, you would check. If there is fluid coming out, then you would need to replace it in which case you just go on 1AAuto.com. Anyway.
Now we've got our pads. Pads are nice and frozen in there. Those are not going to come out on their own. The reason why I took the caliper off of the bracket is because I wanted to show you you've got one caliper bracket bolt right here. It's just a 14-millimeter head. The other one is located behind this arm, so we'd have to take off this bolt with the nut. Take it out of here, get this arm out of the way to get to it, or you could try to use something like a wrench, just try to get in between there somehow magically and weasel it out. That's completely up to you. Me, personally, I'm just going to try to take off this bolt. There's a nut on the backside. We'll do it that way, and then we'll have clear access to get to that bolt.
Right here, we have a 17-millimeter head bolt that goes through from the rear to the front, and there's a nut on the backside, which is also a 17-millimeter. What I'm going to do, I'm going to have my wrench on the nut side, and then I'm going to blast this side with my air gun with a 17-millimeter. You can use a ratchet. You can use a wrench, whatever you need to do to get it off. 17, 17. Safety glasses, hand protection. There's our nut. Get my gun off of here. There it is. See if I can get our bolt out of here. There's our bolt, nice. All right, let's see if this arm will move. Watch your eyes. Perfect.
Now we have a clear view of our 14-millimeter bolt right there. That was easy peasy, and another 14 right here. We'll take both of these out, and we'll move along. I'm going to remove the lower one here using my 14-millimeter and my ratchet with a short extension. I get this one almost all the way out. I'm going to leave it in just a little bit just like that. Now I'm going to remove the other one, and that will help prevent he bracket from falling out. Yeah. One bracket bolt. See if this one is ready to come out by hand. It feels like a no. I'm going to hold the bracket, so it can't fall down and hurt me. Bolt number two same as bolt number one. We don't have to worry about mixing those up. Caliper bracket is nice and stuck on that rotor due to those pads being frozen in there. There's our bracket.
Now it's time to get this caliper off of here. We've got our brake hose. This is our banjo bolt, which holds the brake hose to the caliper itself. I'm just going to take some little hose crimpers here. That's just going to keep the gravity from pulling the brake fluid down and out through this hose. You might still get a couple drips, but at least it's not going to be a lost of drips. The drips that we are going to have, it would be great if you had some sort of recycling receptacle that you can catch your fluid into, save the unicorns, and Sasquatch, and all those guys that may or may not exist. Anyway, penguins. We'll say save the penguins and the dolphins. It's almost ready, and the Loch Ness Monster.
There's our banjo bolt. Now I'm going to carefully try to wiggle this. It might splash fluid, so make sure you're wearing gloves and eye protection. Here we are. This is our break hose. A lot of times, what you'll notice is there will be a copper gasket stuck on here like this copper gasket right there. That might be stuck on either this side or this side because there should be a gasket on both sides. If there is, you need to make sure you get that off before you go ahead and put your new one on, okay. I'm just going to go ahead and put this aside.
Let's go ahead and get these pads out of here. I'm just going to use a hammer, and I'm going to try to bonk them out, okay? Bonk, bonk. That's my thing. There we are. It's the inner pad, this one. I'm hitting on the metal side of it, not on the meat side of it, obviously. I don't want to damage that. There we are. Those are out. On your pad along the edge right here, there and right there, okay, three edges, that's where your caliper bracket is going to be sitting, or your pad is going to be sitting inside the bracket. Same thing on this side. What we want to do is just clean it up. It looks pretty good in comparison to that. We'll do the same to this side. There we are.
Now you could take a sanding block if you wanted to and scuff this up, do whatever you had to do, if that's what you wanted to do. It's completely up to you, it's your prerogative. These are going back on the old rotors. You don't really necessarily have to worry about that so much. You definitely want to clean them up either way though. Okay, if you're reusing them, just clean up along those edges, so they can flow freely inside those brackets. I'm going to do the same to the other pads, and we'll move along.
Okay, so I just want to show you real quick something to pay attention to is where your bleeder screw is located on your caliper. If you notice that your bleeder screw on your new caliper is over here in comparison to where this one is, you just have the caliper for the wrong side of the vehicle. It should be easy peasy, assuming you bought two. All you do is just go over, grab your other one. Bring it over, boom. It should match right up. If it doesn't, somebody might have boxed it wrong. Stuff happens, it's life. Human error, blah, blah, blah.
Anyway, so to continue, we're just going to match up our calipers. Make sure that everything seems like it's about the same size. The brackets themselves, whoops. Turn it, here we go. The brackets themselves are the same length just like this side to side. Okay, that seems pretty decent. You got them matched up the same height. Your new one isn't kind of up this high, right. That would make it, obviously, the wrong bracket for this particular vehicle. As you could tell, this looks really good. Let's go ahead and get it going.
Let's get our new caliper all prepped up and ready to go. I'm, going to take this bolt out right here. It's just a caliper to the bracket bolt. Take that one out. They're both the same. You don't have to worry about mixing them up. Here's the muscle of the brake, right, muscle. When you step on your brake pedal, it forces fluid down the line. It comes through here, fills this up with fluid and squeezes your piston and your pad up against the rotor. That's how you stop with friction, so this is the muscles and this is what holds the muscle where it needs to be, the bracket.
What I'm going to do, I'm going to take out the slider, take out the other slider. They're both the same. Sometimes you'll see them, they'll have a little rubber on there. These look the exact same. I like to just put a little extra lube. Sometimes in the assembly line, maybe the machine or person that was doing it was having kind of a lazy day, and they didn't put as much as maybe I like to have in there. I like to make sure these puppies can move around for days, or months, or even years, right, really. Preferably, years, so I just put on a little extra lube. Why not? This is just caliper lube. You can use something like silicon paste, if you wanted to, or whatever. This is what I have access to, so this is what I'm using. It is black, it's not just dirty. I don't know. I just want to make sure that I mention that. I'm not using dirty grease.
I wanted to make sure that the grease came up along this lip up here, so that way there I can make sure that no water is going to make its way in between there. Our calipers came with new tins, that's always a special treat. That means we don't have to try to reuse our old tins from our other brackets. Let's see if I can get them apart real quick here. That's what it looks like. All that's going to do is sit right on here. It's going to go like this, but before you put it on there I want to show you that you're going to put a little bit more of that caliper grease right along here. The reason for that is so when you're driving in puddles or anything, really, moisture gets in there. What does moisture do to metal? Makes it rust. Rust starts to flake and swell, and then, of course, you're going to have your pads stuck in your brackets again. It's going to be a real issue, and I don't want to deal with that.
I just put a little bit of caliper lube on there. Now I'm going to take my tin. Let's see if I can get it in here, squeeze it. Those little prongs right here, okay. What I'm going to do with those prongs is I'm just trying to put them inside that slot right there. Prongs, slot, line it up and squeeze it in. There we are. It's important to note that you don't want to use any lube on the outside of these tins where the pads are going to be riding. All that's going to happen at that point is you'll collect and debris and everything in between there, and then it's going to cause sticking and everything in the long run. If you're putting on new pads, you definitely don't want to put any type of lubricant there.
Now we're going to move on to the muscle. I'm going to go right on this little forky end here right on the other end. Then I like to go right directly on the piston right there. Some people will say, "You just lubed the whole back side of the pad. That doesn't make sense. Why would you put it on the whole back side of the pad when this is the only part that actually touches? All you're doing is wasting grease, and you're creating more of an area for your pad to collect debris, and gunk and all that." If you're reusing your pads, you didn't get new ones for some reason, you're only replacing the caliper, you'd have your old pads. The one with the squealer on here, this is called a squealer, so when your pad gets down to a certain level, about 2/32, this little piece of metal will start hitting your rotor, will start making a ee, ee, ee, ee when you're driving. That's how you know, hey, it's time to pull over and get some brakes done.
All you do is you just slide it in here. Slide it in there. The squealer goes on the inner pad. That would be the side facing down as well. Go ahead and do the same to the outer pad. Get it situated in there just like that. We can take our caliper. Slide it right over like this. Then at this point, you can go ahead and tighten these down if you wanted to. I prefer to actually leave this apart until I get it mounted on the vehicle. All I'm going to do now is I'm just going to bring this over to the vehicle, and I'll get it mounted on the vehicle, and I'll show you how to go from there.
Now it's time to get our bracket mounted on. We've got our two-caliper bracket mounting bolts. If you wanted to, you could use a little bit of thread locker. It's never a bad idea to use some of that. You definitely don't want to use Never-Seez. People have been known to do that. That's there prerogative. I would not recommend using Never-Seez because that just makes it so things can come lose easier. Do we want our brakes coming loose easy? I don't. Now I'm going to go ahead and tighten those down. I'm just going to snug them, and then I'm going to torque them using my 14. Snug. Let's grab the torque spec for these, and we'll move along.
It's time to torque these down. The caliper bolts to the knuckle are 43-foot pounds, 43. I'm using my 14-millimeter. There's one. There we are. I'm just going to hit it again. This one. There we are. I'd always rather have them a little bit over-torqued than under-torqued, so at least do 43. Let's get the muscle on here now. We've got our caliper. We're going to slide it right over these sliders. Okay. We got our two bolts. You can use some thread locker, if you want. Once again, I would avoid using the Never-Seez. Both of those are bottomed out, 14, 14. Those are going to be torqued to 23-foot pounds. I'm going to get my torque wrench ready here.
You'll notice that your caliper slider is spinning. That happens sometimes. All I'm going to do is grab something to hold it. Let's see if I have pliers. I'm going to hold onto the metal parts of the slider just to try to keep it from spinning. I'm going to torque this down to 23-foot pounds, hopefully. There's one. There we are. I'm just going to hit one more time. That feels good. Do this one. Pliers on there. There we are. Got our flex hose right here. That's going to go right on the back side here. There's a little plastic boot in there. You're just going to use something like a pick or a small screwdriver, or whatever you happen to have to get this out, tweezers, nail file, I don't know, whatever you got. It looks like that, easy peasy. Set that aside, we can put that into our old caliper. That'll help keep the fluid from coming out all over the place.
Now we're going to grab our brand new copper gaskets, and we'll grab our banjo bolt, and we'll get that in. Now it's time to get the muscle on here. We've got our bleeder screw. It's going to be facing up when we mount this on. You don't want it down here. We already checked it. It's up, that's where it's going to be. We have our brand new bolts. Go ahead and put that in there. This one. Use a little bit of thread locker, if you want. It's your prerogative. Get these bottomed out, and then I'm going torque them down to 23-foot pounds with my 14-millimeter socket. There we are. I'm going to try to turn this. The slider is spinning as well, so all I want to do is just hold that. You can use whatever you need to to do that, pliers or wrench. There we are. We'll do the same thing to the top. That's spinning as well. Just hold it. All right, I'm just going to hit it again. This one. Still spinning. Get my pliers on here. There we are.
Let's move along to our flex hose. This is our flex hose. We want to make sure that it's not cracked, or split, or leaking anywhere, of course. We already checked to make sure that we don't have our little copper gaskets on there. Show you what they look like. That's what they look like right there. If you see copper on this, take it off. We've got two copper gaskets. We've got our banjo bolt. We want to pay special attention, make sure there isn't a copper gasket still stuck on that. If you leave that old gasket on there, it's going to do something called double gasketing. You'll have a leak. Brakes are very high-pressure, so you want to make sure that you don't have double gaskets on there.
I'm just going to clean this off. I got my gloves, safety glasses, of course. Take a look at it. It looks good. I've got two gaskets. One is going to go on this side. I'm going to go through my hose. Then I'm going to put this on hit again, and that's going to go between the hose and the caliper itself. I got my banjo bolt, put it through my hose. Put my other copper gasket. Now I'm going to bring this down, get it started in here. There we are. I'm going to tighten that up with a 12-millimeter. I'm going to go until it bottoms out and just give it a little more, maybe, I don't know, an eighth or even a quarter turn, but probably an eighth. Right about there. That feels pretty great. We don't need to go much tighter than that. All we want to do is make sure that we crush down those copper gaskets a little bit, and that's going to make the seal. Take this off. Inspect your hose. Make sure it's not doing a whole bunch of little curly Qs, Us, or anything like that. If you did, you probably just twisted the caliper around or something. If it's not a nice, even, smooth, little bend like that, just take it back off and spin it around, okay, because those little Qs, that's going to cause issues down the line.
Now we've got our bolt. That's going to go right through here. It goes through the knuckle, through this arm, through the other side of the knuckle. Then we've got our nut, 17, 17. I'm just going to line this up, use my handy dandy hammer. It looks like it's pretty close. Take this. See if I can get enough swing. There we are. I've got my nut. You can use some thread locker, if you like. There it is. Okay. Here we go. 17 on both sides. Use a ratchet. Use a wrench, use an air gun. You do you, Boo Boo. I'm going to use a wrench on the back side here. I'm going to use my air gun on the forward side or, I guess, rearward side because it's the rear of the vehicle. Nice and tight.
Now that we've got that tight, got these torqued, now we can go ahead and bleed this. The way that we're going to want to bleed this is we're going to open up this bleeder screw. We'll let air trickle out a little bit, so there's no more air. It's kind of doing a solid trickle. I'm going to close it back up. I'm going to go up inside the vehicle. I'm going to pump up the brakes three to five times, okay, nice and slow. That's going to let this push its way out. It's going to let all the air make its way up to the bleeder screw. I'm going to double check the fluid inside the reservoir, make sure it's full.
Then I'll come back here, and I'll break this free again. I'll watch more air come out, little air bubbles. I'll watch fluid come out. I'm going to wait till there's a solid stream, close it up. At that point, you're clear to do a full bleed, if you wanted to. It's always a good habit. If you have an extra person, you can have them get up inside the vehicle and do a bleed with you. You can watch the bleed sequence on one of our videos. We also sell a special tool that makes it so you can bleed the brakes on your own.
Next step, essentially, like I said, would be to bleed your brakes, so here we go. Good job, everybody. All right, it's time to get the wheel up on here. We've got our lug nuts close, we've got our hug cap. I'm just going to take it, roll it up my leg here. Get it on there. Take my hub cap. We've got our little slot right there where our valve stem goes through. Get one lug nut on while I'm still holding it, make sure it's on there good. There we go. The wheel can't fall off, and I'm going to grab the others. 21-millimeter. I'm just going to bottom these out. You can use an air gun, if you have access to it.
All right. I want to make sure we do this in a star pattern, so the wheel won't get kinked on like this. If I tighten this one up, and then this one, the wheel might be sitting like this. I might think I have these tightened down and really they're not. It's pretty obvious, so we'll get it close. We'll come down here. Air gun will make short work of this. Time to torque this down. 21-millimeter, star pattern. We're going to go 80-foot pounds. Let's go ahead and go around in a circle here now.
Thanks for watching. Visit 1AAuto.com for quality auto parts shipped to your door, the place for DIY auto repair. If you enjoyed this video, please click the subscribe button.

How to Replace Front Brake Caliper 2000-06 Chevy Tahoe
This video shows you how to a (front/rear)brake caliper on your 2000-2006 Chevy Tahoe.
