How to Replace Brake Light Switch 1998-1999 Ford Explorer
Created on: 2010-10-20
Check out this video to learn how to replace the brake light switch in your 98-06 Ford Explorer. If your lights don't work after changing bulbs, try this!
-
step 1 :Diagnosis
- Check the bulbs if one or more of your brake lights are still working.
- If none of them are working at all, you could have a bad brake switch or a blown fuse.
- To rule out a blown fuse, check your fuse box and use the manual to identify which fuses are responsible for the brake lights.
- If it’s not a bad bulb or blown fuse, you can go on to replace the brake switch.
-
step 2 :Uninstall the old brake switch.
- Under the dash, unclip the yellow clip securing the brake switch.
- Unplug the brake switch.
- Make sure not to lose the little bushing on the mounting, as they are prone to flying away.
- Unplug the brake switch from the wiring harness.
-
step 3 :Install the new brake switch.
- Plug in the new switch and secure with the little yellow plastic clip.
- Connect the wiring harness.
- Again, ensure all flying bushings are firmly where they should be and all small parts are accounted for.
Brought you by 1AAuto.com- your source for quality replacement parts and the best service on the internet.
Hi. I'm Mike Green. I'm one of the owners of 1A Auto. I want to help you save time and money repairing or maintaining your vehicle. I'm going to use my 20-plus years experience restoring and repairing cars and trucks like this to show you the correct way to install parts from 1AAuto.com. The right parts installed correctly; that's going to save you time and money. Thank you and enjoy the video.
In this video we're going to show you how to replace the stoplight switch on this Explorer, and give you some tips on diagnosing bad brake lights or brake lights that don't work. To replace a stoplight switch, you actually don't need any tools, although you may want to use a flat blade screwdriver or a pair of pliers.
As you saw, the brake lights on this Explorer are working fine. It wasn't the case when I got it. When I got this truck, the third brake light was working, but the lower two weren't working. What you want to check for first is bulbs. I was actually kind of surprised to find- Here's one of the old bulbs from the car. Hopefully, you can see that the filaments actually look fine. At first look these bulbs look fine. Just on a whim, I put in a new bulb to test. It ended up being that just the bulbs were bad in my brake lights. If you're having an issue with your brake lights not working, and indicator is that your third brake light is working and your other lights aren't working, check the bulbs. Even if your bulbs look fine, go ahead and replace it with a new one and see what happens.
If none of your brakes are working, then what you need to look for and try is the brake switch. This is mounted up under the dash. It's actually quite easy to replace. Inside they have some contacts. Contacts can get corroded. Also, they can break, causing the switch not to work. Again, like I said, it's a pretty easy replacement. I'm going to show it to you.
Before you actually go in and replace that brake switch, another thing you obviously have to check is your fuse block, which is right here on the side of the dash. I'm going to show you - just in case you don't have it - but your manual has a very good guide to which fuses are which. I'm going to do a close up of the manual right here. Sometime. Here it comes. Hopefully in HD, if you get that, you can freeze frame it and get a good enough picture off of it. Actually on this car, there are two pages. There's also, if you look right below my thumb up on top, that's the fuse block that's under the hood of that car. As far as the brake lights go, I believe it's the number three and the number nine fuses. You just want to check those, and make sure you don't have a fuse blown, either before you go trying to diagnose a switch or anything like that.
Here, I'm actually just taking off that lower trim plate. You don't have to do this. I'm just doing this to get a better angle as far as the video goes. If you do want to do it, it's just four screws. Remove them, and put it to the side.
Now here, up under the dash, you can see that's the brake rod. There's a little yellow clip. I'm just going to use my thumb. You might want to use a screwdriver. I'm using my thumb to push that clip up off. It'll fly right off of here in a second. Once that clip's off, grab a hold of your switch right there and just work it back and forth. Move it to the left. I'm moving it over towards the driver side wall. Once you move it over that way, then you actually pull it down. You can see right there that silver shaft is through it, so you pull it out. Now you can see, you pull it right down. There's a bushing that goes between the brake booster rod and that shaft. It tends to fly off sometimes, so make sure it stays in place or it gets back in place.
Here's my switch hanging down. There's a clip on the side of it, so you just want to pull that pin out of the side. It's just a little serrated pin that sticks in there. Then there's a little button here to push and pull the connector out.
Here's the new one from 1A Auto on the left side and the original on the left side. You can see there all the same. Everything's going to go together the same. Everything's going to plug in the same and work correctly. If your switch is bad, then the new one is going to work the way it should. We're going to go move the camera here and reinstall.
Just plug your harness in and push the clip in to re-secure that harness. Back up underneath, you want to feel up in there, or look up in there, and move that master cylinder rod over just to the edge of that shaft. Make sure that bushing is still on there. I'm feeling my way to do this. I can't actually see. Get the switch up on there. I'll get the angle right here in a second. Push the switch up, then push it on to the shaft.
Looking from the other side, I've got that little yellow clip in my hands. You can tell I've done this type of thing a few times, or maybe you can't. Who knows? Trying to do it while holding the camera in your hand is not the easiest thing. Not being able to see anything. Take the little clip, and the hole is up on the top so you want to put it up on top and then slide it down. You should be all set.
We hope this helps you out. Brought to you by www.1AAuto.com, your source for quality replacement parts and the best service on the internet. Please feel free to call us toll-free at 888-844-3393. We're the company that's here for you on the internet and in person.
Shop Products
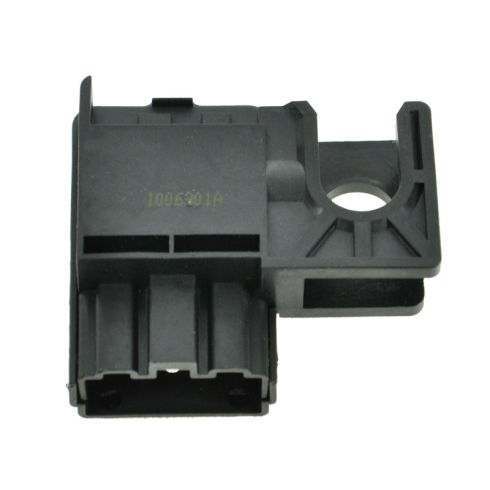
Ford Mazda Lincoln Mercury Brake Light Switch TRQ SWA41758
Part Details:
- 5
- Female
- Male
- No
- 1
- No
- Push

How to Replace Brake Light Switch 2007-14 Chevy Silverado
This video shows you how to install a new brake light switch on your 2007-14 Chevy Silverado.
