How to Replace Brake Rotor 1998-2003 Toyota Sienna
Created on: 2011-02-02
In this video, 1A Auto shows you how to replace front disc brake rotors and pads in a 98-03 Toyota Sienna.
-
step 1 :Remove the wheel
- Loosen the lug nuts with a 21 mm socket and ratchet or lug wrench.
- Raise and secure the vehicle.
- Remove the lug nuts and the wheel.
- Set aside.
-
step 2 :Remove the calipers.
- Remove the 14 mm caliper bolts and the 17 mm caliper bracket bolts.
- Pull off the calipers and brackets.
- Remove the rotor.
- Check the caliper pistons to make sure they are moving in and out freely.
- Add bearing grease to lubricate them if necessary.
-
step 3 :Install the new brake pads and rotors
- Clean the new rotor with brake cleaner
- Be careful not to touch the brake disk.
- Install new brake pads.
- Apply a little white grease to the corners to make installation and replacement easier.
- Use a c clamp to compress the caliper to install it easier.
-
step 4 :Put the wheel back on
- Put the wheel on and hand tighten the lug nuts.
- Lower the car and use a star pattern to torque the lug nuts.
- Consult the owner’s manual to torque the lug nuts to the correct ft lbs.
Tools needed
-
Large C-Clamp
14mm Socket
17mm Socket
Jack Stands
Brake Parts Cleaner
21mm Socket
Bearing Grease
Flat Blade Screwdriver
Anti-Seize Grease
Lug Wrench
Ratchet
Wire Brush
Floor Jack
Brought to you by 1AAuto.com- your source for quality replacement parts and the best service on the internet.
Hi I'm Mike Green; I'm one of the owners of 1A Auto. I want to help you save time and money repairing and maintaining your vehicle. I'm going to use my 20 plus years experience restoring and repairing cars and trucks like this to show you the correct way to install parts from 1aauto.com. The right parts installed correctly, that's going to save you time and money. Thank you and enjoy the video.
In this video we're going to show you how to remove and replace the front brake pads and rotors on this 1999 Sienna same as any of this generation Sienna. Tools you'll need are a large flat blade screwdriver, 21 mm socket and ratchet or your tire iron and 14 mm and 17 mm sockets with a ratchet, a wire brush, a little bit of wheel bearing or some type of lubricant, a torque wrench and a large C clamp.
First we'll take off the week, large screw driver, remove the hubcap and if you don't have the best air tools you'll want to have your car on the ground first and then loosen up your lug nuts with an either 21 mm socket and ratchet or your tire iron. I'm just going to use the air ratchet to get these off. What you want to do is bring your- this place you have easy access to the back of the rotor. Obviously lifting and securing the vehicle is required here so you want to obviously follow all the precautions on your jack and jack stands and obviously if you can't turn this by hand just you can use the steering wheel and turn your wheels so you can access the back.
There are going to be two 14 mm bolts. One here and then one up here and then there's two 17 mm bolts, one there and one right up there. These 14 mm bolts just hold the brake caliper on so if you just want to change your pads if your rotors are in good shape which you can see these are not; big area of pitting right here where it was sitting for a while and there's pitting all over the place so these rotors need to be changed out. If your rotors were in good shape if you ran your finger across them and you felt no real deep grooves or anything you could get away with just replacing your pads.
If your vehicle is older you'll either want to have your rotors checked for the run out or just replace them with a new set of rotors. You can see right in here it's probably a little difficult but you can see the part that moves. I can't even move it, is the rotor and then you can see that that pads very thin and the outer pad I think is not the thin side. The two 14 mm bolts remove easily by hand. Before you take those all the way out what you can do is use a screwdriver, large screwdriver, put it down in there and then pry your caliper out and that resets your system. Just slowly keep prying out till it stops then the caliper just pulls right up and off. This is a plate that it looks like they used an adhesive on this car, maybe try to keep the squeaking down I guess. The caliper right up here and on these 17 mm bolts if all you have is regular tools what you might want to use is a piece of pipe, put it right over the ratchet to give you extra leverage and just pull. Go easy you don't want to pull too hard because you could actually break your ratchet.
The rest of the way I'm just going to cheat and use my air tools right here. Now you can see there's my pad and you can just use your ratchet, knock them out. Now if you're not planning on replacing your rotors you actually don't have to take that bracket off and you can just use a screwdriver to pry the pads out of that bracket. Out of this bracket a couple things, these bolts should easily move back and forth. If they don't what you want to do is take off the rubber here, pull them out, clean them up a little bit, put some a little bit of wheel bearing grease on them and put them back in and make sure they're nice a free. Do that and then the other thing you want to check is these stainless steel slides here. You want to clean them up really good with a wire brush and then when you put the new pads on just put a little bit of grease on the ends of the pads so that the pads can slide back and forth there.
Here's my new rotor from 1A Auto, obviously the old rotor. The old rotor just pulls right off, new ones going to go right on. I've got the plastic on here still just to be careful not to touch the rotor with my hands; don't want to get any oil on it. You can touch this flan surface but you want to avoid touching the actual breaking surface of the rotor. What I do is just push the rotor on, put a lug nut on to hold it in place. This is my bracket.
The torque with these 17 mm bolts is 75 foot pounds. My new brake pads and I've put a little bit of grease right on the ends, right on here and slide the back one in. This keeps falling out so back up in. Put this one down in on the bottom first and then the top and you may want to use your ratchet handle with it to get it in place. Then you're going to want to use a big C clamp to push this caliper piston in the rest of the way. Now you can see this piston right here is just out a little bit so I'm going to put this C clamp in there. Push it in all the way, slide the caliper down on, I need to pull these in a little bit. Two 14 mm bolts, these two we only tighten up to about 25 foot pounds, all they do really is hold the caliper in place, they don't really absorb any of the breaking power. This shaft was spinning so you may find you want to have a small adjustable wrench around to hold it in place. See that I try and tighten that spin. Bring it back around off this lug nut.
Now I'm going to speed it up here as I put the wheel back on, put the lug nuts on and then just tighten them up a little bit with my air ratchet and then lower the vehicle down and torque the lug nuts to 100 foot pounds and then put the center cap on. Very important before you drive your car, make sure you get in and pump the breaks because when you push those pistons back into the calipers you'll have to reset those so you want to pump the breaks a bunch of times then just try to stop from like 5 miles an hour before you drive the car on the street.
We hope this helps you out, brought to you by www.1AAuto.com- your source for quality replacement parts and the best service on the internet. Please feel free to call us toll free 888-844-3393. We're the company that's here for you on the internet and in person.
Shop Products


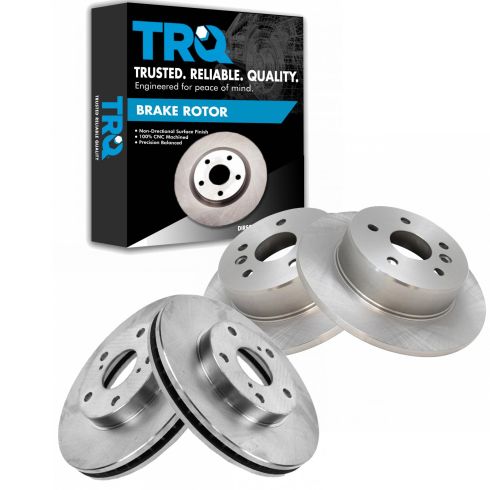
2000-04 Toyota Avalon Front & Rear 4 Piece Brake Rotor Set TRQ BRA13905
Part Details:
- Solid
- Vented
- 10.83 in. (275mm)
- 5 Lug
- 11.34 in. (288mm)
- 4 Piece
- (2) Front Brake Rotors
- (2) Rear Brake Rotors
- No
- Standard Replacement

How to Replace Front Brakes 2014-17 Infiniti QX50
This video shows you how to install new, quality TRQ brake pads and rotors on your 2016-19 Infiniti QX50.
