
How to Replace Cabin Air Filter 1999-2002 GMC Sierra 2500 Truck
Created on: 2011-01-04
Watch this video to learn how to change a dirty or clogged cabin air filter. The experts at 1A Auto show you how to replace the filter on your 99-02 GMC Sierra or Yukon; or Chevy Silverado, Suburban, or Tahoe.
-
step 1 :Removing the Cover
- Use 7 millimeter socket wrench to remove the four bolts under the passenger side dash
- Pull the cover off and put it out of the way
-
step 2 :Removing the Bolts
- Use your 7/32 inch socket to remove the bolt tucked down by the wiring harness
-
step 3 :Removing the Filter
- Pull the cover down and towards you and pull out the filter
- Clean up any dust and debris with a vacuum
-
step 4 :Installing the New Filters
- Use the arrows on your 1A Auto air filter to position your new filters
- Push them into the filter bracket
-
step 5 :Reassembling the Cover
- Replace filter cover, screw back in your bolt with your 7/32 inch socket
- Reassemble the cover and four 7mm bolts
Tools needed
-
7mm Socket
Ratchet
7/32 Inch Socket
Brought to you by 1AAuto.com, your source for quality replacement parts and the best service on the internet.
Hi, I'm Mike Green. I'm one of the owners of 1A Auto. I want to help you save time and money repairing and maintaining your vehicle. I'm going to use my 20+ years' experience restoring and repairing cars and trucks like this to show you the correct way to install parts from 1AAuto.com. The right parts installed correctly, that's going to save you time and money. Thank you and enjoy the video.
In this video, we're going to show you how to replace the cabin air filter on this 2002 Sierra, same procedure for any '99 to '02 Silverado or Sierra, as well as 2000 to 2002 Suburban Tahoe and Yukon. The only tools you'll need are a 7mm and a 7/32" inch sockets with a ratchet and small extension.
On the passenger's side there are four 7mm bolts to remove - one there and one in there. There's one up in that hole right there; I can't really video it, and then over here closer to the gas pedal there is one right there. Once you remove those bolts, just reach in and pull it down and out of the way. Once you have that cover off, up and underneath here, this is where your cabin filter's located. You need a 7/32" socket, and there is a bolt hidden by this wiring harness here. There's a bolt right here you need to remove, and then this comes down. It also locks on the top, but once you pull it down like that This is your filter right here, so just shake and pull it down. Then there's actually another one here, and we'll pull towards the back and down. As you can see, all the dirt coming out, these have probably never been changed in this vehicle. You can probably take your shop vac or house vac and just stick it up in there and get some of this stuff out.
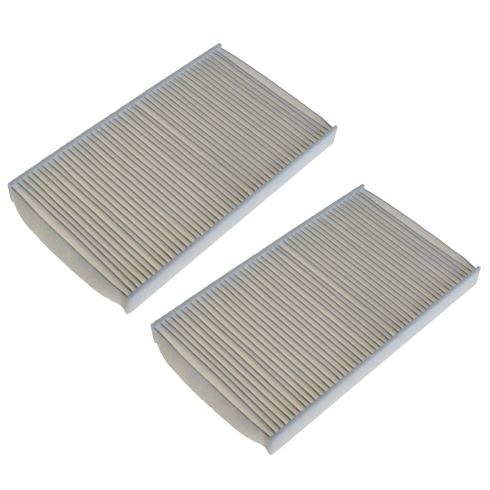
Here you can see my original ones and my new ones. I'm imagining that I'm going to get quite a bit more air flow. Now I'm ready to put my new filters back up in there. You'll want to pay attention. This has arrows on it: air flow that way. Your fan is over here, closer to the passenger side wall, so you want the airflow arrows pointing towards the driver's side. Let's put one up in, and then push it towards the back. Same thing, make sure the airflow arrows are correct here and then push that one up and in. And then this installs, you put the hook up in first and then push it up. I did use a little bit or warm, soapy water to wash off this door. So I'll get that in and tighten it up.
The final part is to put your cover back in place. You want to push it up in there. You push it against the firewall first. I'm sorry about shaking around a little bit here; I'm just trying to film with one hand and push it up in there with the other. Push the front of it up and in first, and then make sure you have everything lined up. As you can see here, these are the passenger side outlet holes. Make sure those are all lined up, and then start your end bolt here. I'd recommend starting the one over near the driver's side. Once you have those lined up, then the other two middle ones go in pretty easily.
We hope this helps you out. Brought to you by www.1aauto.com, your source for quality replacement parts and the best service on the internet. Please feel free to call us toll free: 888-844-3393. We're the company that's here for you on the internet and in person.
Shop Products

How to Replace Cabin Air Filter 2007-10 Toyota FJ Cruiser
If the cabin air filter is dirty like in this video, check out these instructions to replace it
