How to Replace Cabin Air Filter 2001-05 Honda Civic
Created on: 2016-06-03
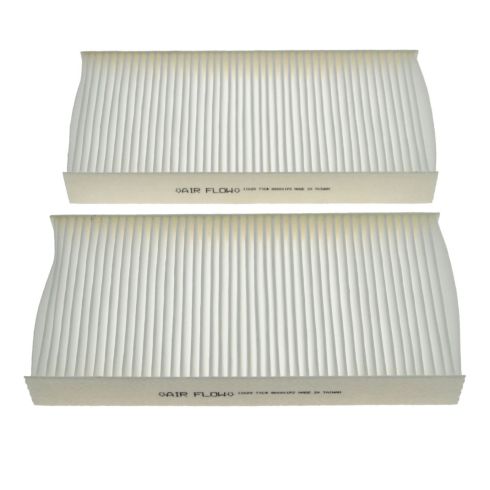
New Cabin Air Filter from 1AAuto.com How to repair, install, fix, change or replace a dirty, dusty or clogged cabin air filter on 01, 02, 03, 04, 05 Honda Civic
-
step 1 :Removing the Cabin Air Filter
- Open the glove box
- Snap out the clip on the glove box
- Let the glove box drop
- Remove the cabin air filter cover
- Remove the first cabin air filter
- Remove the second cabin air filter
-
step 2 :Installing the Cabin Air Filter
- Insert the air filter into the plastic slot, lining up the arrows
- Insert the first air filter into place
- Insert the second air filter into place
- Insert the cover into place
- Lift the glove box up
- Hook the glove box stop in
Brought to you by 1AAuto.com, your source for quality replacement parts and the best service on the Internet.
Hi, I'm Mike from 1A Auto. I hope this how-to video helps you out, and next time you need parts for your vehicle, think of 1AAuto.com. Thanks.
In this video, we're going to show you cabin air filter replacement. This is a 2003 Honda Civic. This process is the same for a lot of different Honda models and you actually don't need any tools. You just need a new cabin air filer from 1AAuto.com.
Open your glove box. Remove anything you might have in there and place it off to the side because the glove box is going to hang down. This clip snaps out. Push the glove box in slightly to take the pressure off the latch and pop it out. You can see it hooks in, snaps into place, snaps out. You have to bring it out at an angle. Normally there's one on each side. They remove the same way, but ours is missing one.
Allow the glove box to hang. Release the latch on the left side and move the cover. Place the tab to the right. I'm going to pull out one cabin air filter slide. Slide the other tab all the way to the left. Remove the other cabin air filter box.
You can see this is all the stuff that this filter is keeping out of the cabin of your car when you have your heat and A/C going, just letting the air in through the vents. As you can see, our cabin filer is marked air flow with an arrow, and the air filter housing is marked air flow. You want to make sure both of those arrows face the same direction before installing our filter.
The tab on the left goes in first. Slide it in to the right. It does the same thing on our other filter. Match up the air flow arrows. Put it into the housing. With the tab on the right side, slide your air filter housing back in. Lock the tab with the door into the hinge on the right side and snap the cover back into place.
Put our glove box in past the opening, hook our stop in, and snap it into place. Repeat this on the opposite side if you have both, and you're ready to put all your stuff back in your glove box and good to go.
Thanks for tuning in. We hope this video helped you out. Next time you need parts for your car, please visit 1AAuto.com. Also check out our other helpful how-to and diagnosis videos.
Shop Products

How to Replace Cabin Filter 2007-11 Honda CR-V
How to repair, install, fix, change or replace a dirty, dusty or clogged cabin air filter on 09 Honda CRV.

