How to Replace Catalytic Converter 2001-05 Honda Civic
Created on: 2016-08-04
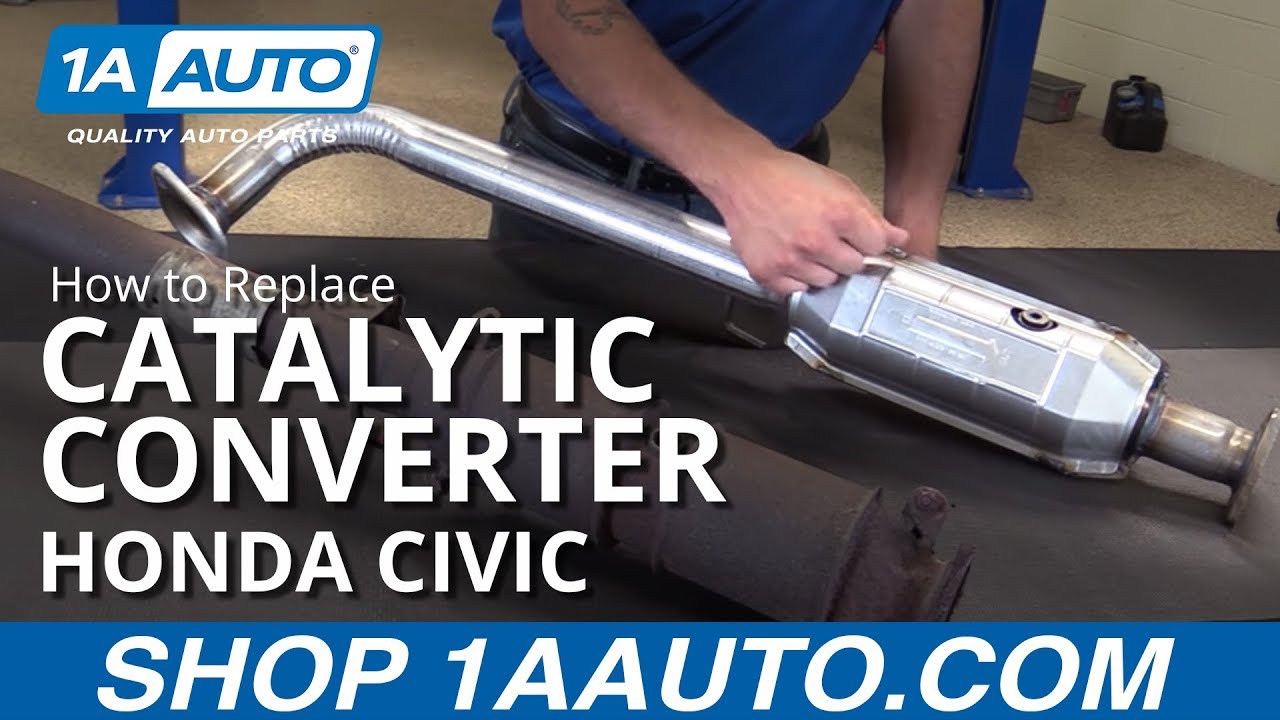
Check out this video to see how to replace the catalytic converter on your 01-05 Honda Civic.
-
step 1 :Removing the O2 Sensors
- Loosen the rear O2 sensor with an O2 sensor socket or 22mm wrench
- Twist the O2 sensor off by hand
- Allow the sensor to hang
- Loosen the front O2 sensor with an O2 sensor socket or 22mm wrench
- Unclip the O2 sensor wiring harness from its keeper
- Twist the O2 sensor off by hand
- Allow the sensor to hang
-
step 2 :Removing the Catalytic Converter
- Apply rust penetrant to the 12mm bolts on the exhaust manifold flange
- Remove the two 12mm bolts from the exhaust manifold flange
- If the bolts are corroded, use a hammer to tap on an 11mm socket
- Support the tail pipe with a bungee cord
- Remove the three 13mm bolts from the tail pipe flange
- Allow the front of the catalytic converter to hang
- Pull the catalytic converter off its rubber bushing
-
step 3 :Installing the Catalytic Converter
- Remove the plugs from the two O2 sensor bungs with an 8mm Allen wrench
- Hang the catalytic converter from the rubber bushing
- Insert the exhaust gasket into the exhaust manifold with the thinner side at the bottom
- Lift the catalytic converter to meet the exhaust manifold
- Start the two 14mm bolts into the exhaust manifold flange
- Insert the gasket into the rear of the catalytic converter
- Insert the three 13mm bolts into the tail pipe flange
- Remove the bungee cord
- Tighten the two 14mm bolts in the exhaust manifold flange
-
step 4 :Installing the O2 Sensors
- Start the front O2 sensor by hand
- Tighten the front O2 sensor with an O2 sensor socket or 22mm wrench
- Clip the O2 sensor wire into its keeper
- Start the rear O2 sensor by hand
- Tighten the rear O2 sensor with an O2 sensor socket or 22mm wrench
- Run your car and listen for exhaust leaks
- Clear your ECU code or have a shop do so if necessary
Tools needed
-
12mm Socket
13mm Socket
Hammer
Socket Extensions
14mm Socket
8mm Allen Wrench
O2 Sensor Socket
Bungee Cord
22mm Wrench
Ratchet
11mm Socket
13mm Wrench
Brought to you by 1AAuto.com, your source for quality replacement parts and the best service on the Internet.
Hi, I'm Mike from 1A Auto. I hope this how-to video helps you out, and next time you need parts for your vehicle, think of 1AAuto.com. Thanks.
In this video we're going to show you how to replace the catalytic converter in your 2003 Honda Civic 1.7 VTEC EX model. The items you'll need for this repair are a new catalytic converter from 1AAuto.com; 11, 12, 13, and 14-millimeter sockets; a ratchet and extension; a 13-millimeter wrench; an O2 sensor socket or a 22-millimeter wrench; an 8-millimeter Allen wrench; a hammer; and a bungee cord.
The catalytic converter is located underneath the center of the vehicle on this Honda EX model. All other models are located on the header.
We're going to remove the rear O2 sensor using an oxygen sensor socket. You can also use a 22 millimeter wrench. Watch the wires when removing to make sure that they don't twist up and break. Otherwise you'll have to unplug the sensor. Once the sensor is cracked loose, you should be able to remove it by hand. Allow that to hang out of the way.
Use that same O2 sensor socket to remove the front O2 sensor, which is located at the bottom of the exhaust manifold, and the top of the pipe to the catalytic converter. You may have to remove the keeper for the wiring harness here in order to get enough slack to remove it without having to disconnect the connector. Allow that too to hang out of the way.
We're going to remove the two spring bolts securing the flange for the catalytic converter pipe to the bottom of the exhaust manifold. I believe at one point they were 12-millimeter socket but ours have corroded down so we're going to use an 11 millimeter socket and tap it on with a hammer. Now carefully try to remove the bolt with a socket and ratchet. We've soaked ours in penetrating oil, but there's still a good chance that these bolts are going to break so it's a good idea to have replacements on hand. We'll try a 12 millimeter socket on this one now.
At the rear of the pipe remove the 3 bolts connecting the cat flange to the tail pipe flange. You'll need a 13 millimeter wrench to support one side while you remove the other with a 13 millimeter socket and ratchet. Before removing the last bolt, you may want to use a bungee cord to hang the tailpipe so it doesn't fall out after you've removed all the hardware. Allow the front of the cat to hang down and remove the hanger from the rubber bushing.
Here we have our old part that we removed from the vehicle and our new part from 1AAuto.com. See there are some minor aesthetic differences between the two, but they are going to both work just fine. See we have the same two bolt flange at the top. They look a little different, but these hangers line up to the same place. These tabs here are most likely where the heat shield used to mount up to this catalytic converter. As you can see our new one is welded on nice and sturdy, and a nice fresh three bolt flange is exactly what this one used to look like. The catalytic converters are the same in both size and composition. They come with a new bung for the O2 sensor on the cat itself, as well as on the up pipe to the exhaust manifold.
The reason we replaced our old catalytic converter is because our vehicle had the check engine light code PO420 which is a catalyst system efficiency below threshold on bank 1. This is a 4-cylinder vehicle, so it only has one bank. It is true that this code as well as many other codes can be caused by the catalytic converter. It could also be a fuel system rich or lean as well as an O2 issue. We went through and checked everything, all our O2 sensors were new, everything else works, so we narrowed it down to having to replace our catalytic converter. Another couple of symptoms that your catalytic converter has gone bad are poor fuel economy, or power, or high under hood, or exhaust gas temperatures. As this clogs up the exhaust fights harder and builds up in the system and creates more heat. In this case it actually melted some plastic components under our engine. So if your old catalytic converter is clogged or malfunctioning causing check engine lights and emission related codes or high under hood temperatures as well as high exhaust gas temperatures, loss of power or loss of fuel economy, then this new catalytic converter from 1A Auto is going to go in direct fit, just like your original equipment, get your car running clean and right again, and fix you up right.
Before installing our new catalytic converter into the vehicle we'll have to remove these plugs in the O2 sensor bungs. To do this you'll need an 8-millimeter Allen key. Remove the one in the top of the catalytic converter as well as the one below the two bolt flange where it bolts up to the exhaust manifold.
Reinstall our catalytic converter into the hanger. Install this conical exhaust gasket onto the bottom of the exhaust manifold with the thinner end of the cone facing down. Set the flange into place. Install our new spring bolts. Install the gasket into the rear flange. Install your three 13 millimeter bolts. Once you've started your bolts you can remove the bungee cord and tighten down the hardware with a 13 millimeter socket ratchet and wrench.
The new hardware is 14 millimeter so we'll use a 14 millimeter socket ratchet and extension to tighten the flange back to the exhaust manifold. What I like to do with these O2 sensors – as you can see the wires are already twisted up a little. What we're going to do is we're going to spin this sensor counterclockwise, which means when we spin it in and tighten it up clockwise it will reduce the stress on our wires.
Bring it down as tight as you can by hand. Finish tightening it with an O2 sensor socket or a 22 millimeter wrench. Repeat these steps for the rear O2. If you had to remove your wire harness from its clip, reattach it now.
Fire up your car. Make sure that the exhaust system is free of leaks, it sounds correct. Then erase the code from the ECU if you're able to do so yourself, or go to your nearest professional or parts dealer to have the codes erased from the ECU.
Thanks for tuning in. We hope this video helps you out. Brought to you by www.1AAuto.com, your source for quality replacement parts and the best service on the Internet. Please feel free to call us toll-free, 888-844-3393. We're the company that's here for you on the Internet and in person.

How To Replace Catalytic Converters 2008-12 Ford Escape
This video shows you how to install new catalytic converters in your 2008-2012 Ford Escape.
