How to Replace Control Arm with Ball Joint 1999-2003 Nissan Maxima
Created on: 2013-05-11
Suspension trouble? You can fix it yourself! Watch this video to learn how to replace the control arm with ball joint on your 99-04 Nissan Maxima.
-
step 1 :Removing the Wheel
- Loosen the lug nuts with the vehicle on the ground
- Raise the vehicle with a floor jack
- Secure the vehicle on jack stands
- Remove the lug nuts
- Pull off the wheel
-
step 2 :Freeing the Axle from the Hub
- Twist off the hub nut cotter pin with needle nose pliers
- Remove the hub nut with a 32mm socket and an impact wrench
- Test that the axle is not seized inside the hub by pushing it in by hand
- If it is seized, thread on the 32mm bolt by hand and strike the axle with a hammer
-
step 3 :Moving the Stabilizer Link
- Hold the back of the lower stabilizer link bolt with a 14mm wrench
- Remove the lower 15mm nut from the stabilizer link
- Pull the stabilizer link aside
-
step 4 :Removing the Control Arm
- Apply penetrating oil to the 27mm nut on the control arm
- Remove the 27mm bolt from the control arm
- Remove the four 22mm bolts from the control arm alignment bar
- Remove the two 22mm bolts from the control arm bracket
- Pull the axle out of the hub
- Remove the cotter pin from the ball joint with the needle nose pliers
- Remove the 19mm bolt from the control arm ball joint
- Strike the steering knuckle with a hammer to loosen the ball joint
- Pull the ball joint out of the steering knuckle
-
step 5 :Preparing the New Control Arm
- Transfer the alignment bar from the old to the new control arm
- Thread the nut onto the alignment bar
-
step 6 :Installing the New Control Arm
- Push the ball joint into the steering knuckle
- Fasten the 19mm nut onto the ball joint
- Tighten the 19mm nut to 45 - 50 foot-pounds of torque
- Turn the nut further to line up the castle nut with the cotter pin hole
- Put the cotter pin into the ball joint
- Bend the cotter pin, making sure it doesn't contact the CV joint
- Push the axle into the hub
- Lift the control arm into place
- Start the 22mm bolts into the alignment bar
- Start the 22mm bolts into the control arm bracket
- Tighten the six 22mm bolts to 120 foot-pounds
- Raise the control arm to its proper ride height with a floor jack
- Start the 27mm bolt into the control arm
- Tighten the 27mm bolt to 120 foot-pounds
-
step 7 :Reinstalling the Stabilizer Link
- Push the stabilizer link back into place
- Hold the back of the lower stabilizer link bolt with a 14mm wrench
- Fasten the lower 15mm nut onto the stabilizer link
-
step 8 :Fastening the Axle to the Hub
- Thread on the center hub nut
- Have an assistant press the brake pedal
- Tighten the hub nut to 217 foot-pounds
- Insert the cotter pin into the hub nut
- Bend the cotter pin into place with needle nose pliers
- Push in the transmission fill plug
-
step 9 :Reattaching the Wheel
- Slide the wheel into place
- Start the lug nuts by hand
- Tighten the lug nuts preliminarily
- Lower the vehicle to the ground
- Tighten the lug nuts to 100 foot-pounds in a crossing or star pattern
- Have your suspension professionally aligned
Tools needed
-
14mm Wrench
A Piece of Pipe (for leverage)
Torque Wrench
Hammer
15mm Socket
Rust Penetrant
Jack Stands
21mm Socket
27mm socket
32mm Socket
Center Punch
Ratchet
Floor Jack
Assistant
Needle nose pliers
1/2 Inch Breaker Bar
1/2 Inch Impact Gun
22mm Socket
Brought to you by 1AAuto.com, your source for quality replacement parts and the best service on the Internet.
Hi, I'm Don from 1A Auto. I hope this how-to video helps you out, and next time you need parts for your vehicle, think of 1AAuto.com. Thanks.
In this video, we're going to replace the lower front control arm on this 2003 Maxima. The procedure is the same for any Maxima around this year as well as the Infinity I30. A lot of times these control arms will actually rust out. At 1A Auto, we sell a very nice replacement. We're going to do the left side; the right side is pretty much the same procedure. You'll need a new control arm from 1AAuto.com, jack, and jack stands. In the video we do use a lift, it makes it a lot easier to video all the different angles and it does make the job easier but this is a job you can get done with jack and jack stands. You'll need 15, 21, 22, 27 and 32mm sockets, ratchet and a breaker bar or a pipe for some extra leverage, as some of the bolts are quite tight, pliers, a 14mm wrench, a torque wrench and you'll probably need an impact wrench to get the center hub nut off.
Start out by removing the front tire. If you don't have air impact tools, start with the tire on the ground, loosen the lug nuts then raise and secure the vehicle with jack stands, remove the lug nuts the rest of the way and remove the wheel and tire.
I'm taking the cotter pin out of this axle shaft. Basically it's just a procedure of straightening out the ends of the cotter pin and pulling it back through with a pair of pliers. I'll use my 32mm socket and zap off the axle nut. Most likely you're going to need an impact gun for this. While Don is working on that, I will do commentary here. We did try to get this nut off with a breaker bar and a piece of pipe. They are tightened to 217 foot pounds and this one did not come off using that method. Most likely you're going to have to use an impact wrench.
I'm making sure that the axle isn't seized inside the hub so I'm just pushing through and it's pushing through no problem. If you find any resistance, you can screw your nut back on just a little bit and give it a couple of whacks with the hammer and that should loosen it up.
I'm going to remove the lower stabilizer link nut, 15mm, and counter hold the opposite side with a 14mm wrench. On this side, you put the wrench right in between the boot here and the control arm. You can see Don's got that bolt loosened up and we'll just fast forward here as he removes it. I got the nut off and I'm just going to push the stabilizer rod out of the lower control arm.
For the 27mm nut on the front of the control arm, spray that down with some penetrating oil. I'm using a 27mm socket to remove this front nut on the lower control arm and I'm doing that because we're going to need to strap the bracket to new control arm once we get it out. You saw Don loosen it up with the ratchet and pipe and he's just going to loosen it up until he can twist it by hand but he's going to leave the nut on there for now. I'm removing these four front lower control arm bolts. They're 22mm. Then, I'll proceed to the back and remove these two 22mm bolts. I'm using a breaker bar and a pipe for extra leverage. As you can see, it takes quite a bit of leverage, you'll need your ratchet and a pipe or your breaker bar and a pipe if you have to use hand tools. You can see here, to make the video go a little quicker and make things go quicker, we just go over to the impact wrench and pull the rest of them out. I got my control arm down and the nut off, and I'm going to pull the joint and push it through and out the front.
I'm removing the cotter pin from the ball joint. I'll fast forward here. It's really important that you get that cotter pin all the way out. Donny uses pliers and then a hammer and drift pin and gets it out. I'm Using a 19mm socket and breaker bar to remove the nut. Fast forward through here as Don removes that nut the rest of the way. As you can tell it took quite a bit of force to get it off initially.
The next step would be to break the ball joint free from the steering knuckle and we actually missed getting the footage. Use a hammer and in this picture you can see the dot. That is the steering knuckle. You want to contact the steering knuckle right there very hard with a hammer. After hitting it probably four or five times, the ball joint should break free and then you can pull the control arm right down.
Here's the original control arm. Transfer the alignment bracket to the new control arm from 1A Auto. As you can see, it's exactly the same. It's going to install the same and function the same. Now, we're speeding through these a little bit. Put the ball joint up in place in the control arm, screw the nut on then tighten it. You want to torque it to 45 to 50 foot pounds and then turn it further to line up the castle nut with the hole in the ball joint and then put your cotter pin through and bend the ends over. Make sure the ends don't contact the CV joint at all once it's all put together.
I'm putting the axle back in. I'm installing the bolts to the lower control arm. Fast forward as we put those in and tighten them up preliminarily. Tighten the lower control arm bolts that go to the chassis to 120 foot pounds. For this nut, here, before we tighten it up and torque it to 120 foot pounds, we've put a jack underneath the control arm so that it gets it into the correct ride position, the right height.
Use a little fast forward here as we put the stabilizer back in place. I just put it back into the control arm and use the 14mm wrench to hold the shaft as you tighten it up. Get it nice and tight.
Install the center hub nut and just tighten it up preliminarily. I've got Mike in the car holding the brake pedal down while we torque it to 217 foot pounds. I'm putting the cotter pin back in. Make sure you put your transmission fill plug back in and then you can put your wheel and tire back on. Hand thread the lug nuts first, tighten them preliminarily and then torque them to 100 foot pounds and then make sure you get your vehicle aligned.
We hope this video helps you out. Brought to you by www.1AAuto.com, your source for quality replacement parts and the best service on the Internet. Please feel free to call us toll-free, 888-844-3393. We're the company that's here for you on the Internet and in person.
Shop Products


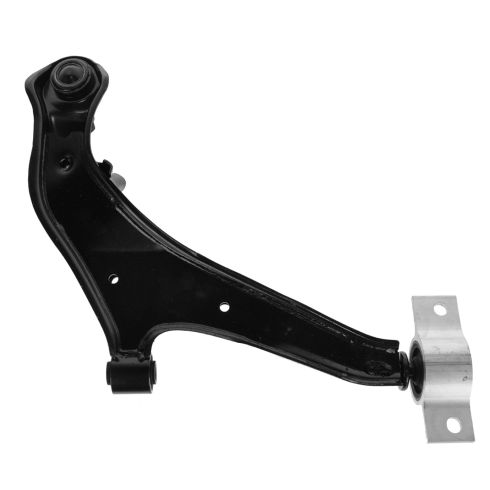
Nissan Maxima Infiniti I30 I35 Front Driver Side Control Arm with Ball Joint TRQ PSA83909
Part Details:
- Press In
- No
- Yes
- No
- Steel

How to Replace Front Lower Control Arm 2011-15 Chevy Cruze
Control arms are a crucial part of the suspension system of your vehicle. They carry the load of the vehicle to the wheel and maintain its alignment. Control arms are large and strong. They contain rubber bushings for smoother rides at the cost of eventual wear. How to install a new quality TRQ lower control arm in your 2011-15 Chevy Cruze.
