How to Replace Control Arm with Ball Joint 2002-06 Nissan Altima
Created on: 2013-12-08
If the lower control arm or ball joint on your 02-06 Nissan Altima is rusted or clunking, watch this video. You can learn how to replace it yourself!
-
step 1 :Remove the wheel
- Loosen the lug nuts with your 19 mm socket and breaker bar
- Raise and secure the vehicle
- Remove the lug nuts and set the wheel aside.
-
step 2 :Remove control arm
- Remove the cotter pin in the control arm joint.
- Hit the nut with penetrating oil.
- Use a 22 mm wrench to remove the nut.
- Remove the first of two 19 mm bolts on the other end of the control arm.
- In order to get the second 19 mm bolt, you have to remove the engine bracket.
- Jack up the suspension to relieve tension from the control arm.
- Unbolt the two 12 mm bolts and the 19 mm nut to remove this bracket.
- Now remove the final bolt with your 19 mm socket and ratchet.
-
step 3 :Install the new control arm
- Remove the castle nut and remove the plastic cover from the bushing.
- Install the control arm, gently using a hammer to convince the control arm to line up if necessary.
- Thread the bolts through and tighten them up.
- Install the engine bracket.
- Torque the 19 mm bolts in the control arm to 85 ft lbs
- Replace castle nut and thread the cotter pin through and secure it.
-
step 4 :Replace the wheel
- Put the wheel back on.
- Thread on the lug nuts.
- Lower the vehicle
- Torque the lug nuts in a star pattern to 100 ft lbs.
Tools needed
-
21mm Socket
12mm Socket
Hammer
Torque Wrench
Jack Stands
19mm Socket
22mm Wrench
Lug Wrench
Ratchet
Floor Jack
1/2 Inch Breaker Bar
Brought to you by 1AAuto.com, your source for quality replacement parts and the best service on the internet. Hi, I'm Don for 1A Auto. I hope this how to video helps you out. The next time you need a part for your vehicle, think of 1AAuto.com. Thanks.
In this video, we'll show you how to replace a front control arm on this 2003 Nissan Altima, it's same process on these Altima's from 2002 to 2006 and we show you on the passenger side but the driver's side is the same process. The items you'll need for this is a new front control arm from 1AAuto.com, 12, 19 and 21 mm sockets and racket with a piece of pipe for extra leverage, 22 mm wrench, penetrating oil, a torque wrench, hammer, pliers and jack and jack stands. After this repair, you will want to have the alignment checked on your vehicle.
Start off by removing your wheel, if you don't have air powered tools you're going to remove the lug nuts while the vehicle is on the ground and jack it up and remove them the rest of the way.
The first thing on the control arm that you want to do is remove this cotter pin. You just want to straighten out the prongs and pull it out from the other side using pliers. Once you get the pin out, spray it with some penetrating oil to break it loose and then remove it with the 22 mm wrench. Once the nut is removed, hit the knuckle with a hammer and that will allow you to pull this down.
Next, you want to remove this 19 mm bolt. Now you do want to put an additional stand underneath your engine here because to remove the last control arm bolt, you're first going have to remove one of these engine brackets. To do that, you just want to remove the 19 mm bolt on the one end and the two 12 mm bolts on the other. Once those are removed, you can just remove that bracket. Now remove these last two 19 mm bolts holding in your control arm. Once all of those are removed, you just want to pry this out.
Old control arm on the left, the new one from 1A Auto on the right, you can see they're identical and they are going to mount exactly the same. Before you install your new control arm, you want to first remove the castle nut and pull off that plastic cover and then feed your new control arm into place. You may need some assistance from a hammer. You want to do this carefully and we are going to fast forward as he does this but you are just trying to line up the holes on the control arm with the holes on the body of the car. Now you can replace that 19 mm bolt and just hammer it in half way and that will hold the control arm in place. Then replace these two 19 mm bolts and then just tighten them up. Tighten up this bolt the rest of the way.
If you replace bracket and the 19 mm nut and the two 12 mm bolts and then you just want to torque each of these 19 mm bolts to 85 foot pounds. Now you can remove that stand now. Now push the stud of the control arm into the hole in the wheel and replace that nut. We do supply you with a new castle nut. Once you've tightened it up, put the cotter pin into place and using pliers bend the prongs in opposite directions. Replace your wheel, hubcap and lug nuts and tighten the lug nuts preliminarily, lower the vehicle and tighten them the rest of way. Then you want to torque the lug nuts in a crossing pattern to 100 foot pounds.
We hope this helps you out. Brought to you by www.1AAuto.com. Your source for quality replacement parts and the best service on the Internet. Please feel free call us toll-free 888-844-3393. We're the company that's here for you on the Internet.
Shop Products


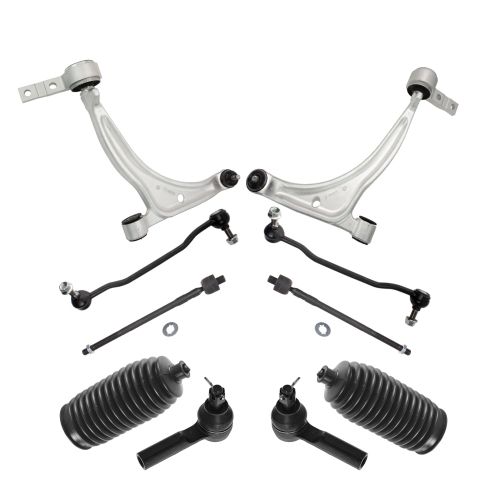
Nissan Altima Front 10 Piece Steering & Suspension Kit TRQ PSA79383
Part Details:
- (2) Front Sway Bar Links
- 10 Piece
- (2) Front Lower Control Arms with Ball Joints
- (2) Front Steering Rack & Pinion Bellows
- (2) Front Outer Tie Rods
- (2) Front Inner Tie Rods

How to Replace Front Control Arms 2006-13 Volkswagen GTI
How to repair, install, fix, change or replace failing, rusted, rotted, or damaged rear upper control arms on 06, 07, 08, 09, 10, 11, 12, 13 Volkswagen GTI
