How to Replace Crankshaft Position Sensor 2001-06 Chrysler Sebring 2-7L
Created on: 2013-10-30
Watch this 1A Auto video to learn how to replace the crankshaft position sensor on your 01-06 Chrysler Sebring 2.7L
-
step 1 :Remove the air box
- Loosen the clamp and the bolt securing the air box.
- Disconnect the hose and wiring harness.
-
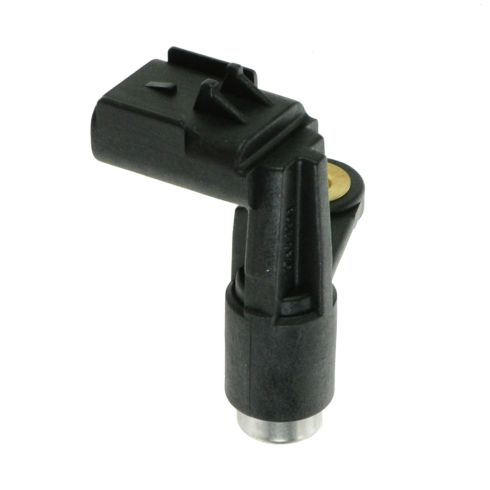
step 2 :Remove the crankshaft position sensor
- Disconnect the wiring harness clip to the sensor.
- Remove the 10 mm bolt securing the sensor with your socket and ratchet.
- Pull out the sensor.
-
step 3 :Install the new crankshaft position sensor
- Bolt the sensor with your 10 mm socket and ratchet.
- Clip the wiring harness back in.
-
step 4 :Reinstall the air box.
- Tighten the clamp that connects the intake to the throttle body
- Reconnect the hose and double check all of your sensors are connected.
Tools needed
-
Flat Blade Screwdriver
10mm Socket
Ratchet
Brought to you by 1AAuto.com, your source for quality replacement parts, and the best service on the Internet. Hi, I'm Don from 1AAuto. I hope this how-to video helps you out, and the next time you need a part for your vehicle, think of 1AAuto.com. Thanks.
In this video, we are going to show you how to replace a crank shaft position sensor on this 2004 Chrysler Sebring. It has the 2.7 Liter V6. The procedure is basically the same for most of the cars and trucks or vans with this 2.7 Liter V6. You'll need a new sensor from 1AAuto.com, a flat blade screwdriver, and a 10mm socket with a ratchet. When position sensors start going bad, you'll get a check engine light, and usually the code is a P0335 or P0336.
You're going to remove your air box. Loosen that clamp. There's also usually another bolt down where his forearm is that holds the air box to the frame. You can see, remove the sensor, the hose, and then pull the air box up and out. Your sensor is back in the back of the engine, and you can see it right there with the little red clip. You want to push that clip down, from our angle right here. Push it down, and then disconnect it. It requires two hands to get in there, so the shot gets a little ugly here, but basically you push that right clip through and then pull off the connector.
Here you can see the clip pushed out. Here you can see there's a 10 mm bolt that holds the sensor in place, so we get our 10mm socket and ratchet down in there and remove it. We'll just fast forward through taking that bolt out. Once the bolt is out, you can grab on to the sensor and try and move it and pull it. You should be able to basically wiggle it back and forth, pull it. You can see we're struggling with it a little bit. We do get it to move a little, so then we go in with a flat blade screwdriver down in there and try and pry it. Actually, it just ends up breaking the ear off where the bolt goes. It doesn't really move it at all, but you can't say we didn't try. Then we just go back in and pull it really firm, and it comes up and out.
Here is the new one from 1AAuto on the left. It's an exact match. It's going to bolt right in place and connect just the same as the original. No big mystery to installing it. Put the sensor side in and push it in to place. Then start your 10mm bolt back on there. We'll fast forward as we tighten that up. You want to tighten it up from maybe 5 or 6 foot-pounds, not very tight, but enough to hold it in there securely.
Once you have it installed and tight, make sure you go back in and reconnect it, because quite honestly, the engine won't even start up if it's not connected. Make sure you press the red tab to lock it. There it is, all reinstalled. Then we'll reinstall our air box, and tighten up the clamp that holds the intake hose to the throttle body. Reconnect the hose, and reconnect any of the sensors you might have disconnected. We hope this helps you out.
Brought to you by: www.1AAuto.com, your source for quality replacement parts and the best service on the Internet. Please feel free to call us toll free, 888-844-3393. We're the company that's here for you on the Internet and in person.
Shop Products
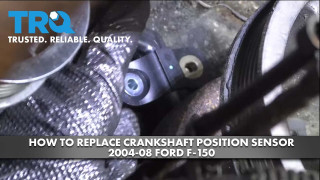
How To Replace Crankshaft Position Sensor 2004-08 Ford F-150
This video shows you how to install a new crankshaft position sensor on your 2004-2008 Ford F150.
