How to Replace Crankshaft Position Sensor 2002-06 Nissan Altima L4 2-5L
Created on: 2017-09-26
Check out this video to learn how to replace the crankshaft position sensor on your 02-06 Nissan Altima
-
step 1 :Removing the Air Intake Hose
- Loosen the hose clamp from the breather hose
- Slide the breather hose off
- Loosen the air intake hose clamps with an 8mm socket
- Slide the hose off of the throttle body and air filter housing
- Remove the hose
-
step 2 :Removing the Camshaft Position Sensor
- Remove the 10mm bolt from the sensor
- Pull the sensor out
- Disconnect the wiring harness
- Remove the sensor
-
step 3 :Installing the Camshaft Position Sensor
- Lace the o-ring with engine oil or white grease
- Insert the sensor into place
- Tighten the 10mm bolt to the sensor
- Connect the wiring harness
-
step 4 :Installing the Air Intake Hose
- Insert the intake hose to air filter housing and the throttle body
- Tighten the hose clamps on each end with an 8mm socket and ratchet
- Slide the breather hose on
- Clamp the hose clamp with needle nose pliers
Tools needed
-
Gloves
Socket Extensions
Paper Towels
8mm Socket
White Grease
10mm Socket
Ratchet
Cloth Rags
Needle nose pliers
Engine Oil
Pick
Hi, I’m Mike from 1A Auto. We’ve been selling auto parts for over 30 years!
Remove the upper intake tube. Start with this vacuum on here. Take some pliers, squeeze the clamp together, move the clamp down. Work the hose off. If you need to, you can take a right angle pic, work it under the hose and break that seal. Move the clamp down further out of my way. Loosen the two hose clamps. We'll start with the one near the mass airflow meter. Using an 8mm socket or a flat blade screwdriver. Loosen the one at the throttle body. This one is actually a 10 mm. If it got replaced, it could be a different size. Work the hose off the throttle body. And we're going to work if off the mass airflow meter. Move this hose out of the way and this one out of the way and lift it straight out of the car.
The crankshaft position sensor on this 2.5 Altima is located at the back of the engine, near the fire wall, near the bell housing for the transmission. So it's all the way right here. And there's the connector and the bolt connector. The lock part is right against the transmission. I'm going to remove the bolt first. Pull the sensor out. Then I can disconnect it. I've got plenty of harness here. Some oil may drip out, so I'll have a rag ready. Since you really can't see what you're doing, I kind of have to go in with my fingers and find the sensor, and find the 10mm bolt. And then try to guide a ratchet and extensions in there. It's a bit tricky. But once you get it, it'll go right on there. It doesn't take much torque to undo it. Not quite loose enough yet by hand, so I'm going to use just the extension, and the socket to finish removing it. There, I've got it out.
Looks like somebody already replaced this at one point cause it has a piece of tape over it, so the bolt didn't fall out. With that loose, now I can work on getting the sensor out of the side of the engine. Wiggle it back and forth. Pull it out. Now that we've got it loose, I can get to the to the lock. Now we need to disconnect the electrical connector from the sensor. Push in on this green tab to get some tension to it. Push it in and then, as you push it in, it actually pushes the senor out of the connector. When we've disconnected, our sensor is removed.
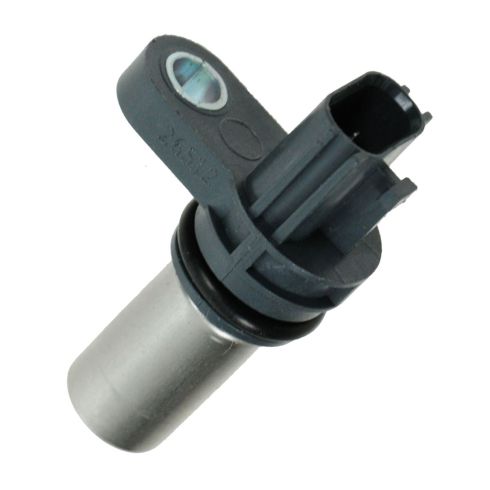
Here is our old crankshaft position sensor from our vehicle. This is our new one from 1AAuto.com. As you can see, it is identical. It'll operate in the same manner. It's with a single tab with the bolt hole. Same style connector. It's the same depth. Got a new O-ring on here. So we'll install that and get your car running again.
Before you install this, you can take a small amount of engine oil, or a little bit of white grease, and we're just going to put it around the O-ring so that it slides back into the hole okay. We don't nick the O-ring. Cause this O-ring's nice and fresh, it might be a little bit tighter. It doesn't matter if you get grease on the sensor cause the hole has oil in it anyways. Now I'm ready to install this. It'll be easier to install it without the connector plugged in. We'll plug that connector in after it's installed. Once you get it in place, rotate it a little bit. I'm just going to thread it in by hand.
So I'm going to cross thread. Take the ratchet. I'm just going to tighten it. It's a very small bolt. It's aluminum. I don't want to over-tighten it. So once I start to feel like it's tight, I'm just going to stop. With it installed, I can now reinstall the connector. The green lock is going to go towards the transmission. So I'm going to turn it this way. Once it clicks, it's locked into place. The crank sensor's installed.
To reinstall the intake tube, we'll start by feeding it into the engine compartment and placing it over the throttle body. Push this vacuum hose just out of the way for a second. Make sure that's seated on the throttle body. You can use a flat bladed screwdriver, or on this one, it's a 10 mm socket. Just bring it down until it feels tight. Make sure this is loose enough. Slide over. Slide the intake tube, it will squish down. Put it over the mass airflow meter housing. Hose clamp in place. Use a flat bladed screwdriver. On this side, it's an 8 mm. Tighten that down. Reinstall this vacuum hose. Take some needle nose pliers.
Thanks for watching. Visit us at 1AAuto.com for quality auto parts, fast and free shipping, and the best customer service in the industry.

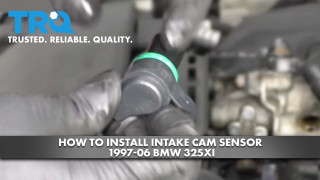
How to Install Intake Cam Sensor 1997-2006 BMW 325XI
This video shows you how to install a new intake camshaft position sensor in your 4th gen (E46) BMW 3 series.
