How to Replace Distributor Cap Rotor 1995-2005 Chevy Blazer S10
Created on: 2011-01-25
Watch this video to learn how to fix engine misfiring or stumbling. The experts at 1A Auto show how to replace the distributor cap and rotor on your 98-05 Chevy Blazer or GMC Jimmy.
-
step 1 :Label the spark plug wires
- Clean them off and mark them.
-
step 2 :Unplug the spark plug wires
-
step 3 :Remove the cap
- Use your T20 Torx driver to remove the screws mounting it.
-
step 4 :Remove the rotor
- Use your T15 Torx driver to unscrew it.
-
step 5 :Install the new rotor
- Mount the new rotor into place.
- Screw in the T15 screws with your driver.
- Install the cap and plug the wires back in properly.
Tools needed
-
T15 Torx Driver
T20 Driver
Brought to you by 1AAuto.com, your source for quality replacement parts and the best service on the internet.
Hi, I'm Mike Green. I'm one of the owners of 1AAuto. I want to help you save time and money repairing and maintaining your vehicle. I'm going to use my 20 plus years experience restoring and repairing cars and trucks like this to show you the correct way to install parts from 1aauto.com. The right parts installed correctly. That's going to save you time and money. Thank you, and enjoy the video.
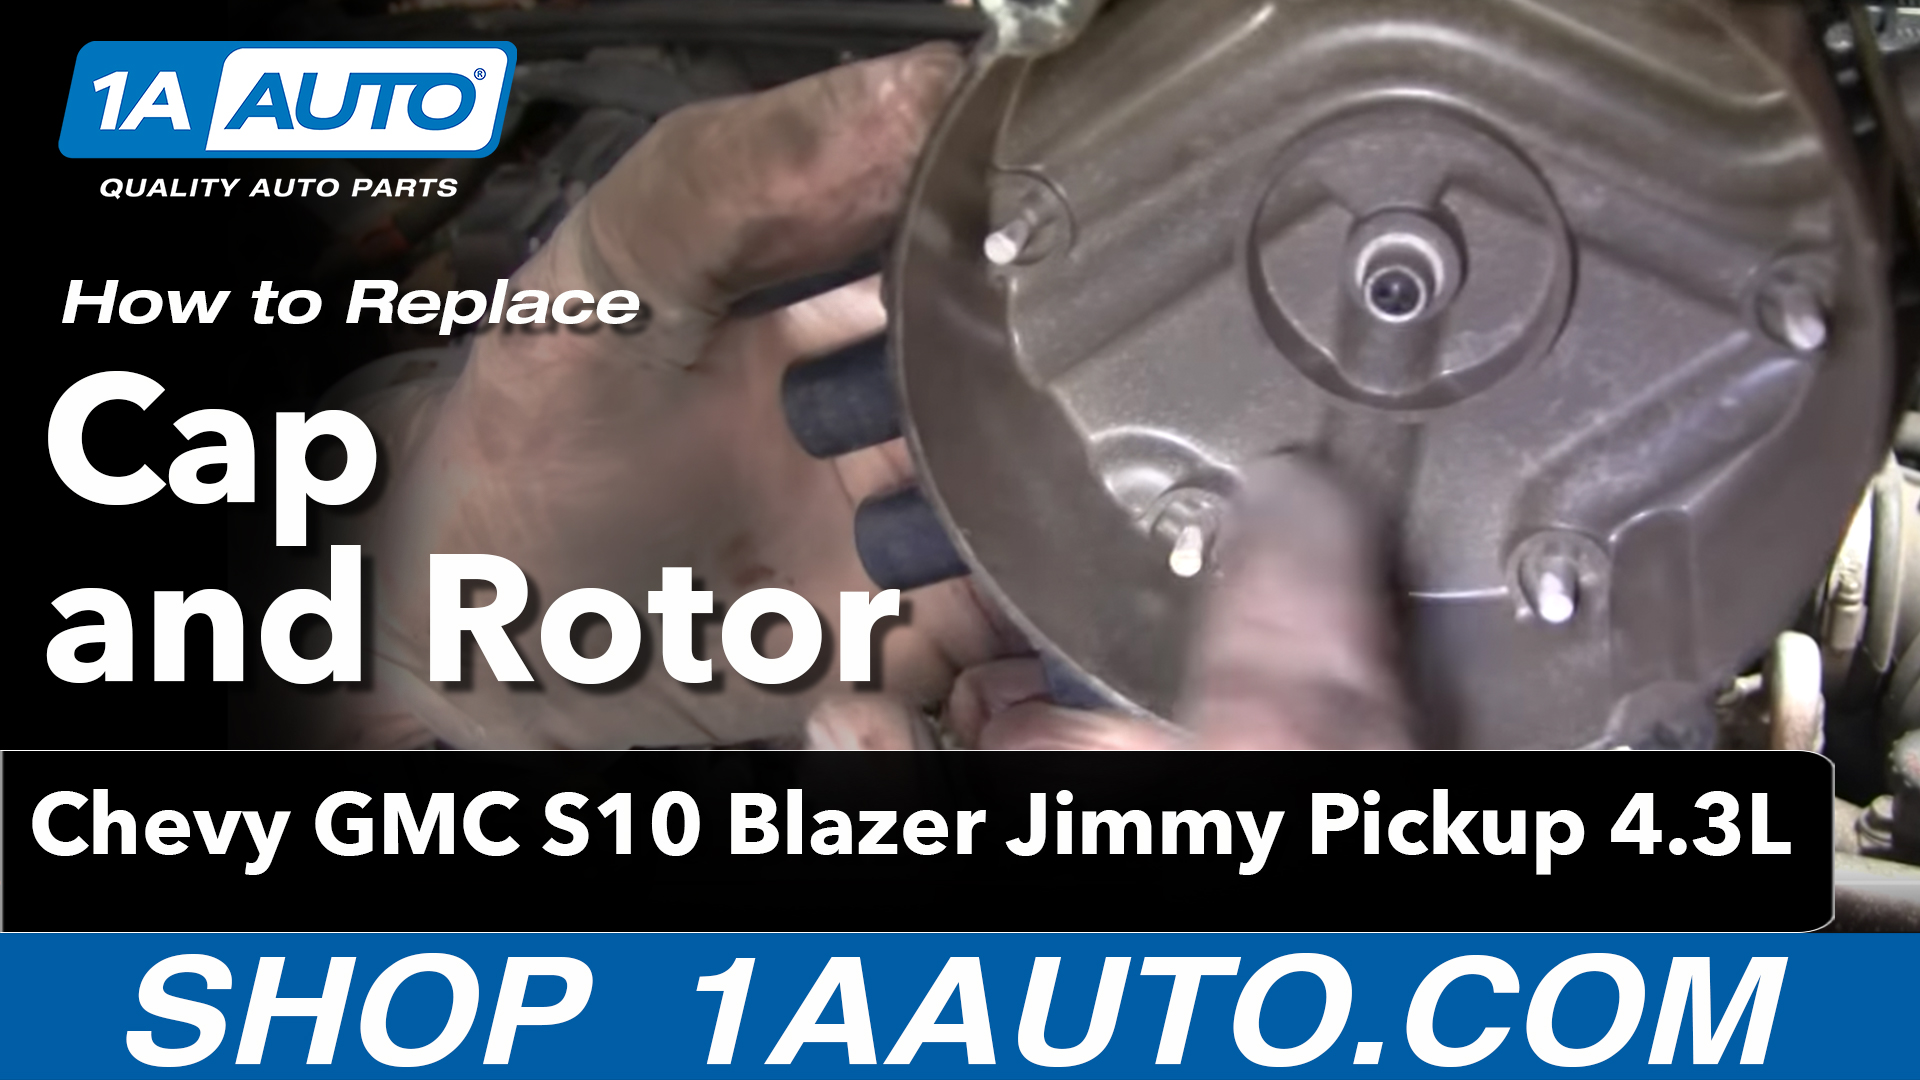
In this video we're going to show you how to replace the distributor cap and rotor on this 2000 Chevy Blazer with a 4.3L, same as a lot of the different vehicles. A lot of different GM vehicles with the 4.3L V6. The only tools you'll need on this vehicle are a T15 and T20 torque drivers. Those are screws with the little star-shaped heads, and you'll see what I mean in the video.
We're looking at the battery here and then the engine. Your distributor cap is right in behind the center. You can see I've done a little work here already. I've wiped down the ends of the plug wires, and I've labeled them with numbers that correspond to the numbers on the cap: five, one, three, five, one, and three, and then two, four, and six, and then the coil for C. Once you have these marked, what you want to do is twist them, and then pull. They are never that easy to get off. So you pull all of them off. Just make sure you mark them first so you know where to put them back on.
Due to the congestion over here, what I'm going to do is actually I'm going to unbolt the cap first. You can see one of the bolts is right there. It's a T20 torques bit. Then just opposite this indent right here, that's where the other screw is and I can't really get the camera down in there. You want to remove those two T20 Torx screws. Here's my T20 Torx driver.
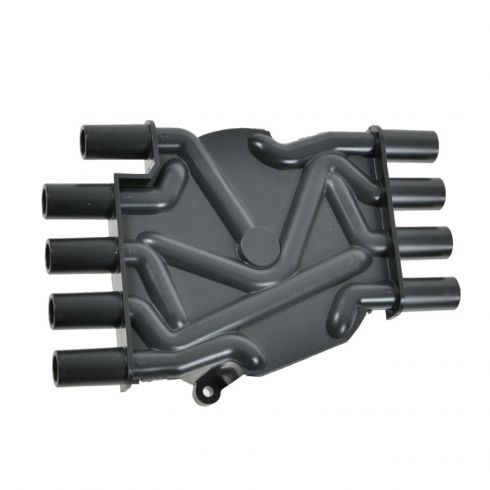
I am going to fast forward through just removing those screws. One thing, just make sure you do not drop them. Be very careful as you're taking them out that you don't drop them down and behind and lose them. Now that I have the cap up, I can pull it clear of these hoses a little bit. Get a better grip on these wires to pull them. There's my cap. You can see how these contacts are burnt somewhat. That's an indication that this has got some wear on it. Now with that cap out of the way, you can see here is our rotor. It's got two T15 screws holding it on. Again, we'll fast forward through here. Again, just make sure you don't lose those screws.
Those screws fall out, and here's the cap, and it too has got some definite wear on the contact there. So here's my new rotor, and it actually has two pins next to the screws. There's another locating pin right here that correspond. So you can really only put it on one way. Just make sure it goes on and down nicely. So there's our new rotor installed, new cap, coil wire. The one with the four goes onto the passenger side. I'm just going to make sure that I don't have any wires in the way. Set the cap down on. And it has a flat spot on here so that it can also only go on one way. Now take our T20 screws. Be very careful not to drop them.
Make sure the cap is on there nice and firm. The new cap has a little bit smaller numbers, but still you can see there's three, one, and five. Obviously make sure you push them all the way on. Over here you got six ... four ... that's two. Then our coil wire. Let's see. Where did he go?
So now it should be ready to fire up. We hope this helps you out. Brought to you by www.1AAuto.com, your source for quality replacement parts and the best service on the internet.


How to Replace Spark Plug Wire Set 96-00 Chevy Tahoe
Learn how to change the spark plug wires on your 96-00 Chevy Tahoe, equipped with the Vortec 5700, in this video from 1A Auto.
