
How to Replace Door Handle Latch Cable 2000-07 Ford Focus
Created on: 2012-10-26
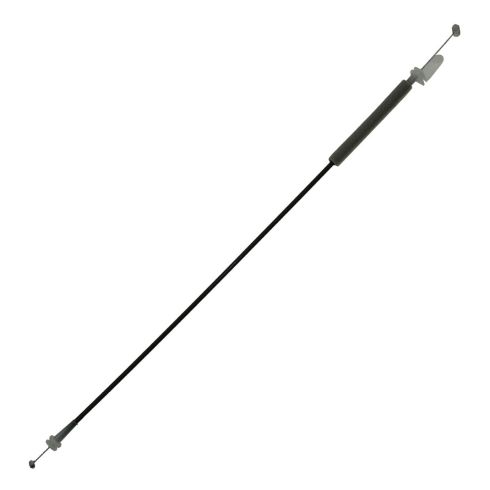
Learn how to replace the door latch handle cable on your 00-03 Ford Focus. 1A Auto will show you how to do it in this video.
-
step 1 :Removing the Door Panel
- Pull off the window base trim panel
- Disconnect the power mirror switch wiring harness
- Remove the trim piece inside the door panel
- Remove the T20 Torx screw from inside the door handle
- Remove the six T20 torx screws from around the door panel
- Pry off the door pull trim panel
- Remove the two 7mm bolts from the door pull
- Pry off the door handle panel by hand
- Disconnect the door lock wiring harness
- Disconnect the window switch wiring harness
- Pry off the door panel by handle
- Grab the foam insulator box by the clips and turn it counterclockwise and pull it off
-
step 2 :Removing the Door Latch Cable
- Remove the three T30 Torx bolts from the edge of the door
- Pull the door handle off by hand
- Disconnect the latch cable from the door handle
- Pull back the water shield
- Disconnect the latch cable from the door lock mechanism
-
step 3 :Installing the New Door Latch Cable
- Insert the latch cable into the lock mechanism
- Push the lock mechanism into place
- Insert the three T30 Torx bolts into the door panel
- Connect the latch cable to the door handle
- Push the door handle into place
-
step 4 :Reinstalling the Door Panel
- Push the water shield back on
- Put the insulator block into place and turn it clockwise to lock it in
- Put the door panel into place
- Connect the mirror switch wiring harness
- Push the mirror base trim panel on by hand
- Connect the window switch wiring harness
- Connect the door lock wiring harness
- Push the door handle panel on
- Insert the two 7mm bolts into the door pull
- Put the door pull panel on starting at the top
- Insert the T20 Torx Bolt into the door handle
- Insert the six T20 Torx bolts into the door panel
- Put the trim piece into the door panel
Tools needed
-
Socket Extensions
Flat Blade Screwdriver
T20 Driver
T30 Driver
7mm Socket
Ratchet
Brought to you by 1AAuto.com, your source for quality replacement parts and the best service on the Internet.
Hi, I'm Mike from 1A Auto. I hope this how-to video helps you out, and next time you need parts for your vehicle, think of 1AAuto.com. Thanks.
In this video we're going to show you how to remove and install a front door latch cable on this 2003 Ford Focus. We'll show you the driver side; the passenger side is pretty much the same procedure. The tools you'll need are: small and regular size flat blade screwdrivers, a T20 Torx driver . it can either be a socket or just a kind of a screwdriver style , then, a 7 mm socket with ratchet and extension, as well as, a T30 Torx socket with a ratchet.
On this door, first at the top corner, you'll want to pull your trim out. It should pull. This has already come off. You pull out, and then it pulls back and off. We can disconnect this. This, use your small screwdriver, and then you actually kind of just pry in here on this side of the connection Pull it out. I'm just going to speed it up here. For those screws use a T20 Torx bit. So, use your T20 Torx bit and remove all of them. You want to pry this off. It's easiest to get right here in the back. Pry that out. It comes right off. Take your 7 mm socket, the extension and ratchet. A quarter mm socket, actually, works as well. Remove these two bolts. If you noticed, I said a quarter millimeter; that's actually a quarter inch socket works just as well as the 7mm socket. For this handle, actually reach right in here. Hold firmly and up here, do the same thing, pull firmly. Pull this panel out, and then disconnect this. There's a little tab. It's back behind the wires. Push that tab down. Pull that out. The tab's actually right on the back. Push it down. Do the same thing over here. There are a couple of harnesses. It just has a tab that you press with your thumb. Pull out. It's disconnected. Now you can just take your panel, pull it out and up, and pull it off. You'll need to remove this foam insulator block. Grab the clips, turn a little bit counter-clockwise, and it comes off.
You'll want a T30 Torx driver with a socket like this. You'll need to remove these three bolts back here on the door. Pull your door handle off. It's pretty tough. It's off. The cable comes out of here. Just pull it up. As long as your lock mechanism is like that, it pulls right out. Pull this down. Your lock mechanism is right here. You have to pull the cable out. Then you have to clock it around, and pull it out of the lock mechanism. It comes out.
Here's a better shot of that as we reinstall it. I'll put the cable in there. Push it right in that slot, and work it around. You can let that go pack in. Put your cable right in there and push it into place. Take your door handle, put the cable right back down in, and lock it down in place. Put your door handle in. Clip it back on. Put your water shield back in place. Reinstall the insulator block by putting it in place with the clips lined up, and then rotate it a little bit clockwise, and snap it in place.
I'm going to fast forward through putting the door panel back together. If you want to see this in regular motion, you can just check out our other videos. Hang the panel back up on the ledge. Reconnect the mirror switch. Reconnect the window switches. And, put those trim panels back in place. Then, put the bolts back in for the door pull. Now, I'm going to fast forward as I take those two 7 mm bolts, reinsert them into that door pull and tighten them up. Then, put the trim panel, and snap it back into place. You want to put the top in first, and then, snap the bottom into place. Continue that speed as I just take the seven T20 screws. One goes in the door handle, the rest go around the perimeter of the door panel, and put those in and tighten them up. Last but not least, put the little trim panel over the screw in the door handle.
We hope this video helps you out. Brought to you by www.1AAuto.com, your source for quality replacement parts and the best service on the Internet. Please feel free to call us toll-free, 888-844-3393. We're the company that's here for you on the Internet and in person.
Shop Products

How To Replace Interior Door Handle 1996-2000 Honda Civic Sedan
How to repair, install, fix, change or replace a broken or snapped off interior door handle on Honda Civic sedan, years 96, 97, 98, 99, or 00.
