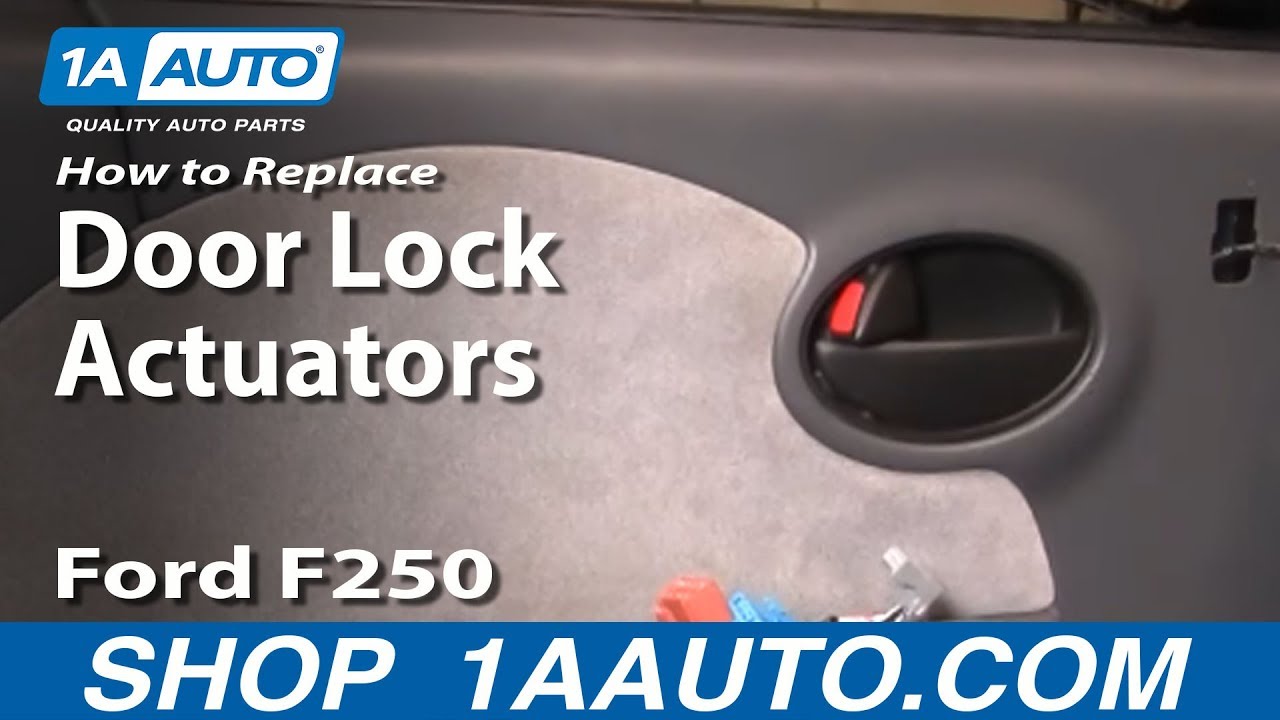
How to Replace Door Lock Actuators 1999-2010 Ford F250 Super Duty
Created on: 2011-11-15
In this video, 1A Auto shows you how to replace broken or snapped rear power door lock actuators in a 99-10 Ford F250 Super Duty.
-
step 1 :Remove the door panel
- Use your flat blade screwdriver to pop the courtesy light lens off.
- Pry up the switch panel with your flat blade.
- Unplug the wiring harnesses from the switch panel.
- Remove the two 7 mm bolts now exposed.
- Lift the door panel up and off.
- Pry up the rubber plug in the side of the door.
- Unplug the courtesy light.
- Peel back the water shield.
-
step 2 :Remove the power door lock actuator
- Roll your window all the way up.
- Remove the 10 mm bolt on the lock actuator.
- Disconnect the lock rod from the actuator.
- Remove the two 11 mm nuts with a socket and extension securing the handle.
- Unclip the door handle rod to remove the door handle.
- Unclip the door latch and use your screwdriver to remove the mounting pins for the door handle cable.
- Use a T27 Torx bit and driver to remove the two Torx screws on the side of the door securing the actuator.
- Pull the actuator out of the door.
- Unplug the wiring harness.
-
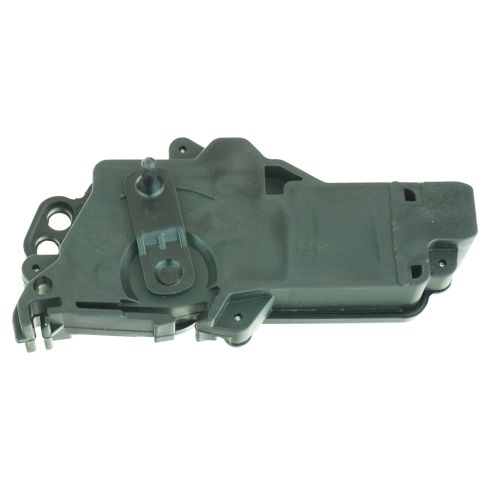
step 3 :Install the new power door lock actuator.
- Plug the door lock actuator into the locking mechanism.
- Secure the assembly with the two T27 Torx screws.
- Pin the door handle cable to the door and clip all your rods and cables back together.
- Bolt your door handle back into the door.
- Bolt the 10 mm bolt back in.
-
step 4 :Reinstall your door panel
- Replace your water shield and the rubber plug in the side of the door.
- Plug in your courtesy light.
- Clip your door panel back on, threading your wiring harness back though.
- Secure with the two 7 mm bolts.
- Plug your switch panel back in and clip the panel into place.
- Clip the courtesy light lens back on.
Tools needed
-
Socket Extensions
Flat Blade Screwdriver
T27 Torx Driver
7mm Socket
10mm Socket
Ratchet
11mm Socket
Brought to you by 1AAuto.com, your source for quality replacement parts and the best service on the internet. Hi, I'm Mike Green. I'm one of the owners of 1A Auto. I want to help you save time and money repairing and maintaining your vehicle. I'm going to use my 20+ years' experience restoring and repairing cars and trucks like this to show you the correct way to install parts from 1AAuto.com. The right parts installed correctly, that's going to save you time and money. Thank you and enjoy the video.
In this video, we're going to show you how to replace a power door lock actuator very common problems on these trucks. If your door locks no longer work on one or more of the doors, this is what you need to do. We're doing it on an '03 F250 on the driver's side. The passenger side is similar. It's similar any '01 to '07 super duty truck. Tools you'll need: 7 mm, 10 mm and 11 mm sockets with a ratchet and extension. You'll need a flat blade screwdriver, and a T27 Torx Bit that uses a ratchet handle. If you wanted to prevent the battery from running down if you have the doors open for an extended period of time, just disconnect your negative battery cable. Using an 8mm wrench loosen up the nut and then pull the cable off. Using a small flat blade screwdriver take this lens pop it off. Mine is actually broken. It should pry out here. Pop it off. Here you're going to do the same thing. Just kind of pull up your handle. Use your screwdriver a little bit right in the front. Pull that up. Pull it forward and then you disconnect all the harnesses. There's little push tabs on them. Push on the tabs with your thumb. Pull the harness here. Push on the tab here, the tab here. Push on it and remove it.
It's the same thing here. You just pull down this trip handle. It's got two clips that hold it on. Now there are two 7mm bolts; one right there, and then one right there. 7 mm socket with a ratchet and extension. A ratchet will work as well. Fast-forward as I just remove those two bolts. Once those two bolts are out just lift up on your panel and bring it out. Then in behind is your courtesy light. Just turn it counterclockwise and pull the socket out and your door panel comes off. I'm going to pull back our water shield so we can see right in here. If it's not already, just make sure that your window is rolled all the way up. You want to remove a 10 mm bolt right here. Separate or disconnect the lock rod by pulling it with your finger and then using a screwdriver to pry apart the clip with your hand. Then it will separate from the teeth and pull it out. Now there's two 11 mm bolts since you took that bolt out down there, you can pull this out of the way. There's one of them, and then right up here remove this plug and there's the other one in there. Using an 11 mm socket with a ratchet and extension. I'm just going to fast-forward it as I remove those two 11 mm nuts. Now you can pull your handle out, and then using your screwdriver there's a clip right down here. You can see a little green tab right there. Pry against that. Open that clip up. Pull that rod out, and then your door handle comes right out. Next use a screwdriver and you just want to undo that clip that is holding the rod right there for the latch. Use your screwdriver to remove the two mounting pins for the door handle cable and push them through. Use a T27 Torx Bit and remove these three screws here. Just fast-forward here a little bit. You heard me snap that first one free.
You do need that T27 Torx Bit that attaches to the ratchet handle so you can get the extra torque on it because they will be difficult. I'm going to pull the lock mechanism away, take this rod, pull that out. I'm just going to push this track to the side and pull the whole lock mechanism down just enough to remove the lock actuator. Use a screwdriver and just pull up on that tab and disconnect. Then what you want to do, there's a little tab right in here that you pry up on and then this whole actuator should just slide off this lock mechanism there. There's the actuator off. Just going to pull out this wiring harness. There's your old actuator off. You can see on the actuator here's that little tab that you just kind of pried away from the lock mechanism to get it off. New actuator from 1A Auto is slightly different than the original, but it's going to work just fine. This is actually patterned after a later design from Ford. It will just go right on. There are two tabs here that you just have to line up. Get this harness out of the way. It snaps right on. Make sure that the arm goes back in here correctly, and then it plugs in exactly the same. You can put this harness pin right here. All ready to reinstall. Make sure this arm is kind of with you right there. I'm going to speed it up here. You feed the lock mechanism back up in there. Be careful not to get any of the wires caught on the track or anything like that.
The lock rod that comes down from the door lock on top should go outside of the cable. Then you can start your screws in, and also just make sure that the rod that comes up that attaches to the door handle lock, it doesn't get stuck in the wrong spot. Let's just make sure everything's here. Here's the rod that's going to connect to our lock. Tighten up those Torx screws, and then I went to clip the door handle cable back in realized that I put the lock rod in wrong so I switched that around and then clipped that cable in correctly. Here I'm going to do a test and I reconnected the battery. I'll disconnect it afterwards. Unlock, lock, unlock, lock. It's working correctly. Make sure we leave it unlocked. Just want to make sure that this rod which is the lock rod is kind of out of the way. You can just let that one drop down in there and it's easy enough to get it afterwards. Put the handle in. Put your bolt into your socket. Put it right in. Start the top one. Now the bottom one, push your channel over. Just fast-forward as I start and tighten up those two nuts to hold the handle in place. Quick test. Make sure that your door is unlocked and then close it and open it. Put that bolt back in place.
Tighten it up right where it was scratching the door before. Put your water shield back in and then put that little filler plug back in. To reinstall the door panel, what you want to do is take your bottom clips and they're actually designed to just kind of go on here and rest in place. You can reach down and put in your courtesy light and turn it clockwise to lock it in. Then make sure all these harnesses come up through. Press it against. Lift it up a little bit. Make sure your door lock comes through. Press it against. You kind of lift it up a little bit, push it in and bring it down on. Make sure you're nice and tight against the door, and nice and tight against the door over here. We'll speed it up again as I take those two 7 mm screws, put them in and tighten them up nice and firm. Now I'm going to clip the molding on up top to cover the mirror mounting holes. Then take my switch panel reconnect all my harnesses. Then I slide the tab back into the back first and make sure no wires are getting pinched in there. Then clip it down in place. That's all set. If you disconnected your battery, then reconnect it and tighten up the 8mm bolt.
We hope this helps you out. Brought to you by www.1AAuto.com, your source for quality replacement parts and the best service on the internet. Please feel free to call us toll free, 888-844-3393. We're the company that's here for you on the internet and in person.
Shop Products


How to Replace Door Lock Actuator 2002-06 Chevy Trailblazer
Check out this video to learn how to replace the door lock actuator on your 02-06 Chevy Trailblazer, or GMC Envoy.
